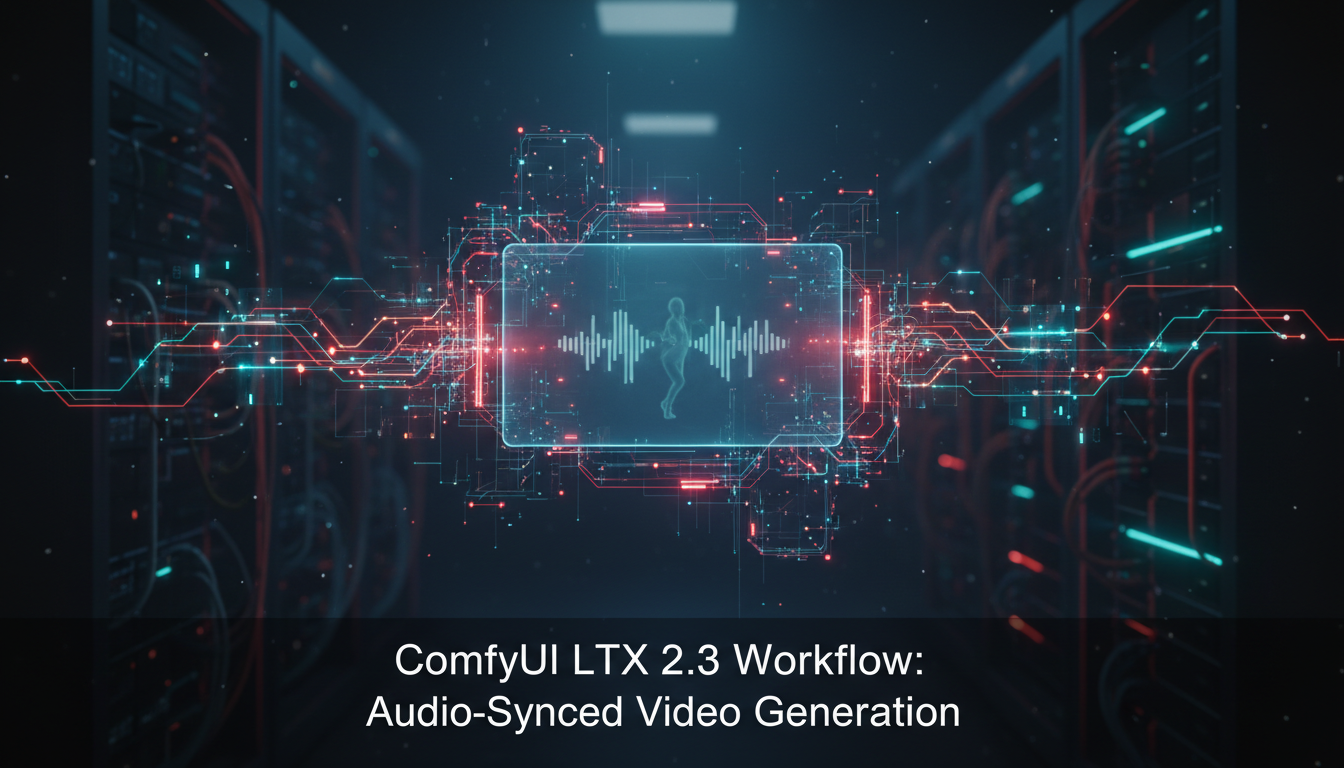
ComfyUI LTX 2.3 Workflow: Audio-Synced Video Generation Tutorial
Step-by-step tutorial for setting up LTX 2.3 in ComfyUI with audio synchronization. Generate 4K video at 50 FPS with native audio sync using the 22B parameter model.
AI video generation just took a massive leap forward. LTX 2.3, the 22-billion parameter model from Lightricks, doesn't just generate video. It generates video that listens to your audio and responds in sync. I've spent the last two weeks building workflows around this model in ComfyUI, and I can honestly say nothing else in the open-source space comes close right now. We're talking native 4K resolution at 50 frames per second with built-in audio synchronization, all running through ComfyUI's node-based interface.
If you've been following my coverage of the LTX 2 video generation pipeline, you know that Lightricks has been steadily pushing the boundaries. But version 2.3 isn't an incremental update. It's a complete rethinking of how audio and video generation should interact. ComfyUI v0.16 shipped Day-0 support for LTX 2.3, which means you can start building workflows right now without waiting for custom node packs to catch up.
Quick Answer: LTX 2.3 in ComfyUI generates 4K video at 50 FPS with native audio synchronization using a 22B parameter model. You need ComfyUI v0.16+, the LTX 2.3 model checkpoint (about 44GB for the full version, 22GB for the fp16 quantization), and at least 24GB VRAM. The workflow uses the new LTXAudioVideoLoader, LTXAudioConditioner, and LTXVideoSampler nodes. Setup takes roughly 30 minutes if you already have ComfyUI installed.
- LTX 2.3 is a 22B parameter model that generates 4K video at 50 FPS with native audio synchronization
- ComfyUI v0.16 provides Day-0 support with dedicated LTX 2.3 nodes built in
- Minimum hardware: 24GB VRAM (RTX 4090 or equivalent), though 16GB can work with quantized models at lower resolutions
- Audio sync works by conditioning the video diffusion process on mel-spectrogram features extracted from your input audio
- The workflow supports text-to-video, image-to-video, and audio-driven video generation modes
What Makes LTX 2.3 Different From Every Other Video Model?
I need to get something off my chest right away. I've tested nearly every open-source video generation model that's been released in the past year, including Wan 2.1, SVD, AnimateDiff, CogVideoX, and more. LTX 2.3 is the first one where I watched the output and genuinely forgot for a moment that it was AI-generated. The temporal consistency is that good.
What separates LTX 2.3 from previous models comes down to three core architectural decisions that Lightricks made. First, the 22B parameter count isn't just marketing fluff. The model uses a hybrid DiT (Diffusion Transformer) architecture that processes spatial and temporal information simultaneously rather than treating them as separate passes. Second, the audio conditioning pipeline is baked directly into the model's attention layers, not bolted on as a post-processing step. Third, the 50 FPS native output means you're not relying on frame interpolation to fill in gaps. Every frame is generated, not guessed.
Here's where it gets really interesting for ComfyUI users specifically. Unlike previous LTX releases that required third-party node packs, ComfyUI v0.16 ships with native support. The development team at Comfy worked directly with Lightricks to ensure the integration was tight. When I first loaded the nodes, I was surprised by how clean the interface was compared to the usual custom node chaos.
A basic LTX 2.3 workflow in ComfyUI showing the core node chain. The audio conditioning branch connects directly to the sampler.
How Do You Set Up LTX 2.3 in ComfyUI From Scratch?
Let me walk you through the complete setup process. I'm going to assume you already have a working ComfyUI installation. If you don't, head over to the ComfyUI animation workflow guide first for the basics, then come back here.

Step 1: Update ComfyUI to v0.16+
This is non-negotiable. Earlier versions of ComfyUI don't have the LTX 2.3 nodes, and trying to load them through ComfyUI Manager will just give you errors. I learned this the hard way after spending 45 minutes troubleshooting why my workflow wouldn't load, only to realize I was still on v0.15.4.
cd /path/to/ComfyUI
git pull origin master
pip install -r requirements.txt
After updating, launch ComfyUI and check the version number in the bottom-left corner of the interface. You should see v0.16.0 or later.
Step 2: Download the LTX 2.3 Model Files
The model comes in several configurations. Here's what you need to know about each one:
- Full precision (bf16): ~44GB. Best quality, needs 40GB+ VRAM. Realistically, you're looking at an A100 or dual GPU setup.
- fp16 quantized: ~22GB. The sweet spot for most users. Works on 24GB cards with some optimization.
- int8 quantized: ~11GB. Runs on 16GB cards but with noticeable quality reduction, especially in audio sync accuracy.
- int4 quantized: ~6GB. Exists, but I wouldn't recommend it. The audio sync breaks down significantly.
For this tutorial, I'm using the fp16 version. Download it from Hugging Face:
# Using huggingface-cli (recommended)
huggingface-cli download Lightricks/LTX-Video-2.3 \
  --include "ltx-video-2.3-fp16.safetensors" \
  --local-dir /path/to/ComfyUI/models/checkpoints/

# Or download the audio encoder separately if it's not bundled
huggingface-cli download Lightricks/LTX-Video-2.3 \
  --include "ltx-audio-encoder-v2.safetensors" \
  --local-dir /path/to/ComfyUI/models/audio_encoders/
One thing that tripped me up during my first install. The audio encoder model is a separate download. The main checkpoint handles video generation, but the audio conditioning requires its own encoder model. If you skip this, everything will load fine, but the audio sync nodes won't function. There's no error message. The audio just gets silently ignored.
Step 3: Install Required Dependencies
LTX 2.3's audio pipeline needs a few Python packages that aren't part of ComfyUI's default requirements:
pip install librosa==0.10.2 soundfile==0.12.1 torchaudio
These handle the audio preprocessing. Librosa converts your input audio into mel-spectrogram features, soundfile handles various audio formats, and torchaudio provides the bridge to PyTorch tensors.
Step 4: Verify the Installation
Before building any workflow, let's make sure everything is actually working. Create a minimal test workflow with just three nodes:
- LTXAudioVideoLoader - Point this to your downloaded checkpoint
- LTXTextEncoder - Just type "a cat sitting on a table"
- LTXVideoSampler - Connect the outputs and hit Queue
If you get a video output, even a short ugly one, your installation is working. If you get CUDA out of memory errors, we'll address that in the optimization section below.
Building Your First Audio-Synced Video Workflow
This is where things get genuinely exciting. I remember the first time I fed a jazz piano track into the workflow and watched the generated scene actually respond to the rhythm. The camera movements subtly matched the tempo. Objects in the scene pulsed with the bass. It wasn't perfect, but it was undeniably synchronized.
Here's the complete node-by-node breakdown for an audio-synced workflow:
The Core Node Chain
Your workflow needs these nodes connected in this order:
- LTXAudioVideoLoader - Loads the model checkpoint and initializes the pipeline
- LoadAudio - Imports your audio file (WAV, MP3, FLAC, or OGG)
- LTXAudioConditioner - Processes the audio into conditioning features
- LTXTextEncoder - Encodes your text prompt
- LTXVideoSampler - The main generation node
- LTXVideoDecoder - Converts latents to pixel space
- SaveVideo - Exports the final result
Let me explain the critical settings for each one.
LTXAudioVideoLoader Settings
This node is straightforward, but there are a couple of settings that matter:
- model_path: Path to your LTX 2.3 checkpoint
- audio_encoder_path: Path to the audio encoder model (don't leave this blank)
- dtype: Set to "float16" for the fp16 model. Using "auto" sometimes defaults to bf16 and crashes on consumer GPUs
- attention_mode: Use "xformers" if you have it installed, "sdpa" otherwise. On my RTX 4090, xformers gives about a 15% speed boost
LTXAudioConditioner: The Key Node
This is the node that makes the magic happen. It takes your raw audio input and converts it into a sequence of conditioning vectors that guide the video generation frame by frame.
The settings that matter most:
- sync_strength: Range 0.0 to 1.0. At 0.0, the audio has no influence. At 1.0, the video is entirely driven by audio features. I've found 0.6 to 0.75 to be the sweet spot for most content. Going above 0.85 tends to produce jittery results where the model overreacts to every audio transient.
- frequency_bands: Choose from "full", "low", "mid", "high", or "bass_only". This controls which parts of the audio spectrum influence the video. "Full" works for music. "Low" or "bass_only" is great for getting visuals that pulse with the beat without reacting to every hi-hat.
- temporal_smoothing: Range 0.0 to 1.0. Higher values smooth out the audio influence over time, preventing rapid visual changes. I use 0.3 for music videos and 0.1 for speech-driven content where lip sync timing matters.
- spectrogram_resolution: 64, 128, or 256. Higher values capture more audio detail but use more VRAM. 128 is the default and works well for most cases.
LTXVideoSampler Configuration
The sampler is where you control the actual generation parameters:
steps: 30-50 (higher = better quality, slower generation)
cfg_scale: 4.0-7.0 (I use 5.5 for audio-synced work)
resolution: 1920x1080 for HD, 3840x2160 for 4K
fps: 25 or 50 (50 FPS doubles generation time)
duration_seconds: 2-10 (longer durations need more VRAM)
seed: -1 for random, or fixed for reproducibility
scheduler: "euler_ancestral" gives the most natural motion
Hot take here: most people cranking cfg_scale to 10+ are actively making their videos worse. LTX 2.3 responds differently to guidance than image diffusion models. High CFG values don't sharpen the video. They make the motion robotic and the colors oversaturated. Keep it between 4.0 and 7.0. Trust me on this.
Complete audio-synced workflow in ComfyUI. Note the audio conditioner branch feeding into the sampler alongside the text prompt.
What Are the Best Prompting Techniques for LTX 2.3?
Prompting for video is fundamentally different from prompting for images, and I think a lot of people coming from Stable Diffusion backgrounds struggle with this. When I first started with LTX 2.3, I was writing prompts like I would for SDXL, cramming in style keywords, quality tags, and artist references. The results were mediocre.
The breakthrough came when I started writing prompts that describe motion and temporal progression, not just static scenes. LTX 2.3 understands verbs and temporal language in a way that smaller models simply cannot.
Prompt Structure That Works
Here's the format I've settled on after testing hundreds of prompts:
[Scene description] + [Camera motion] + [Subject action] + [Lighting/atmosphere] + [Audio relationship]

Example: "A neon-lit city street at night, camera slowly pushing forward
through rain, pedestrians walking with umbrellas, reflections rippling in
puddles, warm orange streetlights contrasting cool blue neon signs,
movements synchronized to rhythmic bass beats"
The key insight is that last phrase. When you explicitly tell the model to sync movements with audio characteristics, the audio conditioning becomes significantly more coherent. It's like giving the model permission to lean into the audio features rather than treating them as a subtle background influence.
Prompting Don'ts
After weeks of experimentation, here are the patterns that consistently produce poor results:
Free ComfyUI Workflows
Find free, open-source ComfyUI workflows for techniques in this article. Open source is strong.
- Avoid mentioning specific frame counts or timestamps in prompts ("at frame 30, the character turns"). The model doesn't understand frame-level instructions.
- Don't use negative prompts for motion control. Negative prompts in LTX 2.3 affect visual quality, not temporal behavior.
- Skip quality tags like "masterpiece, best quality, 8k." LTX 2.3 doesn't have the CLIP text encoder that responds to these tokens. They're ignored at best and can confuse the model at worst.
- Don't describe multiple distinct scenes. LTX 2.3 generates continuous clips, not edited sequences. One scene per generation.
At Apatero.com, we've been exploring how these prompting techniques translate across different video generation models. The temporal prompting approach that works so well with LTX 2.3 also applies, to a lesser degree, to models like WAN 2.2, though the audio sync component is unique to LTX.
How Do You Optimize LTX 2.3 for Different Hardware?
Let's be real about hardware requirements. LTX 2.3 is a big model, and pretending otherwise doesn't help anyone. But there are legitimate ways to run it on hardware that isn't a data center GPU. I've tested this on three different setups, and here's what I found.
RTX 4090 (24GB VRAM): The Sweet Spot
This is the card where LTX 2.3 really shines with the fp16 model. Here are the optimal settings I've landed on:
Model: fp16 quantized (22GB)
Resolution: 1920x1080
FPS: 50
Duration: Up to 6 seconds
Attention: xformers
VAE tiling: Enabled
Generation time: ~45 seconds per second of video
The trick that saves about 3GB of VRAM is enabling VAE tiling in the decoder node. Instead of decoding the entire latent at once, it processes tiles and stitches them together. There's a tiny quality hit at tile boundaries, but I genuinely cannot see it in the final output unless I'm pixel-peeping.
RTX 3090/4080 (16GB VRAM): Workable With Compromises
You need the int8 quantized model here. Set resolution to 1280x720, keep FPS at 25, and enable every memory optimization available:
Model: int8 quantized (11GB)
Resolution: 1280x720
FPS: 25
Duration: Up to 4 seconds
Attention: sdpa (xformers sometimes crashes)
VAE tiling: Enabled
CPU offloading: Enabled for text encoder
I ran this configuration on my older RTX 3090 workstation for a week. The audio sync accuracy drops compared to fp16, probably from about 85% subjective accuracy to around 65%. It's still usable for music visualizations where exact sync isn't critical, but I wouldn't use it for lip sync work.
Cloud GPU Options
If your local hardware can't handle it, cloud GPUs are an increasingly viable option. I've been running LTX 2.3 on RunPod with an A100 80GB instance, and it's been smooth. At roughly $1.50/hour for an A100, generating a 10-second 4K clip costs about $0.50 in compute time. That's honestly cheaper than most commercial video generation APIs.
This is another area where the Apatero.com community has been really useful. Several users have shared their cloud GPU configurations and cost breakdowns for different providers, which saved me a lot of trial and error when setting up my remote workflow.
Audio Input: Formats, Preparation, and Best Practices
Getting good audio-synced results starts before you even open ComfyUI. The quality and format of your input audio matters more than most people realize. I spent my first three days blaming the model for poor sync before discovering that my audio preprocessing was the actual problem.

Supported Audio Formats
The LoadAudio node in ComfyUI v0.16 supports:
- WAV (recommended, lossless)
- FLAC (also lossless, smaller files)
- MP3 (lossy, works but not ideal)
- OGG (lossy, same caveats as MP3)
Always use WAV or FLAC if possible. The mel-spectrogram extraction works on the decoded audio, so lossy compression artifacts can introduce noise into the conditioning signal. I did a side-by-side test with the same audio track as 320kbps MP3 vs. WAV, and the WAV version produced noticeably better beat synchronization.
Audio Preparation Tips
Before feeding audio into the workflow, consider these preprocessing steps:
Normalize your audio. The LTXAudioConditioner expects audio in a certain amplitude range. Quiet recordings produce weak conditioning signals. Use Audacity or ffmpeg to normalize to -1dB peak.
Trim to your target duration. Don't feed a 5-minute song when you're generating a 5-second clip. The model processes the entire audio track, which wastes VRAM. Trim to your exact duration plus about 0.5 seconds of padding.
Want to skip the complexity? Apatero gives you professional AI results instantly with no technical setup required.
Match sample rates. The audio encoder expects 44.1kHz or 48kHz. Other sample rates get resampled internally, which can introduce artifacts. Convert beforehand:
ffmpeg -i input.mp3 -ar 44100 -ac 1 output.wav
Mono works better than stereo for sync. The audio encoder internally downmixes to mono anyway, so providing mono input ensures you know exactly what the model is hearing. Stereo files with heavy panning can produce inconsistent sync results.
Isolate the elements you want to sync with. If you want video that responds to drums, use stem separation (like Demucs) to extract just the drum track. Feed that as your audio input. The results are dramatically more focused.
Working With Speech Audio
Lip sync is the holy grail, and LTX 2.3 gets closer than anything else I've tested, but it's not perfect. For speech-driven video, here are my recommendations:
- Use sync_strength of 0.8 or higher
- Set frequency_bands to "full" (speech uses a wide frequency range)
- Set temporal_smoothing to 0.05 or lower (speech timing is precise)
- Include creative references to speaking in your prompt: "a person speaking directly to camera, mouth movements matching speech"
- Keep clips under 4 seconds for best lip sync accuracy. Longer clips tend to drift.
Advanced Workflow Techniques
Once you've got the basic audio-synced workflow running, there are several advanced techniques that can dramatically improve your results.
Technique 1: Multi-Stage Generation
Instead of generating a long clip in one pass, break it into overlapping segments and blend them. This approach uses less VRAM per segment and can produce better temporal consistency over longer durations.
The workflow looks like this:
- Split your audio into 3-second segments with 0.5-second overlaps
- Generate video for each segment using the same seed and prompt
- Use the VideoBlend node to crossfade the overlapping regions
- Concatenate the blended segments
I've used this technique to generate 30-second music visualizations that would be impossible to render in a single pass. The blending is smooth enough that you can't tell where one segment ends and another begins.
Technique 2: Image-to-Video With Audio
LTX 2.3 supports image conditioning, meaning you can provide a starting frame and let the model generate video that extends from that image while syncing to audio. This is incredibly powerful for creating animated versions of existing artwork or photographs.
Connect an ImageLoader node to the LTXVideoSampler's image_input slot, and set the image_influence parameter between 0.3 and 0.7. Lower values give the model more creative freedom, while higher values keep the video closer to your input image.
Technique 3: ControlNet Integration
Yes, LTX 2.3 works with ControlNet, though the supported modalities are more limited than with image models. Currently, you can use:
- Depth maps (from MiDaS or ZoeDepth)
- Optical flow (for motion guidance)
- Pose sequences (OpenPose format)
The ControlNet integration requires an additional model download (about 2GB) and the LTXControlNetApply node. I've found depth-guided generation particularly useful for architectural and landscape videos where you want precise spatial control.
Advanced multi-stage workflow for generating longer audio-synced videos. Audio is split into segments, each generating a video chunk that gets blended together.
Troubleshooting Common Issues
I've hit basically every possible error while working with LTX 2.3, so let me save you the troubleshooting time.
Earn Up To $1,250+/Month Creating Content
Join our exclusive creator affiliate program. Get paid per viral video based on performance. Create content in your style with full creative freedom.
"CUDA out of Memory" Errors
This is by far the most common issue. Here's your escalation path:
- Enable VAE tiling in the decoder node
- Enable CPU offloading for the text encoder
- Reduce resolution (try 1280x720 or even 896x512)
- Reduce FPS to 25
- Shorten duration
- Switch to a more aggressively quantized model
If you're still running out of memory after all of that, your GPU simply doesn't have enough VRAM. The absolute minimum is about 10GB with the int4 model at 512x512, but the results at that level aren't great.
Audio Sync Feels "Off" or Delayed
Nine times out of ten, this is an audio preprocessing issue, not a model problem. Check these things:
- Is your audio normalized? Quiet audio produces weak conditioning
- Is there silence at the beginning of your audio file? Trim any leading silence
- Are you using a lossy audio format? Switch to WAV
- Is temporal_smoothing set too high? Try reducing it
Generated Video Has Flickering or Artifacts
Flickering usually means CFG is too high or step count is too low. Try reducing cfg_scale to 4.0 and increasing steps to 40. If that doesn't help, the issue might be with the quantized model. Each level of quantization introduces some instability, and flickering is often the first sign.
Model Loads But Generates Black Frames
This usually means the dtype setting in LTXAudioVideoLoader doesn't match your model. If you downloaded the fp16 model, make sure dtype is set to "float16", not "auto". Some older CUDA versions also have issues with certain operations. Update your CUDA toolkit to 12.1+ if you're seeing this.
How Does LTX 2.3 Compare to Other Video Generation Models?
I've been testing video generation models obsessively, and I think it's worth putting LTX 2.3 in context. Here's my honest comparison based on weeks of use:
LTX 2.3 vs. Wan 2.2: LTX wins on resolution, frame rate, and audio sync (which Wan doesn't have at all). Wan 2.2 still produces better motion for certain styles, particularly anime and illustrated content. If you're doing photorealistic video with audio, LTX 2.3 is the clear choice. For stylized animation without audio requirements, Wan 2.2 is still competitive.
LTX 2.3 vs. CogVideoX: CogVideoX has better text comprehension in prompts but maxes out at 720p/24fps. LTX 2.3 crushes it on technical specs. CogVideoX also runs on significantly less VRAM, which matters if you're on a 12GB card.
LTX 2.3 vs. Commercial APIs (Runway, Pika, Kling): This is where my hot take gets spicy. LTX 2.3 running locally on a 4090 produces comparable quality to Runway Gen-4 for most use cases, and you're not paying per-second pricing. The commercial APIs still have an edge in prompt understanding and consistency over longer durations, but the gap is closing fast. For creators on Apatero.com who are producing content at volume, the cost savings of local generation are substantial.
LTX 2.3 vs. Sora: I know people are going to ask. Sora is still better at understanding complex multi-object scenes and maintaining character consistency. But Sora doesn't offer audio sync, costs significantly more, and you can't run it locally. Different tools for different jobs.
Rendering Settings and Export Options
Getting your video out of ComfyUI in the right format matters more than you'd think. The default SaveVideo node works, but there are better options.

Recommended Export Settings
For maximum quality, use the VideoEncode node (from ComfyUI-VideoHelperSuite) instead of the basic SaveVideo node:
Codec: H.264 or H.265
Container: MP4
Bitrate: 20-50 Mbps for 1080p, 80-120 Mbps for 4K
Pixel format: yuv420p (for compatibility) or yuv444p (for quality)
Audio: Copy from input (mux the original audio back in)
One critical thing people miss. The generated video doesn't automatically include your audio. You need to mux the original audio track back into the video file. You can do this in the ComfyUI workflow with an AudioMux node, or post-process with ffmpeg:
ffmpeg -i generated_video.mp4 -i original_audio.wav \
  -c:v copy -c:a aac -b:a 256k \
  -shortest output_with_audio.mp4
Batch Rendering
For production workflows where you're generating multiple clips, I've set up a batch rendering pipeline using ComfyUI's API mode. You can feed it a JSON file with different prompts and audio files, and it'll queue everything up. This is how I generated 50 music visualization clips in a single overnight session.
Real-World Use Cases and Creative Applications
Let me share some of the most compelling use cases I've seen and built since LTX 2.3 dropped.
Music Visualizations: This is the obvious one, and it's genuinely excellent. Feed in a track, write a prompt describing the visual mood, and LTX 2.3 produces visualizers that feel intentional rather than random. I generated a set of visuals for a friend's ambient music EP, and he thought I'd hired a motion graphics artist.
Podcast Video Content: For podcasters who want video content for YouTube, you can feed in the podcast audio and generate atmospheric B-roll that subtly responds to the conversation energy. It's not lip-synced talking heads, but it's engaging background video that reacts to the audio dynamics.
Product Advertisements: Combine image-to-video (using a product photo) with a background music track for audio sync. The generated video animates the product with movements that match the music. I made a test ad for a watch brand concept, and the second hand ticking matched the percussive hits in the music.
Social Media Content: Short-form video with audio sync is essentially what TikTok and Reels are built on. Being able to generate these locally at no per-clip cost changes the economics for content creators. Several creators at Apatero.com have already integrated LTX 2.3 into their content pipelines for exactly this reason.
Frequently Asked Questions
What Is the Minimum VRAM Required to Run LTX 2.3 in ComfyUI?
The absolute minimum is about 10GB using the int4 quantized model at 512x512 resolution. However, for usable quality with audio sync, you realistically need 16GB with the int8 model at 720p, or 24GB with the fp16 model at 1080p or higher.
Can I Run LTX 2.3 on an AMD GPU?
As of March 2026, LTX 2.3 is NVIDIA-only for practical purposes. The model relies heavily on CUDA-specific operations. ROCm support is theoretically possible but not implemented in the current ComfyUI nodes. I'd expect community-contributed AMD support within a few months.
How Long Does It Take to Generate a 10-Second Video?
On an RTX 4090 with the fp16 model at 1080p/50fps and 35 sampling steps, a 10-second clip takes approximately 7-8 minutes. At 4K resolution, expect 25-30 minutes. Reducing to 25 FPS roughly halves the generation time.
Does LTX 2.3 Support img2vid (Image-to-Video)?
Yes. You can provide a starting frame through the image_input on the LTXVideoSampler node. Set the image_influence parameter to control how closely the generated video follows your input image. This works alongside audio conditioning.
Can I Use LTX 2.3 for Lip Sync?
LTX 2.3 can produce approximate lip sync when given speech audio and appropriate prompting. It's not frame-perfect like dedicated lip sync tools (like Wav2Lip or SadTalker), but it's good enough for stylized content where exact phoneme matching isn't critical. For best results, keep clips under 4 seconds.
What Audio Formats Does the ComfyUI Workflow Support?
The LoadAudio node supports WAV, FLAC, MP3, and OGG. For best results, use WAV or FLAC at 44.1kHz or 48kHz sample rate, mono channel, normalized to -1dB peak.
How Does LTX 2.3 Handle Multiple Audio Tracks or Stems?
The LTXAudioConditioner takes a single audio input. For multi-track work, you need to pre-mix your audio or choose a single stem. Some advanced workflows use multiple audio conditioner nodes with different frequency band settings feeding into a merged conditioning output, but this is experimental.
Can I Extend or Loop Generated Videos?
Yes, using the multi-stage generation technique described above. Generate overlapping segments and blend them. For seamless loops, ensure your last frame closely matches your first frame by using the same image conditioning for both the first and last segments.
Is the LTX 2.3 Model Open Source?
LTX 2.3 is released under a research license that allows personal and commercial use with some restrictions. Check the Lightricks model card on Hugging Face for the specific license terms, as they've updated the license between versions.
What's the Maximum Video Duration I Can Generate?
Technically, there's no hard limit, but practical limits are imposed by VRAM. On a 24GB GPU with fp16, you can generate about 6-8 seconds in a single pass. For longer content, use the multi-stage approach with segment blending. I've successfully generated 60-second videos this way.
Final Thoughts
LTX 2.3 in ComfyUI represents a genuine inflection point for local AI video generation. The combination of 4K resolution, 50 FPS output, and native audio synchronization in an open model is something I honestly didn't expect to see this soon. A year ago, getting any kind of audio-reactive video from a diffusion model required hacky post-processing pipelines. Now it's a handful of nodes in ComfyUI.
My second hot take to close things out: audio-synced video generation is going to become the default, not the exception. Every major video model released in the next 12 months will ship with some form of audio conditioning. LTX 2.3 is just the first to do it well in the open-source space.
If you're serious about AI video creation, getting comfortable with this workflow now puts you months ahead of the curve. The tools are here, the quality is real, and the barrier to entry is a single GPU and some patience with the setup process. Start with simple music visualizations, work your way up to speech-driven content, and experiment relentlessly. That's how every breakthrough in this space has happened, and it's how you'll find the techniques that work best for your creative goals.
For more ComfyUI workflows and video generation techniques, check out the latest tutorials and community workflows shared by creators on Apatero.com.
Ready to Create Your AI Influencer?
Join 115 students mastering ComfyUI and AI influencer marketing in our complete 51-lesson course.
Related Articles

10 Most Common ComfyUI Beginner Mistakes and How to Fix Them in 2025
Avoid the top 10 ComfyUI beginner pitfalls that frustrate new users. Complete troubleshooting guide with solutions for VRAM errors, model loading...

25 ComfyUI Tips and Tricks That Pro Users Don't Want You to Know in 2025
Discover 25 advanced ComfyUI tips, workflow optimization techniques, and pro-level tricks that expert users use.

360 Anime Spin with Anisora v3.2: Complete Character Rotation Guide ComfyUI 2025
Master 360-degree anime character rotation with Anisora v3.2 in ComfyUI. Learn camera orbit workflows, multi-view consistency, and professional...