AI Character Voice Cloning: Give Your Virtual Persona a Real Voice
Learn how to create a unique, consistent voice for your AI character or virtual influencer using RVC voice cloning, TTS, and lip sync. The complete audio identity pipeline for virtual personas in 2026.
Your AI character looks incredible. The face is consistent, the outfits are on point, and the social media posts practically write themselves. But then someone asks for a video with voiceover, and you realize the whole illusion falls apart because your virtual persona sounds like a generic text-to-speech robot from 2019. I've been there, and it's frustrating.
Voice cloning for AI characters has become one of the most important pieces of the virtual influencer puzzle, yet it's probably the most overlooked. Creators spend weeks perfecting visual consistency with LoRAs and IP adapters, then slap a stock TTS voice on their content and call it a day. That disconnect between visual quality and audio quality is something your audience will notice immediately, even if they can't articulate exactly what feels off.
Quick Answer: To give your AI character a unique voice, you need to design a voice profile, train an RVC model on reference audio that matches your character's intended sound, use TTS to generate speech from scripts, run it through RVC for the final voice conversion, and then combine with lip sync for video content. The whole pipeline can be set up in a weekend, and the results are dramatically better than using stock TTS voices. Tools like Apatero.com can help streamline parts of this workflow.
- Voice cloning with RVC lets you create a completely unique voice for any AI character or virtual persona
- The full pipeline is: Voice Design, TTS generation, RVC conversion, then lip sync for video
- You don't need the character's "real" voice. You design one from scratch using reference audio
- Quality RVC models need only 10-20 minutes of clean reference audio to produce convincing results
- Combining voice cloning with lip sync creates the most convincing virtual persona content
Why Does Voice Identity Matter for AI Characters?
Think about any character you love from a movie, game, or animated show. Now imagine them with a completely different voice. It would feel wrong, right? That's because voice is identity. It's how we recognize people on the phone without seeing them, and it's how audiences build a relationship with characters over time.
For virtual influencers and AI characters, this matters even more than you might expect. When I first started experimenting with AI character content back in late 2024, I used a default ElevenLabs voice for my test persona. The visuals were great, the scripts were decent, but the engagement on video content was noticeably lower than image posts. I ran a quick poll with my followers and the feedback was clear, the voice felt "generic" and "didn't match the character."
That's when I went down the rabbit hole of voice cloning for AI personas, and it changed everything about how I approach audio content. Here's the thing most people miss. Your AI character doesn't have a "real" voice to clone. You're not trying to replicate someone's existing voice. You're designing a voice from scratch and making it consistent. That's actually easier in some ways, because you have total creative freedom.
The business case is straightforward too. AI influencer content with consistent, unique voices gets significantly better engagement than content with stock TTS. I've seen watch time increase by 30-40% just by switching from generic TTS to a custom RVC voice. If you're building an AI influencer content creation pipeline, voice identity should be near the top of your priority list.
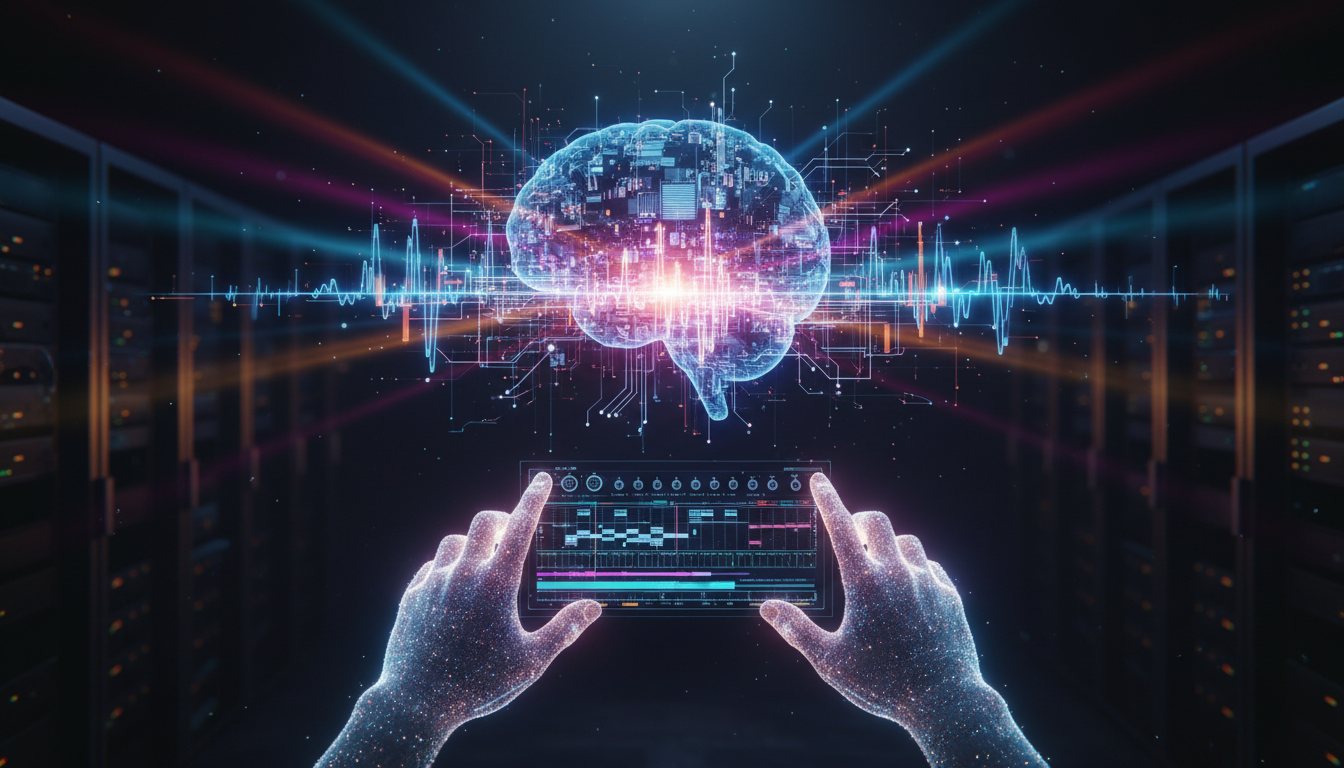
![AI character voice design workflow showing the pipeline from voice profile to final output]
The complete voice identity pipeline: from initial voice design through RVC training to final lip-synced video output.
Step 1: Designing Your Character's Voice Profile
Before you touch any software, you need to make deliberate decisions about what your character should sound like. This is voice design, and it's the creative foundation everything else builds on. Skip this step and you'll end up with a voice that technically works but doesn't feel intentional.
I like to think about voice design the same way I think about character design for visuals. You wouldn't generate random images and hope they form a consistent character. You'd plan the look first. Voice works the same way.
Here are the key dimensions to define for your character's voice:
- Pitch range: Is the voice higher or lower? Where does it sit naturally?
- Pace and rhythm: Does your character speak quickly and energetically, or slowly and deliberately?
- Tone and warmth: Bright and cheerful? Smooth and sultry? Authoritative and grounded?
- Accent or dialect: This adds enormous personality. Even subtle regional coloring makes a voice feel real.
- Vocal texture: Breathy, clear, raspy, smooth? This is the "grain" of the voice.
- Age impression: Voices carry age. Make sure it matches your character's intended age range.
Once you've documented these traits, you need to find reference audio that matches your vision. This is the audio you'll eventually use to train your RVC model, so it needs to be high quality and representative of the voice you want.
Finding the Right Reference Audio
This is where things get practical. You need 10-20 minutes of clean audio from a voice that closely matches your target profile. There are several approaches I've used:
Licensed voice actor recordings. Sites like Fiverr and Voices.com have voice actors who will record custom audio. You can hire someone to read a specific script designed to capture a wide range of phonemes and emotions. Budget around $50-150 for quality recordings. This is my preferred method because you get exactly what you want and you have clear licensing.
Open-source voice datasets. Projects like LibriSpeech, VCTK, and Common Voice contain thousands of speakers. Browse through them to find voices that match your profile. These are freely licensed and work well for RVC training.
Your own voice, modified. Hot take: sometimes the easiest approach is recording yourself and using RVC to shift the voice characteristics. I've done this for a male character when I wanted very specific emotional delivery. It sounds ridiculous during recording, but the RVC model handles the transformation beautifully.
The critical thing is audio quality. Your reference audio should be:
- Recorded at 44.1kHz or higher sample rate
- Mono channel (not stereo)
- Free from background noise, music, or other speakers
- Consistent recording conditions throughout
- A natural mix of statements, questions, and emotional variation
I learned this the hard way when I trained an RVC model on audio I'd pulled from a podcast interview. The background cafe noise was subtle, but the trained model picked up that ambient texture and baked it into every output. Had to start over with cleaner source material.
How Do You Train an RVC Model for Character Voice?
RVC, or Retrieval-based Voice Conversion, is the backbone of the voice cloning pipeline. If you've read my comparison of RVC vs ElevenLabs, you know I'm a big fan of RVC for character voices specifically because it gives you local control and doesn't lock you into a subscription. For production virtual persona work, that local control matters.
Here's the training process broken down into manageable steps.
Preparing Your Training Data
Before training, you need to process your reference audio:
# Split long audio files into 5-15 second segments
# Remove silence and normalize volume
# Export as WAV, 44.1kHz, mono

# Using ffmpeg to normalize and convert
ffmpeg -i reference_audio.mp3 -af "loudnorm=I=-16:TP=-1.5:LRA=11" -ar 44100 -ac 1 reference_clean.wav

# Split into segments using a silence detector
ffmpeg -i reference_clean.wav -af silencedetect=noise=-40dB:d=0.5 -f null -
Clean your audio aggressively. Remove any segments with background noise, overlapping speech, laughter (unless you specifically want that in the model), or recording artifacts. I typically end up discarding 20-30% of my raw reference audio during cleanup.
The RVC Training Process
The latest RVC versions (I'm using RVC v2 with the latest RMVPE pitch extraction as of early 2026) make training surprisingly straightforward:
- Install RVC WebUI or use a Colab notebook if you don't have a local GPU
- Upload your cleaned audio segments to the training dataset folder
- Configure training parameters:
- Epochs: 200-300 for most character voices (more isn't always better)
- Batch size: Based on your VRAM. 8 for 8GB, 16 for 12GB+
- Sample rate: Match your reference audio (44.1kHz recommended)
- Pitch extraction: RMVPE is the current best option
- Train the model. This takes 1-3 hours on a decent GPU (RTX 3070 or better)
- Test with various input audio to evaluate quality
# Basic RVC inference example (simplified)
import rvc_inference

model = rvc_inference.load_model("my_character_v1.pth")
output = model.convert(
 input_audio="tts_output.wav",
 pitch_shift=0, # Adjust if needed
 index_rate=0.75, # How much to use the trained voice index
 filter_radius=3,
 resample_rate=0,
 rms_mix_rate=0.25,
 protect=0.33 # Protects consonants from artifacts
)
output.save("character_voice_output.wav")
Here's a hot take that might ruffle some feathers: for AI character voices, RVC produces more natural results than most cloud-based voice cloning services. The reason is control. With RVC, you can fine-tune the index rate, pitch protection, and conversion parameters until the voice sounds exactly right. Cloud services give you a single "clone" button and whatever comes out is what you get. When you're building a character's signature voice that needs to be consistent across hundreds of pieces of content, that granular control is worth the extra setup time.
Evaluating Your Trained Model
Don't just listen to one test clip and call it done. Run your model through a gauntlet:
- Test with different emotional deliveries (happy, serious, excited, calm)
- Test with different speaking speeds
- Test with sentences containing difficult phoneme combinations
- Test with whispered or very quiet speech
- Listen for artifacts, metallic tones, or "digital" quality in the output
I keep a standard evaluation script of 20 sentences that I run through every new model. It includes tongue twisters, emotional lines, questions, and statements. If the model handles all of those well, it's ready for production use.
What Is the Best TTS Engine for AI Character Scripts?
TTS, text-to-speech, is where your character's written scripts become raw audio that you'll then run through RVC. The quality of your TTS input matters because RVC can only transform what it receives. Garbage in, garbage out.
The TTS landscape in 2026 has some genuinely impressive options. Here's how I evaluate them specifically for the character voice pipeline.
Top TTS Options for Character Voice Pipelines
XTTS v2 / Coqui TTS (Local, Free)
This is my daily driver for most character voice work. XTTS v2 supports voice cloning from short reference clips and generates remarkably natural speech. Running it locally means no API costs and no usage limits, which matters when you're generating dozens of audio clips per week for content.
The output quality is excellent for a local model, though it occasionally struggles with very long sentences or unusual proper nouns. I typically break scripts into paragraph-sized chunks and generate them individually.
ElevenLabs (Cloud, Paid)
Still the gold standard for raw TTS quality. Their latest models produce incredibly natural speech with excellent emotional range. The downside is cost. If you're producing high-volume content, the bills add up fast. I use ElevenLabs when I need premium quality for hero content pieces, like a character's intro video or a sponsored post.
OpenAI TTS (Cloud, Paid)
Free ComfyUI Workflows
Find free, open-source ComfyUI workflows for techniques in this article. Open source is strong.
Good quality at a reasonable price point. The voices are solid but less customizable than ElevenLabs. Works well as a middle-ground option.
Piper TTS (Local, Free)
Lightweight and fast. Quality is a step below XTTS, but it runs on a potato and is great for batch processing. I use Piper when I need to generate large volumes of audio quickly and the RVC conversion will handle most of the heavy lifting anyway.
Here's how I typically structure the TTS choice for different content types:
| Content Type | TTS Engine | Why |
|---|---|---|
| YouTube videos | XTTS v2 or ElevenLabs | Maximum quality needed |
| TikTok/Reels | XTTS v2 | Good quality, high volume |
| Podcast format | ElevenLabs | Long-form needs best naturalness |
| Interactive/chat | Piper | Speed matters more than perfection |
| Testing/prototyping | Piper | Fast iteration |
Optimizing TTS Output for RVC
There's a crucial step most guides skip, optimizing your TTS output before running it through RVC. Raw TTS audio and RVC-converted audio interact in specific ways, and you can dramatically improve your final results with a few preprocessing steps.
# Normalize TTS output to consistent volume
ffmpeg -i tts_raw.wav -af "loudnorm=I=-16:TP=-1.5:LRA=11" tts_normalized.wav

# Optional: slight noise gate to clean up any TTS artifacts
ffmpeg -i tts_normalized.wav -af "afftdn=nf=-25" tts_clean.wav
I also recommend generating TTS at a slightly slower pace than your target speed. You can speed up audio later without quality loss, but you can't slow it down without artifacts. Most TTS engines have a speed or rate parameter. Set it to 0.9x for your base generation.
![Screenshot showing RVC interface with voice conversion settings for character voice]
RVC voice conversion interface. The index rate and protect settings are where most of the magic happens for character voice quality.
How Do You Combine Voice Cloning with Lip Sync for Video?
This is where everything comes together. You've designed your voice, trained your RVC model, generated speech through TTS, and converted it to your character's voice. Now you need to make your character's mouth move in sync with that audio. This is the step that transforms a voiceover into a performance.
The lip sync landscape has evolved significantly. Here's the current leading approach and how I integrate it into the pipeline.
The Lip Sync Pipeline
The workflow I use for Apatero.com content production looks like this:
- Generate character image or video clip (using whatever your visual pipeline is)
- Generate speech audio (TTS then RVC, as described above)
- Run lip sync to animate the character's face to match the audio
- Post-process for final output quality
For lip sync specifically, these are the tools that work best in 2026:
Wav2Lip / Wav2Lip-HD: The OG of AI lip sync. Still works well for basic applications, though quality has been surpassed by newer tools. Fast inference makes it good for high-volume production.
SadTalker: Better head movement and more natural facial expressions than Wav2Lip. I use this for content where the character needs to feel more alive and expressive.
MuseTalk: The newest contender, and honestly my current favorite for static-to-video conversion. The lip movements are more natural and the face preservation is excellent.
Want to skip the complexity? Apatero gives you professional AI results instantly with no technical setup required.
Hedra / HeyGen (Cloud services): If you want to skip the local setup entirely, these cloud platforms handle lip sync as a service. Higher quality than most local tools, but you're paying per minute of output.
My Production Workflow
Let me walk you through how I actually produce a 60-second character video from start to finish. This is the real workflow, not the theoretical one.
# Step 1: Generate TTS from script
python generate_tts.py --text "script.txt" --output tts_raw.wav --model xtts_v2

# Step 2: Run through RVC for character voice
python rvc_convert.py --input tts_raw.wav --model character_v3.pth --output character_voice.wav

# Step 3: Generate character image (if starting from scratch)
# This assumes you have your character's LoRA or consistent image pipeline

# Step 4: Run lip sync
python musetalk_inference.py --audio character_voice.wav --image character_portrait.png --output talking_video.mp4

# Step 5: Add background, transitions, captions
# Standard video editing from here
The total processing time for a 60-second clip is roughly:
- TTS generation: 15-30 seconds
- RVC conversion: 10-20 seconds
- Lip sync: 2-5 minutes
- Total: Under 6 minutes on my RTX 4070
That's fast enough to produce multiple clips per hour, which is exactly what you need for consistent social media posting.
One thing I've learned through painful experience: always generate your lip sync video at a higher resolution than your final output. Lip sync models introduce subtle quality loss, especially around the mouth and jaw area. If you generate at 1024x1024 and downscale to 720p for social media, those artifacts become invisible. Generate at 512x512 for a 720p output and you'll see the smudging around the lips.
Building a Consistent Audio Identity Pipeline
Consistency is what separates a character from a one-off experiment. Your audience should recognize your character's voice immediately, whether it's a 15-second TikTok or a 10-minute YouTube video. Building that consistency requires treating your voice pipeline as a production system, not a creative experiment.
Here's how I structure the pipeline for ongoing content production on Apatero.com and the character projects I consult on.
Version Control Your Voice Models
Just like you version your code, version your voice models. I keep a naming convention:
character_name_v1.pth # Initial training
character_name_v2.pth # Retrained with better data
character_name_v3.pth # Current production model
Along with each model, I save:
- The exact training data used
- Training parameters (epochs, batch size, settings)
- A set of test audio samples for comparison
- Notes on what changed from the previous version
This sounds like overkill until the day your hard drive dies or you need to recreate a model. Trust me on this one. I lost a character voice model early on because I didn't back up the training data, and recreating it from scratch produced a noticeably different voice. My audience noticed.
Standardizing Your Script-to-Audio Pipeline
For production consistency, I use a simple Python script that wraps the entire TTS-to-RVC pipeline:
# character_voice_pipeline.py
import subprocess
import os

def generate_character_audio(script_text, character_model, output_path):
 """
 Complete pipeline: TTS -> Normalize -> RVC -> Final output
 """
 # Step 1: TTS
 tts_raw = "temp/tts_raw.wav"
 generate_tts(script_text, tts_raw)

 # Step 2: Normalize
 tts_clean = "temp/tts_normalized.wav"
 normalize_audio(tts_raw, tts_clean)

 # Step 3: RVC conversion
 rvc_output = "temp/rvc_output.wav"
 run_rvc(tts_clean, character_model, rvc_output)

 # Step 4: Final normalization and format
 finalize_audio(rvc_output, output_path)

 # Cleanup
 cleanup_temp_files

 return output_path
By wrapping everything in a single function, every piece of content goes through the exact same processing chain. No variations, no forgotten steps, no "I think I used different settings for that one."
Audio Post-Processing for Professional Results
The RVC output is good, but a few post-processing steps take it from "good" to "professional." These are the same steps audio engineers use for podcast production, adapted for AI character voices:
- Noise gate: Remove any residual background noise between phrases
- Compression: Even out the volume so quiet words aren't lost and loud ones aren't jarring
- EQ: Subtle adjustments to emphasize the characteristics of your character's voice
- De-essing: Reduce harsh "s" sounds that RVC sometimes introduces
- Limiting: Prevent any peaks from clipping
# All-in-one post-processing with ffmpeg
ffmpeg -i rvc_output.wav \
 -af "afftdn=nf=-25,compand=attacks=0.3:decays=0.8:points=-80/-900|-45/-15|-27/-9|0/-7|20/-7,highpass=f=80,lowpass=f=14000,alimiter=limit=0.95" \
 final_output.wav
This single ffmpeg command handles noise reduction, compression, frequency cleanup, and limiting. I've been using this exact filter chain for months and it consistently produces broadcast-quality output.
What Common Mistakes Should You Avoid with Character Voice Cloning?
I've made most of these mistakes myself, so consider this section a collection of expensive lessons learned the easy way. If you're just starting with character voice cloning, reading this section alone could save you weeks of frustration.
Earn Up To $1,250+/Month Creating Content
Join our exclusive creator affiliate program. Get paid per viral video based on performance. Create content in your style with full creative freedom.
Mistake 1: Training on Too Little Data
The absolute minimum for a decent RVC model is about 5 minutes of clean audio, but I wouldn't recommend going below 10 minutes. With less data, the model tends to produce a "thin" version of the target voice that works for some sentences but falls apart on others. Spend the extra time gathering quality reference audio.
Mistake 2: Ignoring the TTS-to-RVC Mismatch
Your TTS engine produces a voice with its own characteristics. RVC then converts that voice to your target. If the source TTS voice is radically different from your target (say, a deep male voice being converted to a high female voice), the conversion quality drops significantly. Choose a TTS voice that's at least in the same general range as your target character voice.
Mistake 3: Over-Training the RVC Model
More epochs doesn't mean better quality. I've seen character voice models peak at 200 epochs and actually degrade at 400. Always save checkpoints during training and compare. The "best" model is usually somewhere in the middle of training, not at the end.
Mistake 4: Forgetting About Emotion
A voice clone that can only deliver one emotional tone is useless for real content production. When gathering your reference audio, make sure it includes a range of emotions: excited, serious, warm, concerned, playful. Your RVC model can only reproduce emotional qualities that existed in the training data.
I learned this when I trained a model on reference audio from a corporate training video. The model sounded great for informational content but was completely flat when I needed the character to sound enthusiastic or emotional. Had to retrain from scratch with more dynamic source material.
Mistake 5: Not Testing Across Devices
Your character's voice might sound perfect on your studio monitors or quality headphones, but most of your audience is listening on phone speakers. Always test your final audio on:
- Phone speaker (no headphones)
- Cheap earbuds
- Car Bluetooth
- Laptop speakers
I was shocked the first time I played my character's voice through an iPhone speaker. Frequencies I'd carefully crafted were completely inaudible, and artifacts I couldn't hear on headphones were glaringly obvious. Now I test on three different devices before approving any voice content for publication.
![Comparison of voice waveforms showing original TTS versus RVC-converted character voice]
Before and after: the top waveform shows raw TTS output, the bottom shows the same audio after RVC conversion. Notice the changed harmonic structure that gives the character its unique vocal quality.
Advanced Techniques for Character Voice Refinement
Once you've got the basics working, these techniques will push your character's voice quality even further. I'm sharing these because they're the kind of details that separate amateur virtual persona content from the professional stuff you see getting millions of views.
Multi-Speaker Training Data
Here's a technique I stumbled on accidentally: training an RVC model on audio from 2-3 similar voices rather than just one produces a model that's more flexible and natural-sounding. The theory is that the model learns a more generalized version of the voice characteristics rather than overfitting to one specific recording environment or speaking pattern.
For example, if your character should have a warm, mid-range female voice, find 2-3 reference voices with those qualities and mix them in your training data. The resulting model produces a voice that's "inspired by" those references without being a direct copy of any one of them. This is also better from an ethical standpoint, since the output voice is genuinely novel.
Dynamic Voice Modulation
For longer content like YouTube videos or podcasts, a static voice delivery gets boring fast. I build variation into my scripts by:
- Writing stage directions into the script: "[excited] This is incredible!" vs "[thoughtful] Let me think about this..."
- Generating different emotional takes of key lines and choosing the best one
- Adjusting RVC parameters slightly for different emotional contexts (lower index rate for more natural variation)
This creates a performance rather than a reading, and audiences can feel the difference even if they can't articulate it.
Building a Voice Style Library
Over time, I've built a library of parameter presets for my characters:
- Normal conversation: Standard RVC settings, moderate pace TTS
- Excited/energetic: Slightly faster TTS (1.1x), lower protect value in RVC for more expression
- Serious/informative: Slower TTS (0.85x), higher protect value for clarity
- Whisper/intimate: Very low volume TTS, high index rate for tight voice matching
Having these presets means I can produce content with appropriate vocal energy without manually tweaking settings every time. It's the kind of production optimization that matters when you're managing content for platforms like Apatero.com and creating multiple pieces per day.
The Ethics and Legal Landscape of Character Voice Cloning
I'd be doing you a disservice if I wrote a complete guide on voice cloning without addressing the ethical and legal dimensions. This is an area where the technology is running well ahead of the law, and making smart choices now protects you later.
Using someone's voice without their consent is ethically wrong and increasingly illegal. Several US states have passed voice likeness protection laws, and the EU's AI Act has provisions that apply to synthetic voice generation. Even if you're in a jurisdiction without specific voice cloning laws, misrepresenting a synthetic voice as a real person can constitute fraud or defamation.
For AI character voices, the safest approach is what I've described throughout this guide: design an original voice using licensed or openly licensed reference audio, and train your model to produce something new rather than copying a specific person. If you're using voice actor recordings, make sure your contract explicitly covers AI training and voice synthesis use.
Hot take: I think the virtual persona space will actually benefit from clearer regulation. Right now, the lack of rules means bad actors can clone anyone's voice and claim it's their "character." Proper regulation would protect legitimate creators while making the space more trustworthy for audiences and brands. The people who do this right, with original voice designs and proper licensing, will have a massive advantage when the regulatory landscape inevitably tightens.
Frequently Asked Questions
How Much Does It Cost to Create a Custom AI Character Voice?
The whole pipeline can be set up for free if you use open-source tools: RVC is free, XTTS v2 is free, and lip sync tools like MuseTalk are free. The main cost is a decent GPU for training and inference. If you're using cloud TTS like ElevenLabs, budget $22-99/month depending on volume. Hiring a voice actor for reference audio runs $50-150. For most creators, the total setup cost is under $200.
How Long Does It Take to Train an RVC Voice Model?
On a mid-range GPU like an RTX 3070, training a 200-epoch model on 15 minutes of reference audio takes about 1-2 hours. Data preparation and cleanup typically takes another 1-2 hours. You can have a working character voice in a single afternoon.
Can I Clone a Celebrity's Voice for My AI Character?
No, and you shouldn't. Using a real person's voice without consent raises serious legal and ethical issues. Instead, design an original voice using the techniques in this guide. The results are better anyway, because you get a voice perfectly tailored to your character rather than a copy that always invites unfavorable comparison to the original.
What Hardware Do I Need for Voice Cloning?
Minimum: a GPU with 6GB VRAM (GTX 1660 or equivalent) for RVC inference. For training, 8GB+ VRAM is recommended (RTX 3060 or better). CPU-only inference is possible but painfully slow. If you don't have local hardware, Google Colab provides free GPU access that's sufficient for both training and inference.
How Do I Keep My Character's Voice Consistent Across Different Content?
Use the same RVC model, the same TTS engine with the same settings, and the same post-processing chain for every piece of content. Version control your models and save your settings. I described my exact approach in the "Building a Consistent Audio Identity Pipeline" section above.
Is RVC Better Than ElevenLabs for Character Voices?
They serve different purposes. RVC gives you local control, no ongoing costs, and deep customization. ElevenLabs offers better raw TTS quality with less setup. For most AI character work, I use XTTS for TTS generation and RVC for voice conversion, which gives me the best of both worlds. Check out my detailed RVC vs ElevenLabs comparison for the full breakdown.
Can I Use Voice Cloning for Real-Time Conversation or Live Streaming?
Yes, but with caveats. RVC supports real-time inference with about 100-200ms latency on a good GPU. That's fast enough for live streaming with a slight delay but too slow for natural real-time conversation. For or interactive applications, you might need a faster inference setup or accept the latency trade-off.
How Do I Handle Multiple Languages for My Character?
Train separate RVC models for each language, using reference audio in that language. The voice characteristics will transfer, but pronunciation and phoneme patterns differ across languages. Alternatively, use a multilingual TTS engine like XTTS v2 (which supports 16 languages) and run the output through a single RVC model. The second approach is easier but produces slightly less natural results for non-English content.
What's the Difference Between Voice Cloning and Voice Conversion?
Voice cloning attempts to exactly replicate a specific voice so a TTS engine can speak in that voice. Voice conversion (what RVC does) takes existing audio and transforms it to sound like a different voice. For the character voice pipeline, we use both: TTS generates speech, then RVC converts it to the character's voice. The combination produces better results than either technique alone.
How Often Should I Retrain My Character's Voice Model?
Only retrain when you're not satisfied with the quality or when new RVC versions offer significant improvements. A well-trained model doesn't degrade over time. I retrained my main character's model three times over 14 months: once when I got better reference audio, once when RVC v2 launched with improved architecture, and once when I wanted to expand the emotional range using additional training data.
Wrapping Up: Your Character Deserves a Real Voice
Building a unique voice for your AI character or virtual persona isn't just a nice-to-have anymore. It's table stakes for anyone creating serious virtual influencer content in 2026. The tools are accessible, the quality is excellent, and the difference it makes in audience engagement and content immersion is dramatic.
The complete pipeline I've outlined here, voice design, reference audio sourcing, RVC model training, TTS generation, voice conversion, and lip sync integration, can be set up in a weekend and will serve your content production needs for months. Whether you're building a single AI character or managing a roster of virtual personas, having a solid audio identity system is what separates hobby projects from professional productions.
Start with the voice design step. Really think about who your character is and how they should sound. Then work through the pipeline methodically. Don't rush the training data preparation. Don't skip the evaluation step. And for the sake of your audience, test on phone speakers before you publish.
I've been working on this pipeline for over a year now, and the quality gap between the early experiments and what I'm producing today is staggering. The tools keep getting better, the models keep getting more efficient, and the results keep getting more convincing. If you're building an AI character and haven't invested in voice identity yet, now is the perfect time to start. And if you need help with any part of the visual or audio pipeline, the community at Apatero.com is always experimenting with the latest techniques.
Your character's face might get them noticed. But their voice is what makes people stay.
Ready to Create Your AI Influencer?
Join 115 students mastering ComfyUI and AI influencer marketing in our complete 51-lesson course.
Related Articles
AI Music Generation with Open Source Models: Complete Guide for Creators
Complete guide to open-source AI music generation models like MusicGen, Stable Audio, and Bark. Free alternatives to Suno and Udio for creators who want full control.
AI Podcast Generation: Automate Your Show from Script to Audio
How to automate podcast creation end-to-end using AI: script writing with LLMs, multi-voice TTS, background music generation, editing automation, and distribution.
AI Voice Cloning in 2026: Create Realistic Voice Doubles with Open Source Tools
Learn how to clone voices with open source tools like RVC, Coqui TTS, and Bark. Step-by-step guide to creating realistic AI voice doubles for content creation, game development, and accessibility.