ComfyUI Beginners Guide: Getting Started with Node-Based AI Image Generation 2025
Complete beginner's guide to ComfyUI. Installation, first workflow, essential nodes, and tips for getting started with node-based Stable Diffusion.

ComfyUI is the most powerful interface for Stable Diffusion. It's also intimidating for beginners. The node-based interface looks complex, but once you understand the basics, it offers more control than any other option.
Quick Answer: ComfyUI is a node-based interface for Stable Diffusion that offers maximum flexibility and performance. Start by installing via the portable version (Windows) or git clone (Mac/Linux), download a checkpoint model, load the default workflow, and generate your first image. The learning curve is ~2-4 hours to basic proficiency.
- ComfyUI offers more control than Automatic1111 but with a learning curve
- Installation takes 15-30 minutes with the portable version
- Basic workflow: Load Checkpoint → Text Encode → KSampler → VAE Decode → Save
- Node connections represent data flow—colors indicate data types
- 8GB VRAM minimum, 12GB+ recommended
- Once learned, workflows can be saved and shared easily
Why ComfyUI Over Automatic1111?
Let me explain why ComfyUI is worth learning:
Advantages of ComfyUI
Performance:
- Uses less VRAM for same tasks
- Faster generation in many cases
- Better memory management
- Efficient batch processing
Flexibility:
- Complete control over every step
- Mix different models easily
- Complex workflows possible
- Easy to experiment
Reproducibility:
- Workflows are self-contained
- Share exact configurations
- Debug visually
- Understand what's happening
Advanced Features:
- Better ControlNet handling
- Complex LoRA combinations
- Multi-model pipelines
- Custom node ecosystem
When Automatic1111 Is Fine
- Quick, simple generation
- You want familiar interface
- No need for complex workflows
- Limited technical interest
My Recommendation
Learn ComfyUI. The initial learning curve pays off with more capability and better understanding of how Stable Diffusion works.
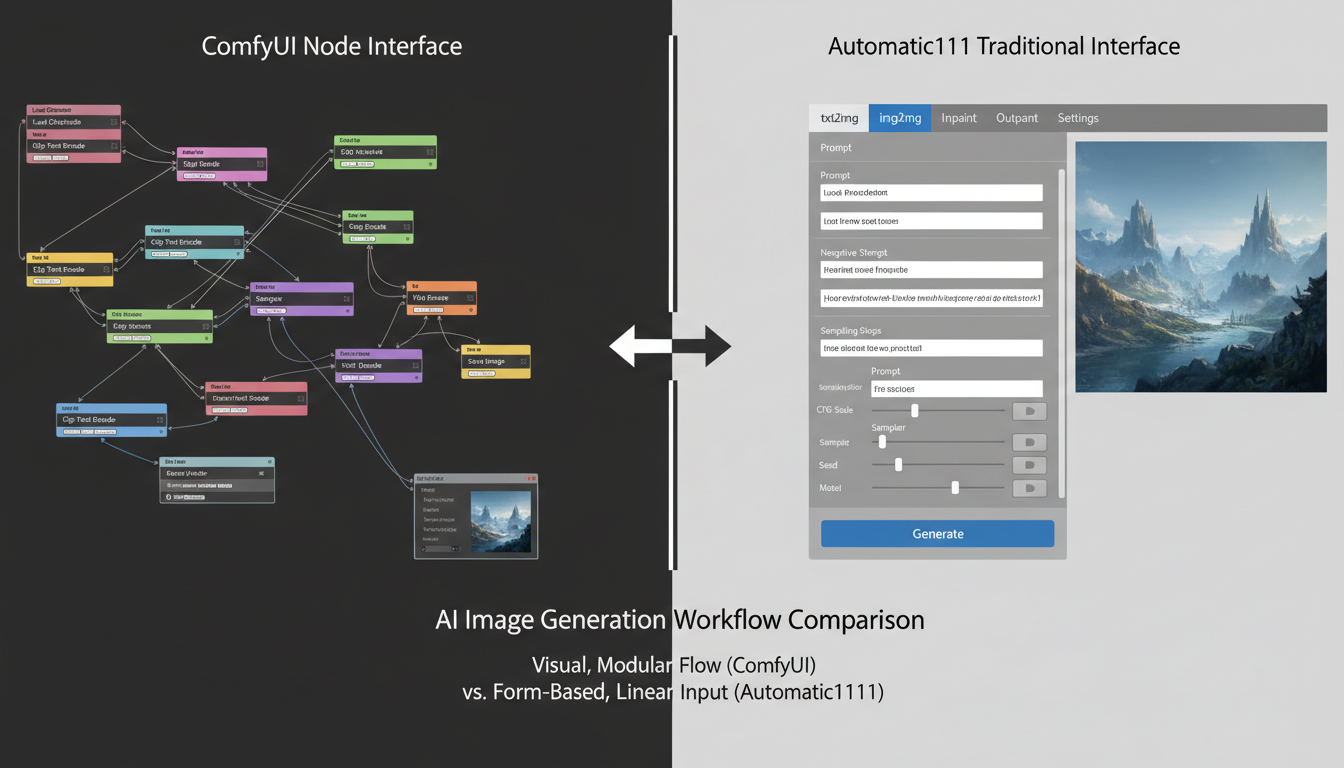 ComfyUI offers more power at the cost of initial complexity
Installation
Windows (Portable - Recommended)
Step 1: Download
- Go to ComfyUI GitHub releases
- Download the latest portable package
- Extract to a folder (avoid spaces in path)
Step 2: First Run
- Double-click
run_nvidia_gpu.bat - Wait for initial setup (may take a few minutes first time)
- Browser opens to
http://127.0.0.1:8188
Step 3: Download a Model
- Get a checkpoint from CivitAI or Hugging Face
- Place in
ComfyUI/models/checkpoints/ - Refresh the interface
Mac/Linux (Git Clone)
Step 1: Prerequisites
## Python 3.10+ required
python3 --version

## Git required
git --version
Step 2: Clone and Install
git clone https://github.com/comfyanonymous/ComfyUI.git
cd ComfyUI
pip install -r requirements.txt
Step 3: Run
python main.py
## Browser opens to http://127.0.0.1:8188
Folder Structure
After installation, understand the folders:
ComfyUI/
├── models/
│ ├── checkpoints/ # Main models (.safetensors)
│ ├── loras/ # LoRA files
│ ├── vae/ # VAE files
│ ├── controlnet/ # ControlNet models
│ ├── upscale_models/ # Upscalers
│ └── embeddings/ # Textual inversions
├── input/ # Input images
├── output/ # Generated images
└── custom_nodes/ # Extensions
Understanding Nodes
ComfyUI uses nodes connected by lines. Each node does one thing. Lines carry data between nodes.
How Nodes Work
Inputs (left side):
- Receive data from other nodes
- Colored dots indicate data type
- Must connect compatible types
Outputs (right side):
- Send data to other nodes
- Color matches data type
- Can connect to multiple inputs
Node Body:
- Contains settings/parameters
- Dropdown menus for selections
- Number inputs for values
Data Types (Colors)
| Color | Data Type | Description |
|---|---|---|
| Pink | MODEL | Loaded checkpoint model |
| Yellow | CLIP | Text encoder component |
| Purple | VAE | Image encoder/decoder |
| Orange | CONDITIONING | Encoded text prompts |
| Cyan | LATENT | Image in latent space |
| Green | IMAGE | Actual image data |
When connecting nodes, colors must match. You can't connect MODEL to CONDITIONING directly.
Essential Nodes
Load Checkpoint:
- Loads your model file
- Outputs: MODEL, CLIP, VAE
CLIP Text Encode:
- Converts text to conditioning
- Inputs: CLIP, text
- Outputs: CONDITIONING
KSampler:
- The actual generation happens here
- Inputs: MODEL, positive/negative conditioning, LATENT
- Outputs: LATENT (generated image)
VAE Decode:
- Converts latent to viewable image
- Inputs: VAE, LATENT
- Outputs: IMAGE
Save Image:
- Saves to output folder
- Inputs: IMAGE
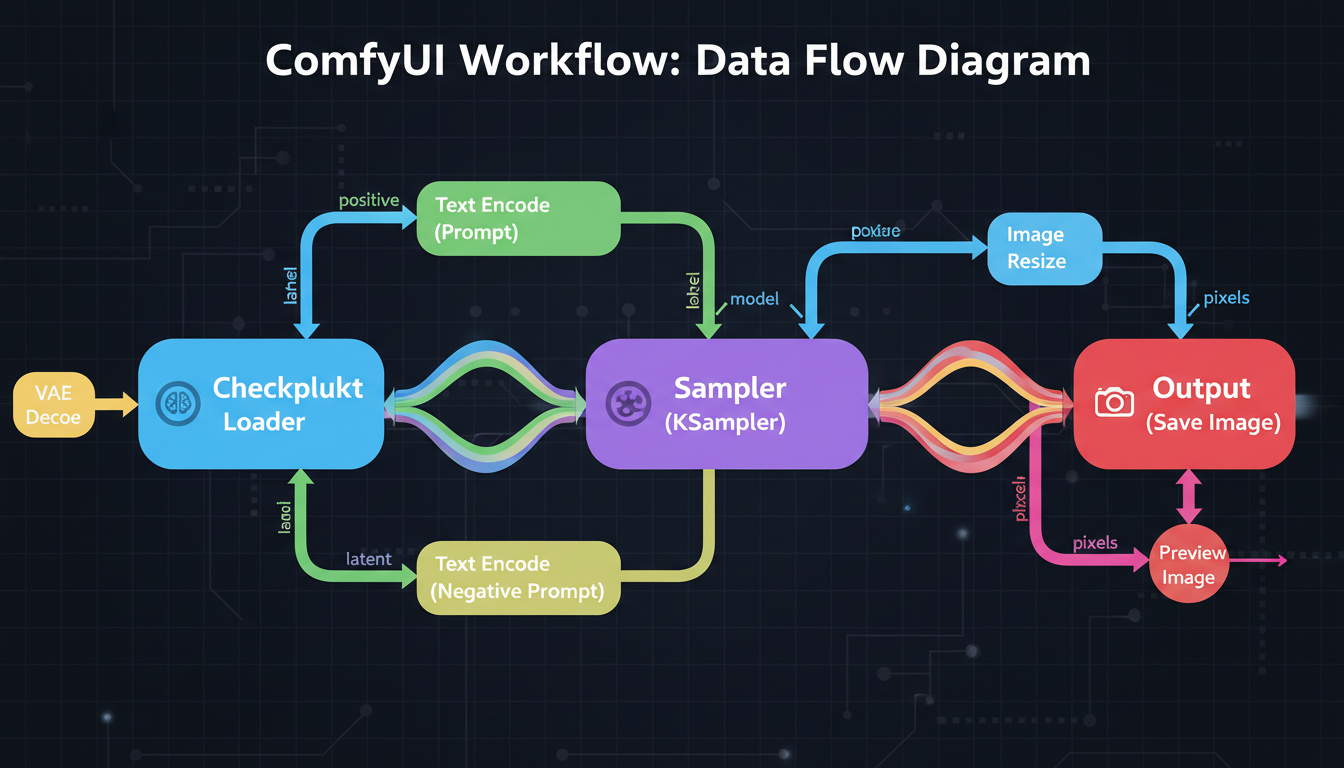 Understanding node connections is key to ComfyUI
Your First Workflow
Let me walk you through creating a basic image generation workflow.
Step 1: Load the Default Workflow
When ComfyUI starts, a default workflow appears. If not:
- Click "Load Default" button
- Or drag in a workflow PNG
The default workflow includes everything needed for basic generation.
Step 2: Select Your Model
- Find "Load Checkpoint" node
- Click the dropdown
- Select your downloaded model
- If no models appear, you haven't placed any in
models/checkpoints/
Step 3: Write Prompts
Positive prompt (what you want):
- Find the CLIP Text Encode connected to "positive"
- Type your prompt in the text box
- Example:
beautiful landscape, mountains, sunset, detailed, 8k
Negative prompt (what to avoid):
- Find the CLIP Text Encode connected to "negative"
- Type quality negatives
- Example:
blurry, low quality, bad, ugly
Step 4: Configure Settings
In the KSampler node:
Free ComfyUI Workflows
Find free, open-source ComfyUI workflows for techniques in this article. Open source is strong.
seed: Random number for reproducibility. Use -1 for random.
steps: Generation steps. 20-30 for most models.
cfg: Prompt adherence. 5-8 typical.
sampler_name: Algorithm. euler or dpmpp_2m are good defaults.
scheduler: Step scheduler. normal or karras work well.
denoise: How much to change. 1.0 for text-to-image.
Step 5: Generate
- Click "Queue Prompt" button (or press Ctrl+Enter)
- Watch progress in the node borders
- Image appears in Preview/Save node
- Find saved image in
output/folder
Troubleshooting First Generation
"No checkpoint loaded":
- Ensure model is in correct folder
- Refresh page after adding models
- Check file extension is .safetensors or .ckpt
Out of memory:
- Try smaller resolution (768x768 → 512x512)
- Close other GPU-using programs
- Use a smaller model
Black or noisy image:
- Check VAE is connected
- Verify model is compatible with resolution
- Try different seed
Practical Workflows
Text to Image (Basic)
The default workflow. You have:
- Checkpoint loading your model
- Two CLIP encoders (positive/negative)
- Empty Latent Image (blank canvas)
- KSampler doing generation
- VAE Decode revealing image
- Save Image storing result
Image to Image
Modify an existing image:
- Add "Load Image" node
- Connect to "VAE Encode" node
- VAE Encode output → KSampler latent_image input
- Set denoise < 1.0 (0.5-0.8 typical)
Lower denoise = more of original preserved.
With LoRAs
Add style/character LoRAs:
- Add "Load LoRA" node
- Connect Checkpoint MODEL → LoRA MODEL input
- Connect Checkpoint CLIP → LoRA CLIP input
- Connect LoRA outputs → rest of workflow
- Set strength (0.5-1.0)
Multiple LoRAs? Chain them together.
Want to skip the complexity? Apatero gives you professional AI results instantly with no technical setup required.
Upscaling
Improve resolution:
- Add "Upscale Image" or model-based upscaler
- Connect after VAE Decode
- Save the upscaled version
Or use latent upscaling for better quality (more complex workflow).
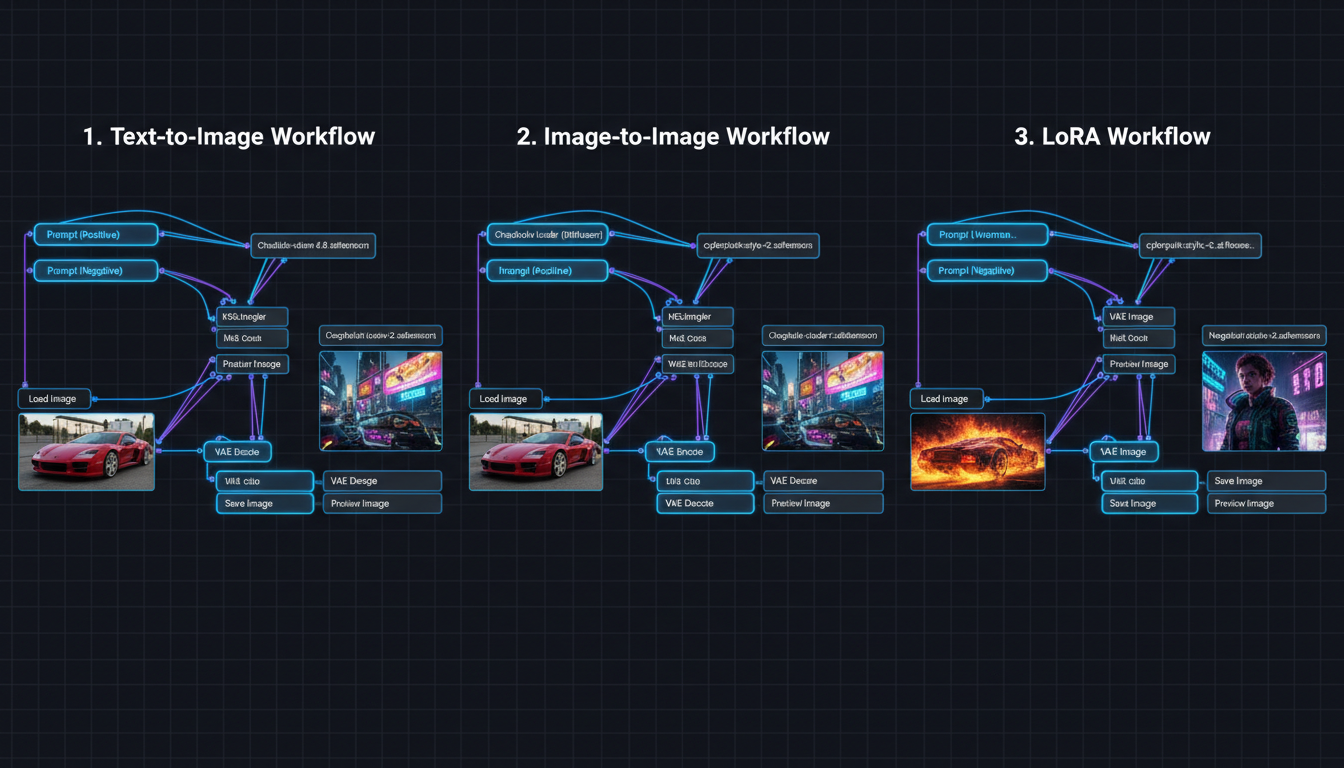 Different workflows for different use cases
Custom Nodes
ComfyUI's power comes from custom nodes—extensions that add functionality.
Installing Custom Nodes
Method 1: ComfyUI Manager (Recommended)
- Install ComfyUI Manager first
- Restart ComfyUI
- Click "Manager" button
- Browse and install nodes
- Restart after installing
Method 2: Manual
cd ComfyUI/custom_nodes
git clone https://github.com/[author]/[node-repo].git
## Restart ComfyUI
Essential Custom Nodes
ComfyUI Manager:
- Node/model installer
- Troubleshooting tools
- Essential for everyone
Impact Pack:
- Additional samplers
- Upscaling tools
- Face fixes
ControlNet Auxiliary Preprocessors:
- Pose detection
- Depth maps
- Edge detection
IPAdapter:
- Face/style transfer
- Character consistency
- Reference-based generation
WAS Node Suite:
- Many utility nodes
- Text tools
- Image operations
Finding Workflows
Workflows are shared as PNG files with embedded data:
- CivitAI (many workflows shared)
- OpenArt.ai (workflow library)
- Reddit r/comfyui
- GitHub repositories
Drag a workflow PNG into ComfyUI to load it.
AI Configuration
ComfyUI has no built-in content filters. For AI Generation:
Earn Up To $1,250+/Month Creating Content
Join our exclusive creator affiliate program. Get paid per viral video based on performance. Create content in your style with full creative freedom.
Use Appropriate Models
- CyberRealistic (realistic)
- Pony Diffusion (anime)
- epiCRealism (realistic)
Place in models/checkpoints/.
AI LoRAs
- Find on CivitAI
- Place in
models/loras/ - Add Load LoRA node
- Set appropriate strength
No Additional Config Needed
Unlike Automatic1111, ComfyUI doesn't have safety checkers to disable. The models themselves determine capability.
Common Issues and Solutions
Issue: Nodes Don't Connect
Cause: Incompatible data types.
Solution: Check colors match. Can't connect MODEL directly to IMAGE.
Issue: Workflow Errors
Cause: Missing models or nodes.
Solution:
- Install missing custom nodes
- Download required models
- Check file paths
Issue: Slow Generation
Cause: High resolution, many steps, limited VRAM.
Solution:
- Lower resolution
- Fewer steps (20 is often enough)
- Close other programs
- Use fp16/fp8 if available
Issue: Same Output Every Time
Cause: Fixed seed.
Solution: Set seed to -1 for random.
Issue: Can't Find Saved Images
Cause: Looking in wrong folder.
Solution: Check ComfyUI/output/ folder.
Tips for Beginners
Start Simple
Don't try complex workflows immediately. Master the basic text-to-image first.
Save Working Workflows
When something works:
- Click "Save" button
- Save as .json file
- Or save workflow image (has embedded data)
Use Preview Nodes
Add "Preview Image" nodes anywhere to see intermediate results. Helps debugging.
Learn Keyboard Shortcuts
- Ctrl+Enter: Queue prompt
- Ctrl+Shift+Enter: Queue front
- Ctrl+D: Duplicate selected nodes
- Ctrl+A: Select all
- Delete/Backspace: Delete selected
Read Node Descriptions
Hover over nodes and inputs for tooltips explaining what they do.
Join the Community
- Reddit: r/comfyui
- Discord servers
- YouTube tutorials
- CivitAI workflows
When to Use Cloud Alternatives
ComfyUI is powerful but requires:
- Hardware investment
- Learning time
- Ongoing maintenance
Platforms like Apatero offer:
- No setup required
- Character consistency built-in
- Video generation
- Pay-per-use pricing
Consider cloud if:
- You don't have capable GPU
- You want immediate results
- Character consistency is priority
- You need video generation
Consider local if:
- You have hardware
- You want maximum control
- Privacy is critical
- You enjoy technical learning
Frequently Asked Questions
Is ComfyUI harder than Automatic1111?
Initially yes. But it becomes more intuitive once you understand nodes. The visual flow helps you understand what's happening.
What GPU do I need?
8GB VRAM minimum (GTX 1070, RTX 2060 level). 12GB+ recommended for comfortable use (RTX 3060, 4070). More VRAM = higher resolution and faster generation.
Can I use Automatic1111 extensions?
No, they're incompatible. But most A1111 features have ComfyUI equivalents through custom nodes.
How do I update ComfyUI?
For portable: Download new release, copy models folder over.
For git: git pull in the ComfyUI directory.
Where do I find models?
CivitAI and Hugging Face are the main sources. Download .safetensors files and place in appropriate folders.
Can ComfyUI do video?
Yes, with custom nodes for AnimateDiff, WAN, or similar. More complex than images but possible.
Getting Started Checklist
Setup:
- Download ComfyUI (portable or git)
- Install/extract to good location
- Download at least one checkpoint model
- Place model in models/checkpoints/
- Run ComfyUI successfully
First Generation:
- Load default workflow
- Select your model in Load Checkpoint
- Write simple positive prompt
- Add basic negative prompt
- Click Queue Prompt
- Find saved image in output/
Next Steps:
- Install ComfyUI Manager
- Try img2img workflow
- Add a LoRA
- Explore custom nodes
- Save your first custom workflow
Final Thoughts
ComfyUI has a learning curve, but it's the most capable Stable Diffusion interface available. The visual node system makes complex workflows possible and helps you understand how AI image generation actually works.
Start with the default workflow. Generate some images. Experiment with settings. Gradually add complexity. Within a few hours, you'll be comfortable. Within a few days, you'll prefer it to other interfaces.
The time investment pays off in capability and understanding. And the workflows you create can be saved, shared, and refined over time.
Related guides: Stable Diffusion Generation Settings
Ready to Create Your AI Influencer?
Join 115 students mastering ComfyUI and AI influencer marketing in our complete 51-lesson course.
Related Articles
Adobe Firefly vs Midjourney vs Ideogram 2026: Which Wins
Brand-safe licensing, scroll-stopping aesthetics, or text rendering. Three tools optimized for three different jobs, tested against real briefs.
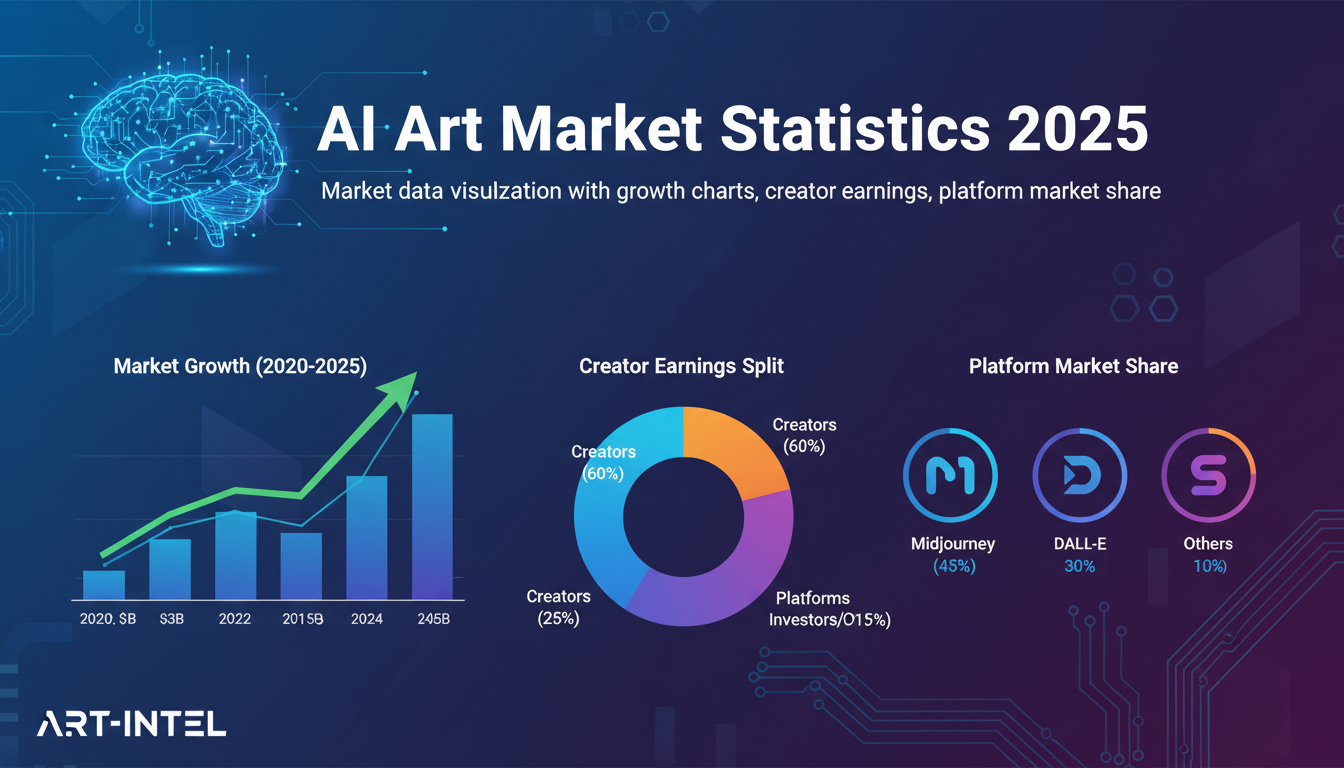
AI Art Market Statistics 2025: Industry Size, Trends, and Growth Projections
Comprehensive AI art market statistics including market size, creator earnings, platform data, and growth projections with 75+ data points.

AI Automation Tools: Transform Your Business Workflows in 2025
Discover the best AI automation tools to transform your business workflows. Learn how to automate repetitive tasks, improve efficiency, and scale operations with AI.