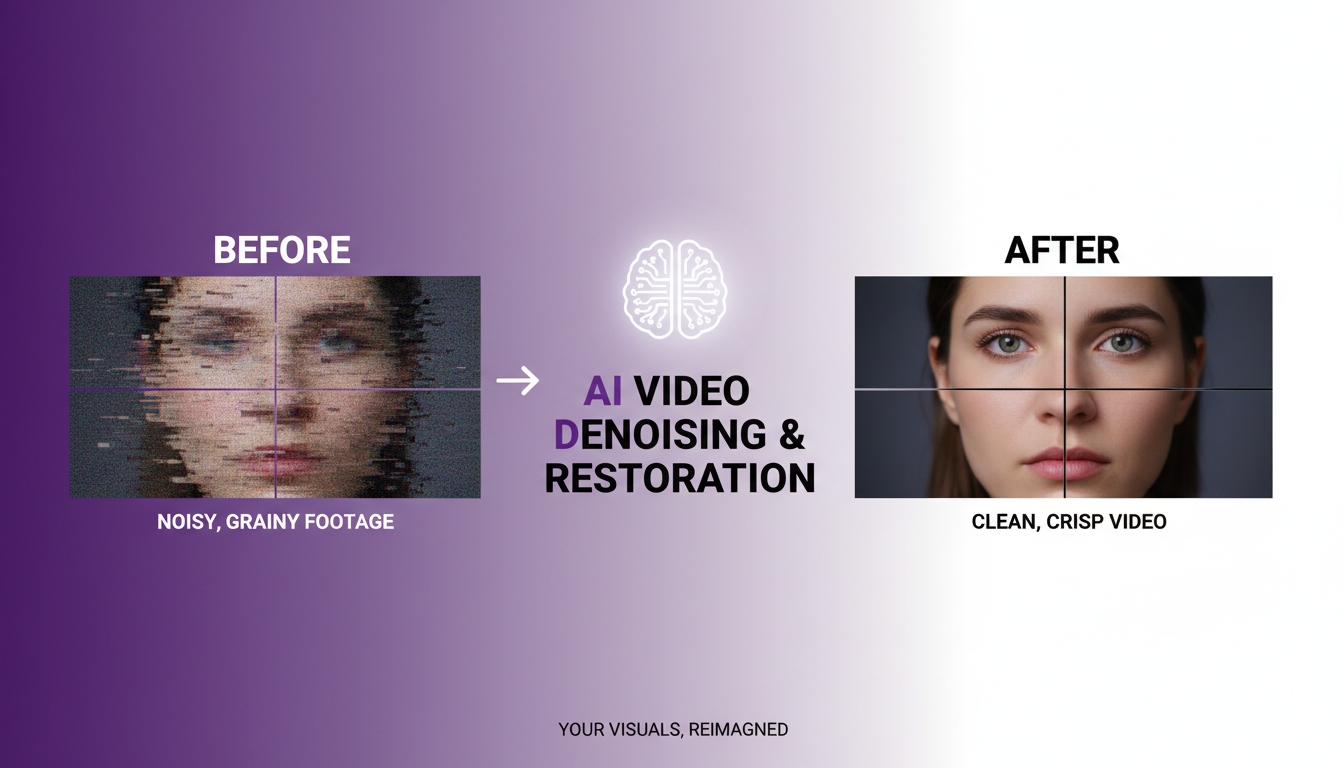
AI Video Denoising and Restoration: Complete Guide to Fixing Noisy Footage (2025)
Master AI video denoising and restoration techniques. Fix grainy footage, remove artifacts, restore old videos, and enhance AI-generated content with professional tools.
Make AI images and video in your browser
Characters, video, photo packs. No GPU, no setup. Your first generation is free.
Noisy video is frustrating whether it's grainy night footage, compressed old files, or AI-generated content with artifacts. AI denoising tools can transform unusable footage into clean, professional quality. This guide covers the best techniques and tools.
Quick Answer: AI video denoising works by analyzing noise patterns and separating them from actual image detail. Best free option: Video2X with SRMD or RealCUGAN for noise reduction. Best paid option: Topaz Video AI with Nyx model. For old footage restoration: combination of denoising, upscaling, and frame interpolation gives best results.
- Temporal denoising: Uses multiple frames for best quality
- Spatial denoising: Single-frame analysis, faster
- AI denoising: Learns to distinguish noise from detail
- Noise types: Gaussian, salt-and-pepper, compression artifacts
- Best approach: Denoise before upscaling for optimal results
Understanding Video Noise
Before you can effectively remove noise, you need to understand what you're dealing with. Different types of noise require different approaches, and using the wrong denoising method can actually make things worse. I've seen people apply heavy temporal denoising to compression artifacts and wonder why their video looks smeared, or use spatial denoising on footage that needed temporal analysis, resulting in flickering output.
The good news is that identifying noise type isn't complicated once you know what to look for. Spend a few seconds examining your footage closely before choosing your denoising approach, and you'll save hours of trial and error later.
Types of Noise
Gaussian noise: Random variation in brightness, looks like grain. Common in:
- Low-light footage
- High ISO camera settings
- Sensor noise
Compression artifacts: Block patterns, banding, mosquito noise. Common in:
- Heavily compressed files
- Old DVD/VHS captures
- Streaming content
Salt-and-pepper noise: Scattered black and white pixels. Common in:
- Damaged files
- Transmission errors
- Very old recordings
Chroma noise: Color variations in smooth areas. Common in:
- Low-light color footage
- Cheap camera sensors
- Over-processed video
Noise vs Detail
The challenge: noise and fine detail look similar to algorithms.
Noise characteristics:
- Random, no pattern
- Changes frame to frame
- Doesn't follow edges
- Uniform across surfaces
Detail characteristics:
- Consistent patterns
- Stable across frames
- Follows subject edges
- Varies with content
Good AI denoising learns to distinguish these.
AI Denoising Approaches
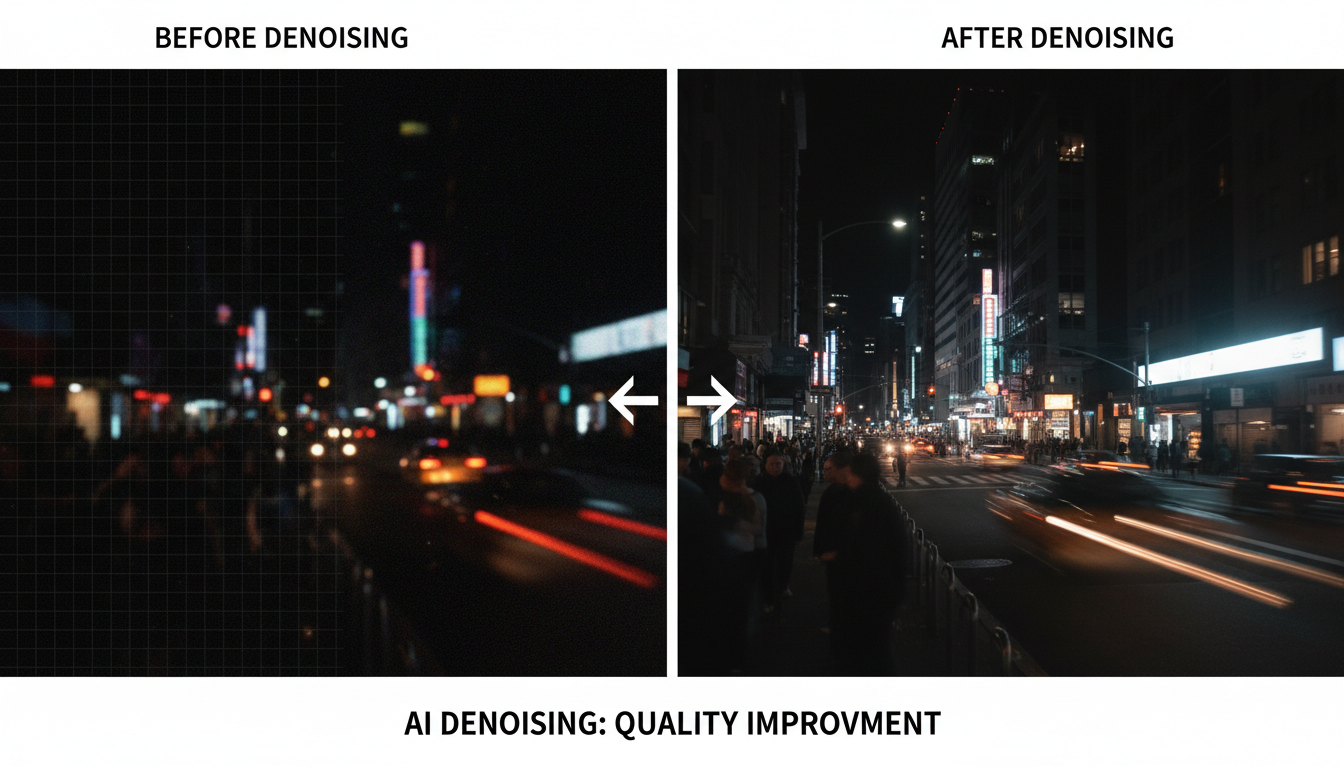 AI denoising dramatically improves video quality by removing grain while preserving detail.
Spatial Denoising
Analyzes single frames:
- Faster processing
- Works on stills
- Less effective on heavy noise
- May blur fine detail
Best for: Quick fixes, moderate noise, when temporal consistency isn't critical.
Temporal Denoising
Analyzes multiple frames:
- Uses motion information
- Better noise/detail separation
- Preserves temporal consistency
- Slower processing
Best for: Final output, heavy noise, professional results.
Hybrid Approaches
Combines both methods:
- Temporal analysis for moving areas
- Spatial analysis for static regions
- Best quality overall
- Highest processing time
Free Denoising Tools
Video2X with SRMD
SRMD (Super-Resolution via Multi-Directional Denoising) specifically targets noise.
Installation: ```bash git clone https://github.com/k4yt3x/video2x.git cd video2x pip install -r requirements.txt python -m video2x.video2x --download-models ```
Denoising usage: ```bash python -m video2x.video2x -i noisy.mp4 -o clean.mp4 -r 1 -p srmd --noise-level 3 ```
Noise levels:
- 0: No denoising (upscale only)
- 1: Light denoising
- 2: Moderate denoising
- 3: Heavy denoising
RealCUGAN for Video
RealCUGAN includes denoising specifically for anime but works on real footage too.
Usage: ```bash python -m video2x.video2x -i input.mp4 -o output.mp4 -r 2 -p realcugan --denoise-level 2 ```
FFmpeg Native Filters
For quick denoising without AI:
hqdn3d filter (temporal): ```bash ffmpeg -i noisy.mp4 -vf "hqdn3d=4:4:3:3" clean.mp4 ```
nlmeans filter (spatial, high quality): ```bash ffmpeg -i noisy.mp4 -vf "nlmeans=s=3:p=7:r=15" clean.mp4 ```
Parameters:
- Lower values = less denoising
- Higher values = more denoising, potential blur
Neat Video (Free Trial)
Professional plugin with free trial:
- Works in Premiere, Resolve, After Effects
- Excellent noise profiling
- Temporal analysis
- Industry standard for years
Paid Denoising Options
Topaz Video AI
Best-in-class AI denoising with Nyx model.
Strengths:
- Learns noise patterns automatically
- Temporal consistency
- Preserves detail well
- Integrated with upscaling
Settings: ``` Model: Nyx Strength: Auto or 20-50 Recover Detail: 20-40 Reduce Compression: Match source compression ```
DaVinci Resolve Studio
Built-in AI denoising (Studio version required):
- Temporal noise reduction
- Spatial noise reduction
- Motion estimation based
- Works in real-time
Settings in Color page:
- Temporal: Higher = smoother, slower
- Spatial: Target specific noise patterns
Adobe Premiere Pro
With recent updates includes:
Free ComfyUI Workflows
Find free, open-source ComfyUI workflows for techniques in this article. Open source is strong.
- AI-powered noise reduction
- Adaptive processing
- Batch processing
- Preview in timeline
Denoising Workflow
Step 1: Analyze Noise
Before processing, identify:
- Noise type (grain, compression, both)
- Noise severity (light, moderate, heavy)
- Noise consistency (uniform, varies)
- Detail level to preserve
Step 2: Choose Tool
| Noise Type | Best Tool |
|---|---|
| Grain (light) | SRMD level 1-2 |
| Grain (heavy) | Topaz Nyx |
| Compression | FFmpeg nlmeans |
| Mixed | Topaz or multi-pass |
Step 3: Test Settings
Test workflow:
- Extract 5-10 second sample
- Process with initial settings
- Compare before/after
- Adjust if needed
- Process full video
Step 4: Process
Recommended order:
- Denoise first
- Color correct if needed
- Upscale if desired
- Final export
Denoising after upscaling amplifies noise. Always denoise first.
Step 5: Quality Check
After processing, verify:
- Noise significantly reduced
- Fine detail preserved
- No new artifacts introduced
- Temporal consistency maintained
- Colors unchanged
Old Video Restoration
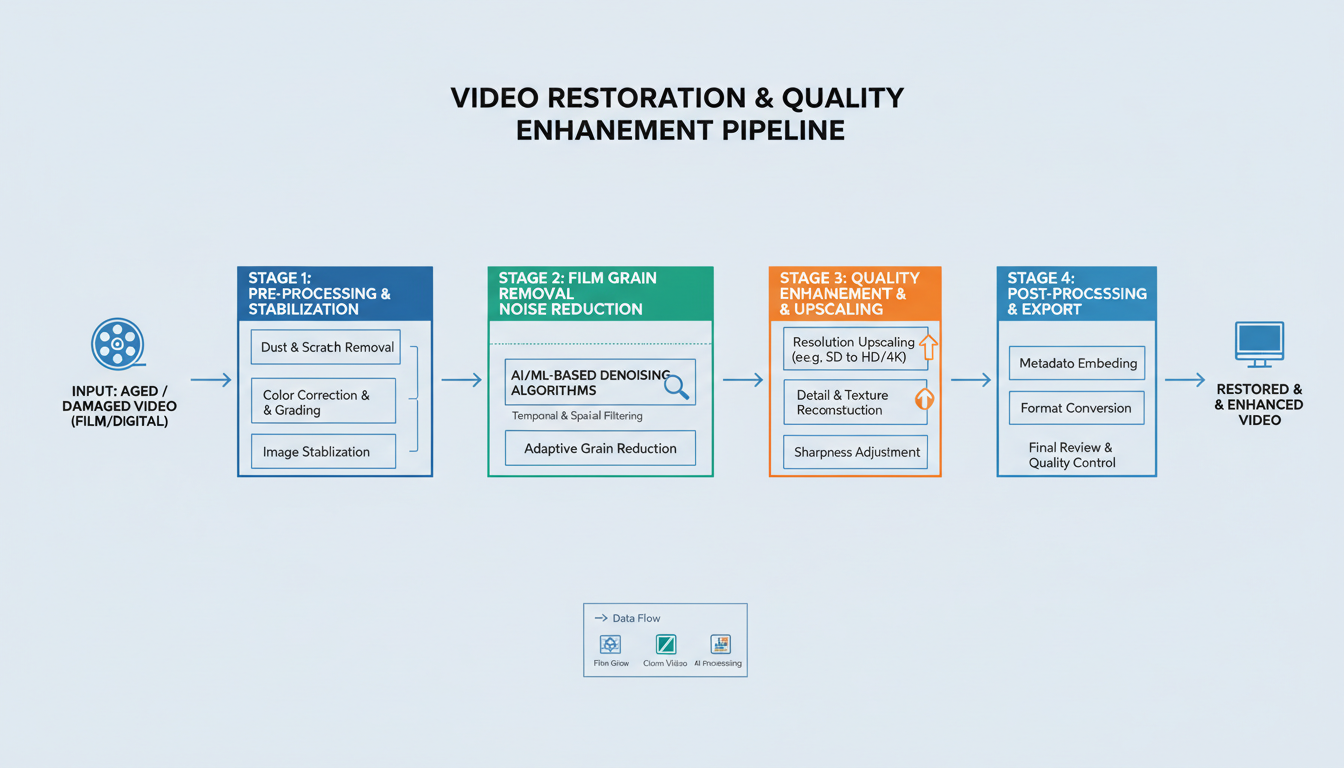 Complete restoration pipelines combine denoising, upscaling, and enhancement for best results.
VHS and Analog Sources
Old analog recordings need multi-step restoration:
Common issues:
- Tape noise and dropouts
- Color bleeding
- Tracking lines
- Low resolution
- Audio degradation
Restoration pipeline: ```
- Capture at highest quality possible
- Stabilize if shaky
- Denoise (aggressive settings OK)
- Color correction
- Upscale (2-4x)
- Sharpen slightly
- Export ```
DVD Recovery
DVDs have specific artifacts:
Issues:
- Macro blocking
- Mosquito noise
- Interlacing
- Limited resolution
Pipeline: ```
- Deinterlace properly
- Remove compression artifacts
- Denoise lightly
- Upscale to HD
- Apply film grain (optional, for look) ```
Film Scans
Scanned film has unique characteristics:
Issues:
- Film grain (sometimes desired)
- Dust and scratches
- Color fading
- Splice marks
Approach:
- Dust/scratch removal first
- Denoise only heavy grain
- Color restore
- Stabilize if needed
AI-Generated Video Denoising
Why AI Video Needs Denoising
AI-generated video often has:
Want to skip the complexity? Apatero gives you professional AI results instantly with no technical setup required.
- Temporal inconsistency (flicker)
- Compression artifacts from generation
- Edge artifacts
- Subtle noise patterns
Specialized Approach
Don't over-denoise: AI video often has intentional texture. Aggressive denoising removes character.
Target artifacts: Focus on removing generation artifacts, not all grain.
Settings: ``` SRMD: Level 1-2 (not 3) Topaz: Strength 15-30 (not higher) ```
Temporal Consistency
AI video may flicker. Solutions:
Frame interpolation: RIFE can smooth flicker by adding intermediate frames.
Temporal smoothing: Apply light temporal filter to reduce frame-to-frame variation.
Regeneration: Sometimes regenerating with different seed produces cleaner result.
Advanced Techniques
Multi-Pass Denoising
For heavy noise, use multiple passes:
Pass 1: Aggressive spatial denoising Pass 2: Light temporal smoothing Pass 3: Detail recovery sharpening
Selective Denoising
Apply different settings to different areas:
Dark areas: More aggressive (noise more visible) Bright areas: Lighter (less noise, preserve detail) Motion areas: Temporal focus Static areas: Spatial focus
Noise Addition
Counterintuitive but sometimes needed:
Why add noise?
- Hide banding from over-denoising
- Match footage styles
- Add film-like texture
How: ```bash ffmpeg -i clean.mp4 -vf "noise=alls=10:allf=t" textured.mp4 ```
Preservation Sharpening
After denoising, recover detail:
Earn Up To $1,250+/Month Creating Content
Join our exclusive creator affiliate program. Get paid per viral video based on performance. Create content in your style with full creative freedom.
Unsharp mask: ```bash ffmpeg -i denoised.mp4 -vf "unsharp=5:5:1.0:5:5:0.0" sharp.mp4 ```
Settings:
- Light: amount 0.5-1.0
- Medium: amount 1.0-1.5
- Heavy: amount 1.5-2.0
Don't over-sharpen. Creates new artifacts.
Batch Processing
FFmpeg Batch Script
Windows: ```batch for %%f in (*.mp4) do ( ffmpeg -i "%%f" -vf "hqdn3d=4:4:3:3" "denoised_%%f" ) ```
Linux/Mac: ```bash for f in *.mp4; do ffmpeg -i "$f" -vf "hqdn3d=4:4:3:3" "denoised_$f" done ```
Video2X Batch
```bash for f in *.mp4; do python -m video2x.video2x -i "$f" -o "clean_$f" -r 1 -p srmd --noise-level 2 done ```
Topaz Batch
Topaz Video AI has built-in batch:
- Add multiple files
- Set same settings for all
- Start batch processing
- Monitor progress
Quality vs Speed Trade-offs
Speed Priority
When time matters:
- FFmpeg hqdn3d filter
- Lower AI denoising settings
- Skip temporal analysis
- Accept some quality loss
Rough speeds (1080p): ``` FFmpeg: 50-100 fps (fast) SRMD: 2-5 fps (slow) Topaz: 5-15 fps (medium) ```
Quality Priority
For final output:
- Multiple passes
- Temporal + spatial analysis
- Manual review
- Slower processing
Balanced Approach
Recommended workflow:
- Quick FFmpeg filter for preview (fast)
- If acceptable, keep it
- If not, run AI denoising (quality)
- Compare, choose best result
Troubleshooting
Problem: Over-Smoothing
Symptoms: Video looks waxy, details gone.
Solutions:
- Reduce denoising strength
- Use detail recovery option
- Apply sharpening after
- Try different algorithm
Problem: Artifacts Added
Symptoms: New patterns, halos, ringing.
Solutions:
- Lower settings
- Try different tool
- Check source quality
- May be unfixable noise level
Problem: Temporal Flicker
Symptoms: Brightness varies frame to frame.
Solutions:
- Enable temporal analysis
- Use frame interpolation
- Apply temporal smoothing filter
- Multiple pass processing
Problem: Color Shift
Symptoms: Colors change after denoising.
Solutions:
- Disable chroma denoising
- Apply luma-only denoising
- Correct colors after
- Use different tool
Problem: Processing Too Slow
Symptoms: Days to process one video.
Solutions:
- Use GPU acceleration
- Lower quality settings
- Process shorter segments
- Use faster algorithm (FFmpeg)
- Cloud processing for one-time jobs
Comparison Matrix
Tool Comparison
| Tool | Quality | Speed | Cost | Ease |
|---|---|---|---|---|
| Topaz | Excellent | Medium | $299 | Easy |
| Video2X SRMD | Very Good | Slow | Free | Moderate |
| DaVinci Studio | Excellent | Fast | $295 | Moderate |
| FFmpeg | Good | Very Fast | Free | Hard |
| Neat Video | Excellent | Medium | $99-$499 | Moderate |
Use Case Recommendations
| Scenario | Recommended Tool |
|---|---|
| Quick fix | FFmpeg hqdn3d |
| Professional output | Topaz or DaVinci |
| AI video cleanup | SRMD level 1-2 |
| Old VHS restoration | Topaz + multi-pass |
| Batch processing | Video2X automated |
| Real-time preview | DaVinci Studio |
Frequently Asked Questions
Can denoising fix any video?
No. Extremely noisy or low-quality sources may not be salvageable. If noise obscures most detail, even AI can't recover what isn't there.
Should I denoise before or after color grading?
Before. Noise affects color algorithms. Denoise first, then color grade the clean footage.
Will denoising reduce file size?
Often yes. Noise is random data that compresses poorly. Clean video compresses more efficiently.
Is AI denoising better than traditional?
Usually yes for heavy noise. For light noise, traditional filters may be sufficient and faster.
Can I denoise 4K video on consumer GPU?
Yes, but slowly. Expect 0.5-2 fps processing speed. Consider cloud processing for large 4K projects.
How do I denoise without losing sharpness?
Use tools with detail preservation. Apply light sharpening after. Don't over-denoise. Accept some noise if it preserves detail.
Does denoising work on live footage?
Not in real-time for AI methods. Traditional FFmpeg filters can work near real-time with GPU.
Should I denoise compressed video?
Yes, but manage expectations. Compression has already removed information. You can reduce visible artifacts but can't recover original quality.
Can I selectively denoise parts of a frame?
Advanced tools support masking. Create a mask for noisy areas, apply denoising only there.
Is grain always noise?
No. Film grain is often intentional artistic choice. Distinguish between unwanted digital noise and desired film grain.
Wrapping Up
AI video denoising has revolutionized what's possible with noisy footage. Even heavily degraded video can now be restored to watchable quality.
Key takeaways:
- Denoise before upscaling for best results
- Use temporal analysis for high-quality output
- Match tool to noise type (grain vs compression)
- Don't over-denoise; preserve intentional texture
- Test on samples before processing full videos
With the right tools and settings, your noisy footage can look professional.
For video upscaling after denoising, see our Video2X guide. For AI video generation tips, check our LTX-2 guide. Generate AI video at Apatero.com.
Make AI images and video in your browser
Characters, video, photo packs. No GPU, no setup. Your first generation is free.
Related Articles

AI Video Generator Comparison 2025: WAN vs Kling vs Runway vs Luma vs Apatero
In-depth comparison of the best AI video generators in 2025. Features, pricing, quality, and which one is right for your needs including AI capabilities.

AI Video Multi-Clip Editing: Complete Workflow for Smooth Transitions (2025)
Master multi-clip AI video editing workflows. Learn to combine LTX-2, WAN, and Hunyuan clips into cohesive videos with smooth transitions and consistent style.

LTX-2 on 8GB VRAM: Complete Optimization Guide for Low-End GPUs (2025)
Run LTX-2 video generation on 8GB VRAM GPUs. Complete guide to memory optimization, FP8 quantization, tile processing, and settings for RTX 3070, 3060, and similar cards.