AI Video Multi-Clip Editing: Complete Workflow for Smooth Transitions (2025)
Master multi-clip AI video editing workflows. Learn to combine LTX-2, WAN, and Hunyuan clips into cohesive videos with smooth transitions and consistent style.
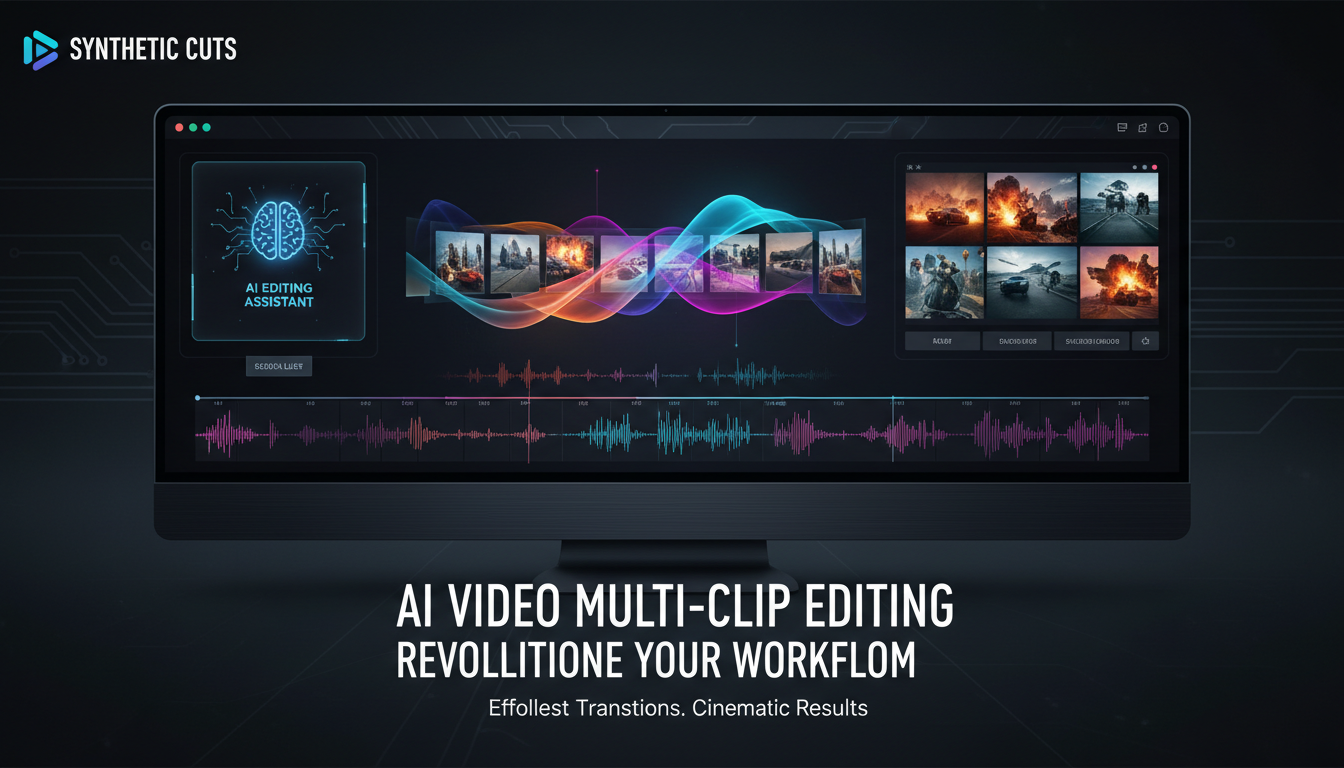
AI video models generate clips of 4-10 seconds. Real videos need to be longer. This guide teaches you how to combine multiple AI clips into cohesive, professional-looking videos with simple transitions.
Quick Answer: Successful multi-clip AI video editing requires three key elements: consistent style prompting across all clips, proper transition planning between clips, and post-production smoothing. Generate clips at the same settings (resolution, CFG, steps), use the last frame of clip A as the first frame reference for clip B, and apply cross-dissolves or motion-matched cuts for direct flow.
- Generate clips with consistent settings and style
- Plan transitions before generating clips
- Use image-to-video for scene continuity
- Apply cross-dissolves for smooth connections
- Match motion direction between clips
Why Multi-Clip Editing Matters
Every AI video creator eventually hits the same wall: you can generate stunning 5-second clips, but your project needs a 60-second video. The technology for longer single-generation videos exists in research labs, but for practical work today, multi-clip editing is how professional AI video content gets made. Understanding this workflow transforms you from someone who makes cool clips into someone who makes complete videos.
The good news is that multi-clip editing isn't just a workaround for limitations. It's actually a powerful creative tool. By thinking in clips, you gain control over pacing, transitions, and narrative structure that single long generations wouldn't provide. The best AI video creators embrace this constraint and use it to their advantage.
The 5-Second Problem
Current AI video models have hard limits:
- LTX-2: Up to 5 seconds per clip
- WAN 2.2: Up to 10 seconds (varies by settings)
- Hunyuan: Up to 6 seconds
For anything longer, you need to combine clips.
The Coherence Challenge
Unlike traditional video where you shoot continuous footage, each AI clip is generated independently. This creates problems:
- Style drift between clips
- Character/subject inconsistency
- Jarring transitions
- Motion mismatches
This guide solves these problems.
Pre-Production Planning
Storyboarding for AI
Before generating anything, plan your sequence:
Scene breakdown:
- List every scene/shot needed
- Note transition type between each
- Identify which clips need to connect smoothly
- Mark style consistency requirements
Example storyboard: ``` Scene 1: Woman walking in city (5s) Transition: Motion match (walking continues) Scene 2: Close-up of woman's face (4s) Transition: Cross-dissolve Scene 3: City skyline establishing shot (3s) Transition: Hard cut Scene 4: Woman enters building (5s) ```
Prompt Consistency Framework
Create a style prompt template: ``` [Scene-specific content], [Character description - constant across clips], [Visual style - constant across clips], [Quality tags - constant across clips] ```
Example template: ``` Base style: "cinematic lighting, film grain, 24fps motion, shallow depth of field, professional cinematography"
Character: "young woman with short black hair, wearing red jacket, confident posture"
Scene 1: "walking through busy city street at sunset, " + character + ", " + base style Scene 2: "close-up portrait turning to camera, " + character + ", " + base style ```
Generation Strategy
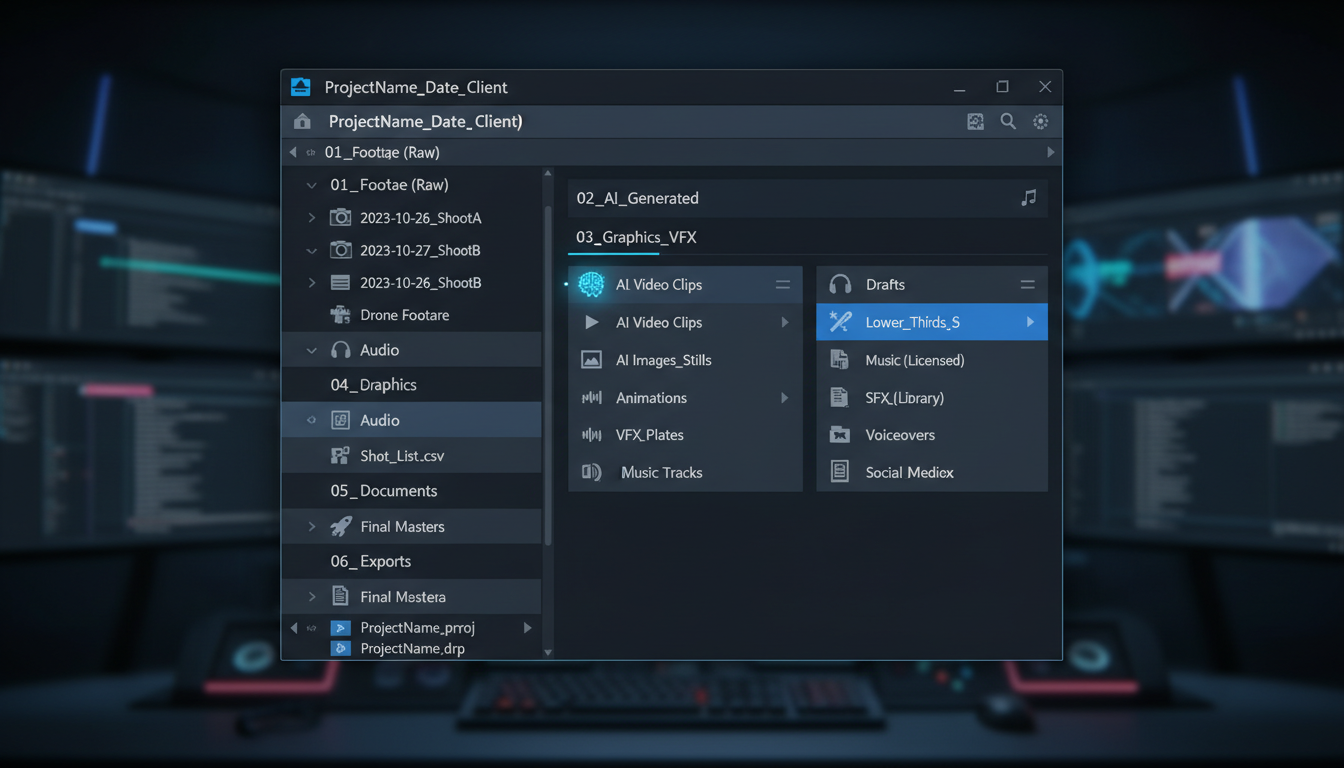 Organized project structure keeps AI-generated clips and assets manageable across complex edits.
Consistent Settings
Use identical settings across all clips:
| Setting | Recommended Value |
|---|---|
| Resolution | 720p (1280x720) |
| CFG Scale | 6-7 |
| Steps | 25-30 |
| FPS | 24 |
| Seed | Note for each clip |
Varying these creates visual inconsistency.
Sequential Generation
For scenes that connect directly:
Method 1: Last Frame Reference
- Generate Clip A
- Extract last frame of Clip A
- Use as init image for Clip B (image-to-video)
- Repeat for Clip C, D, etc.
Method 2: Keyframe Planning
- Generate keyframe images for each scene
- Generate clips between keyframes
- More control over each transition point
Parallel Generation
For independent scenes:
- Generate all clips with same style prompt
- Review for visual consistency
- Regenerate outliers that don't match
- Combine in post-production
Transition Techniques
Cross-Dissolve
Best for:
- Time passage
- Emotional moments
- Softening abrupt changes
Settings: ``` Duration: 12-24 frames (0.5-1 second) Start: 6 frames before clip A ends End: 6 frames after clip B starts ```
Motion Match Cuts
Best for:
- Continuous action
- Camera movement continuation
- Energy maintenance
Technique:
- End Clip A with motion moving right
- Start Clip B with motion continuing right
- Cut on peak action moment
Hard Cuts
Best for:
- Scene changes
- Dramatic impact
- Music-synced editing
When motion matches: Cut directly without transition. Works when scenes are clearly different.
Fade to Black
Best for:
- Chapter endings
- Major time jumps
- Beginning/ending of sequences
Settings: ``` Fade out: 12-18 frames Black hold: 6-12 frames Fade in: 12-18 frames ```
Image-to-Video Continuity
LTX-2 Image Extension
LTX-2 supports image-to-video for clean continuation:
``` Workflow:
- Generate initial clip (text-to-video)
- Extract final frame
- Feed into image-to-video node
- Generate continuation clip
- Repeat as needed ```
ComfyUI Workflow
Nodes needed:
- LTX-2 Video Sampler
- Image Load node
- Video Combine node
Key settings:
- Set first frame weight high (0.8-0.95)
- Match motion direction in prompt
- Use same seed family (+1, +2) for consistency
Quality Considerations
First frame strength:
Free ComfyUI Workflows
Find free, open-source ComfyUI workflows for techniques in this article. Open source is strong.
- 0.9+: Very consistent, may limit motion variety
- 0.7-0.9: Good balance of consistency and variation
- Below 0.7: May drift from reference
Audio Synchronization
Planning for Sound
Consider audio when planning clips:
Dialogue scenes:
- Generate longer clips
- Match mouth movement timing
- Plan for audio sync points
Music videos:
- Map beat drops to transition points
- Generate clips matching rhythm
- Time clip lengths to musical phrases
LTX-2 Audio Sync
LTX-2 generates synchronized audio. For multi-clip:
- Generate clips with audio enabled
- Extract audio tracks
- Cross-fade audio at transitions
- Or replace with custom audio track
Post-Production Audio
Workflow:
- Assemble video clips
- Add background music track
- Sync transitions to beat/rhythm
- Layer sound effects
- Normalize audio levels
Post-Production Workflow
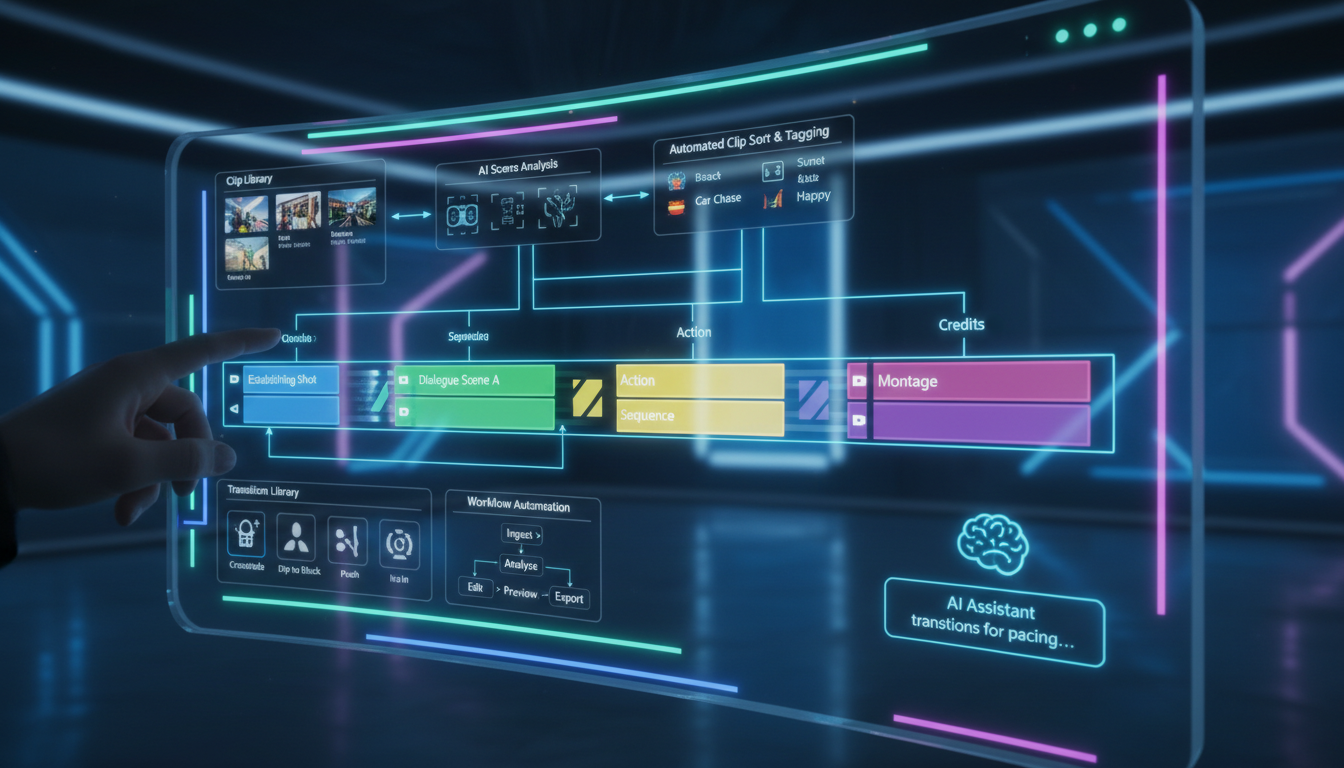 Professional multi-clip timelines show scene transitions and clip management for smooth AI video editing.
Software Options
DaVinci Resolve (Free):
- Professional color grading
- Advanced transitions
- Audio editing included
Premiere Pro:
- Industry standard
- Good for complex timelines
- Extensive effects library
CapCut (Free):
- Quick edits
- Social media focused
- Easy learning curve
Color Grading for Consistency
Even with consistent prompts, AI clips may vary in color. Fix in post:
Process:
- Select "hero" clip as reference
- Match other clips to reference
- Apply overall color grade
- Export with consistent look
DaVinci Resolve workflow: ```
- Add all clips to timeline
- Right-click reference clip → Grab Still
- Select other clip → Match Color to reference
- Fine-tune in Color page
- Apply LUT for final look ```
Transition Effects
Cross-dissolve adjustments: ```
- Overlap clips by desired duration
- Right-click overlap → Add Dissolve
- Adjust handles for smooth blend ```
Motion matching: ```
- Find frame in Clip A with peak motion
- Find matching motion in Clip B
- Cut at these points
- Adjust timing for smooth flow ```
Advanced Techniques
Scene Bridging
When clips don't connect naturally:
Insert bridging clip: Generate a short transition clip specifically designed to bridge: ``` "Camera movement transitioning from [Scene A setting] to [Scene B setting], smooth pan, continuous motion" ```
Want to skip the complexity? Apatero gives you professional AI results instantly with no technical setup required.
Use abstract transitions: Generate abstract motion clips (light flares, particle effects) to bridge disconnected scenes.
Style Transfer for Consistency
If clips have style drift:
Real-ESRGAN consistency: Process all clips through same enhancement model.
Color LUT application: Apply identical LUT to all clips.
Style LoRA: Generate all clips with same style LoRA active.
Motion Interpolation
Smooth choppy transitions:
RIFE interpolation: ```
- Export transition zone as frames
- Apply RIFE to add intermediate frames
- Replace in timeline
- Smoother result ```
Speed Ramping
Create dynamic feel: ``` End of Clip A: 100% → 120% speed (energetic exit) Transition: 120% → 80% (dramatic pause) Start of Clip B: 80% → 100% speed (settle into scene) ```
Specific Model Workflows
LTX-2 Multi-Clip
LTX-2's image-to-video makes it excellent for multi-clip:
Workflow:
- Generate 4-second base clip
- Extract frame at 3.5 seconds
- Generate next clip from that frame
- Overlap clips by 0.5 seconds
- Cross-dissolve at overlap
- Repeat for sequence
Advantages:
- Built-in audio continuity
- High visual consistency
- Fast generation
WAN 2.2 Multi-Clip
WAN allows longer individual clips but less consistency:
Workflow:
- Generate clips at 10 seconds each
- Use heavier post-production matching
- Rely on cross-dissolves for transitions
- May need color correction per clip
Best for: Scenes that don't need direct continuity.
Mixed Model Workflow
Combine strengths of different models:
Earn Up To $1,250+/Month Creating Content
Join our exclusive creator affiliate program. Get paid per viral video based on performance. Create content in your style with full creative freedom.
Example:
- LTX-2 for dialogue scenes (audio sync)
- WAN for action sequences (longer motion)
- Hunyuan for stylized inserts (visual quality)
Post-production: Heavy color grading to unify different model aesthetics.
Common Problems and Solutions
Problem: Style Drift
Symptoms: Each clip looks different despite same prompt.
Solutions:
- Use style LoRA for consistency
- Match seeds across clips (+1, +2, +3)
- Post-production color matching
- More specific style descriptions
Problem: Character Inconsistency
Symptoms: Character looks different between clips.
Solutions:
- Use character LoRA
- Include detailed character description
- Reference same face image for all clips
- Manual regeneration of outlier clips
Problem: Jarring Transitions
Symptoms: Cuts feel abrupt and unprofessional.
Solutions:
- Add cross-dissolve
- Match motion direction
- Use bridging clips
- Apply motion blur at cut points
Problem: Motion Mismatch
Symptoms: Movement direction changes abruptly.
Solutions:
- Prompt for consistent motion direction
- Flip clips if needed (mirror)
- Add static pause between clips
- Use abstract transition effects
Problem: Audio Discontinuity
Symptoms: Sound jumps at transitions.
Solutions:
- Cross-fade audio tracks
- Use room tone under transitions
- Add transition sound effects
- Replace with continuous music track
Efficiency Tips
Batch Generation
Generate all clips in batch: ```
- Prepare all prompts
- Queue all generations
- Review batch for consistency
- Regenerate outliers
- Proceed to editing ```
Template Workflows
Create reusable editing templates:
- Transition presets
- Color grade presets
- Audio mixing templates
- Export settings
Quality Control Checkpoints
Before editing:
- All clips match resolution/FPS
- Style consistency acceptable
- Motion directions mapped
- Audio synced or planned
During editing:
- Transitions smooth
- Colors matched
- Audio levels balanced
- Timing feels natural
Before export:
- Full playback review
- No jarring cuts remaining
- Audio clean throughout
- Export settings correct
Practical Examples
Example 1: Product Commercial (30 seconds)
Structure: ``` Clip 1: Product reveal (5s) - Text-to-video Clip 2: Feature demo (5s) - Image-to-video from Clip 1 Clip 3: User reaction (5s) - Independent clip Clip 4: Lifestyle shot (5s) - Independent clip Clip 5: Brand logo/CTA (5s) - Fade from clip 4 Clip 6: End card (5s) - Hard cut ```
Transitions:
- 1→2: Motion match (product spinning continues)
- 2→3: Cross-dissolve (change of scene)
- 3→4: Hard cut on beat
- 4→5: Fade through white
- 5→6: Simple cut
Example 2: Music Video (60 seconds)
Structure: ``` Verse 1: 4 clips, abstract visuals (20s) Chorus: 3 clips, high energy cuts (12s) Verse 2: 4 clips, narrative elements (20s) Outro: 2 clips, fade to end (8s) ```
Sync strategy:
- Map each clip to musical phrase
- Transitions on beat drops
- Speed ramp to match intensity
Example 3: Short Film Scene (90 seconds)
Structure: ``` Establishing: Wide shot (5s) Action: 6 connected clips using image-to-video chain (30s) Dialogue: 4 clips, alternating angles (20s) Reaction: 3 clips, emotional beats (15s) Resolution: 4 clips, narrative conclusion (20s) ```
Continuity strategy:
- Image-to-video chain for action sequence
- Match lighting prompts for dialogue
- Cross-dissolve for emotional moments
Frequently Asked Questions
How many clips can I combine?
Technically unlimited. Practically, 10-20 clips is manageable. Beyond that, organize into "chapters" for editing efficiency.
Should I generate clips in order?
For connected scenes, yes. For independent scenes, parallel generation is more efficient.
How do I handle different aspect ratios?
Standardize before editing. Either crop/pad to match, or design transitions that accommodate ratio changes.
What's the minimum overlap for cross-dissolve?
Half a second (12 frames at 24fps) minimum. One second (24 frames) is more forgiving.
Can I mix 24fps and 30fps clips?
Technically yes, but not recommended. Convert all to same frame rate before editing for smooth playback.
How do I maintain character consistency across many clips?
Use character LoRA, reference images, and detailed consistent descriptions. Still expect some variation and plan for post-production matching.
What if one clip in a sequence is bad?
Regenerate just that clip using the frames before and after as constraints. Most models support image-to-video which helps match.
How long should my final video be?
Depends on platform and purpose. Short-form (15-60s) works best for current AI video quality. Longer pieces require more post-production work.
Wrapping Up
Multi-clip AI video editing transforms short generations into complete videos. The key is planning consistency before generation and smoothing imperfections in post.
Key takeaways:
- Plan sequences before generating
- Use consistent settings and prompts
- Use image-to-video for continuity
- Apply appropriate transitions
- Post-production color and audio matching
- Review for jarring elements before export
With these techniques, your AI-generated clips become polished, professional videos.
For LTX-2 clip generation, see our complete LTX-2 guide. For audio synchronization, check our LTX-2 audio prompting masterclass. Generate AI video at Apatero.com.
Ready to Create Your AI Influencer?
Join 115 students mastering ComfyUI and AI influencer marketing in our complete 51-lesson course.
Related Articles
AI Video Denoising and Restoration: Complete Guide to Fixing Noisy Footage (2025)
Master AI video denoising and restoration techniques. Fix grainy footage, remove artifacts, restore old videos, and enhance AI-generated content with professional tools.

AI Video Generator Comparison 2025: WAN vs Kling vs Runway vs Luma vs Apatero
In-depth comparison of the best AI video generators in 2025. Features, pricing, quality, and which one is right for your needs including AI capabilities.

LTX-2 on 8GB VRAM: Complete Optimization Guide for Low-End GPUs (2025)
Run LTX-2 video generation on 8GB VRAM GPUs. Complete guide to memory optimization, FP8 quantization, tile processing, and settings for RTX 3070, 3060, and similar cards.