ComfyUI LayerForge: Photoshop-Like Layer Editing Inside Your Workflow
LayerForge brings Photoshop-style layer editing directly into ComfyUI. Multi-layer compositing, blend modes, masking, and AI background removal without leaving your workflow.
I've spent years switching between ComfyUI and Photoshop. Generate an image, export it, layer it in Photoshop, composite, export again, bring back into ComfyUI for inpainting. It was exhausting. LayerForge just killed that entire workflow.
Quick Answer: LayerForge is a ComfyUI custom node that provides Photoshop-style multi-layer editing directly in your workflow. It supports blend modes, masking, transformations, polygonal selection inpainting, and automatic AI background removal—all without leaving ComfyUI.
- Full multi-layer canvas with drag-and-drop and blend modes
- Polygonal selection tool for precise inpainting masks
- AI-powered background removal built into the node
- Canvas state persists in browser IndexedDB between sessions
- Smoothly integrates with any ComfyUI model workflow
Why LayerForge Changes Everything
The typical ComfyUI workflow for compositing is painful. You have separate nodes for loading images, separate nodes for masking, separate nodes for blending. Want to adjust the position of an element? Reconnect nodes. Want to change blend mode? Another node.
LayerForge consolidates all of this into a single visual interface. You see your layers. You drag them. You adjust blend modes. You draw masks. All in real-time, all in one place.
The mental model matches what creatives already know from Photoshop, GIMP, or any professional image editor. Except now it's embedded in your AI generation pipeline.
Installation
Through ComfyUI Manager:
- Search for "Comfyui-LayerForge"
- Click Install
- Restart ComfyUI
That's it. No dependencies to hunt down. No pip installs to debug.
The node appears in your node menu under the "LayerForge" category.
Core Features Explained
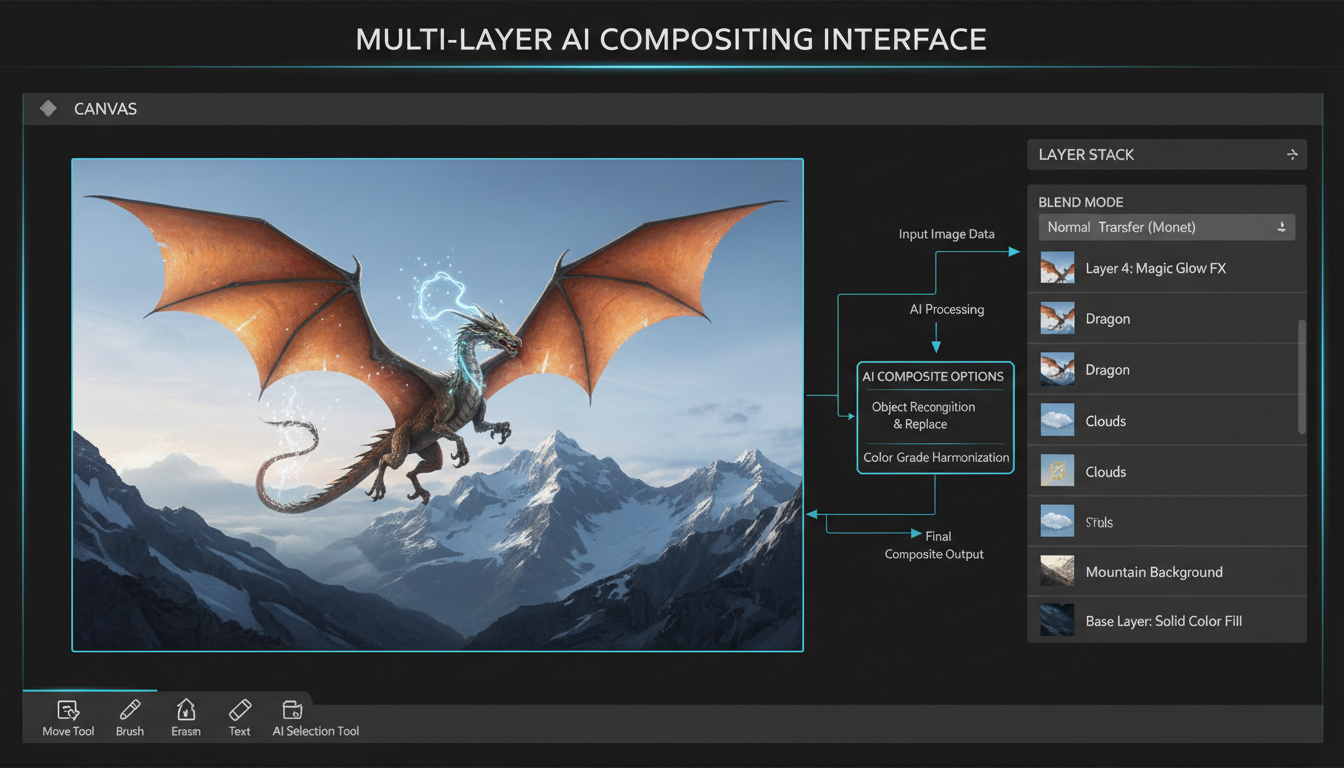
Multi-Layer Canvas
The canvas supports unlimited layers. Each layer can be:
- An imported image file
- A generated image from your workflow
- A painted mask layer
- A transparent overlay
Layers can be reordered by dragging. Double-click to rename. Toggle visibility with the eye icon. Standard stuff for anyone who's used layer-based editors.
What's not standard: this runs inside ComfyUI and outputs directly to your generation nodes.
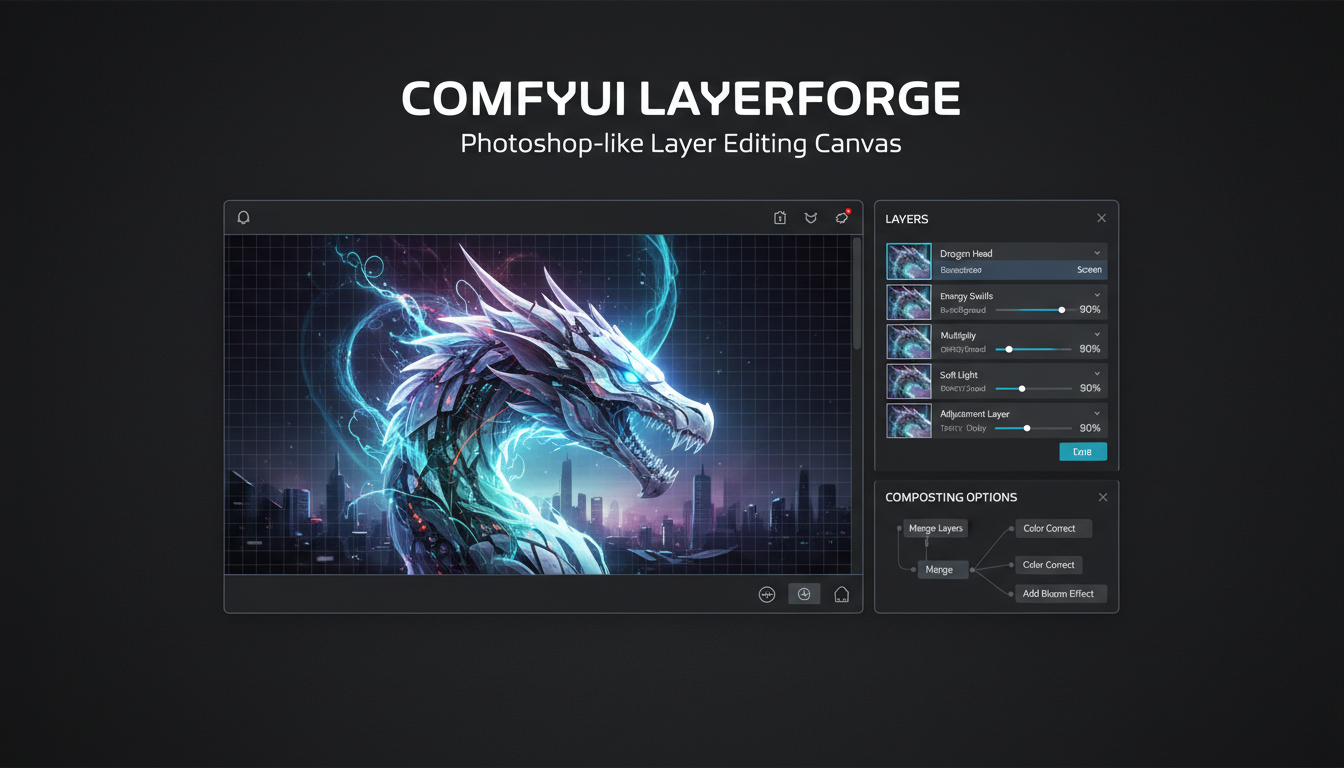
 LayerForge canvas with multiple layers, blend modes, and real-time preview
Blend Modes
All the classics are here:
- Normal, Multiply, Screen
- Overlay, Soft Light, Hard Light
- Darken, Lighten
- Color Dodge, Color Burn
- Difference, Exclusion
Each layer has its own blend mode dropdown. Changes apply instantly in the preview.
For compositing AI-generated elements into backgrounds, Multiply and Screen handle most cases. Overlay is excellent for texture overlays without destroying highlights.
Transformations
Every layer supports:
- Position (drag or enter coordinates)
- Scale (corner handles or numeric input)
- Rotation (rotation handle or degrees)
- Opacity (slider 0-100%)
The canvas is pannable and zoomable, so you can work at any detail level. Standard scroll and middle-click navigation.
Polygonal Selection Inpainting
This feature alone is worth the installation. Instead of painting masks with a brush (imprecise, time-consuming), you draw precise polygonal selections.
How it works:
- Hold Shift + S and left-click to start
- Continue clicking to add vertices
- Click back on the first point to close the selection
- Selection becomes a mask for inpainting
The workflow then sends this mask to your inpainting model. FLUX, SD, whatever you're using. The masked area gets regenerated while the rest stays intact.
This is Photoshop's lasso tool, but outputting directly to AI inpainting.
AI Background Removal
LayerForge includes optional AI-powered background removal. Import an image, click the background removal option, and it automatically generates a transparency mask.
No separate SAM workflow needed. No external tools. It's built in.
The quality is solid for standard subjects—people, products, objects with clear edges. Complex cases like hair or fur may need manual refinement, but it's a huge time saver for 80% of use cases.
Free ComfyUI Workflows
Find free, open-source ComfyUI workflows for techniques in this article. Open source is strong.
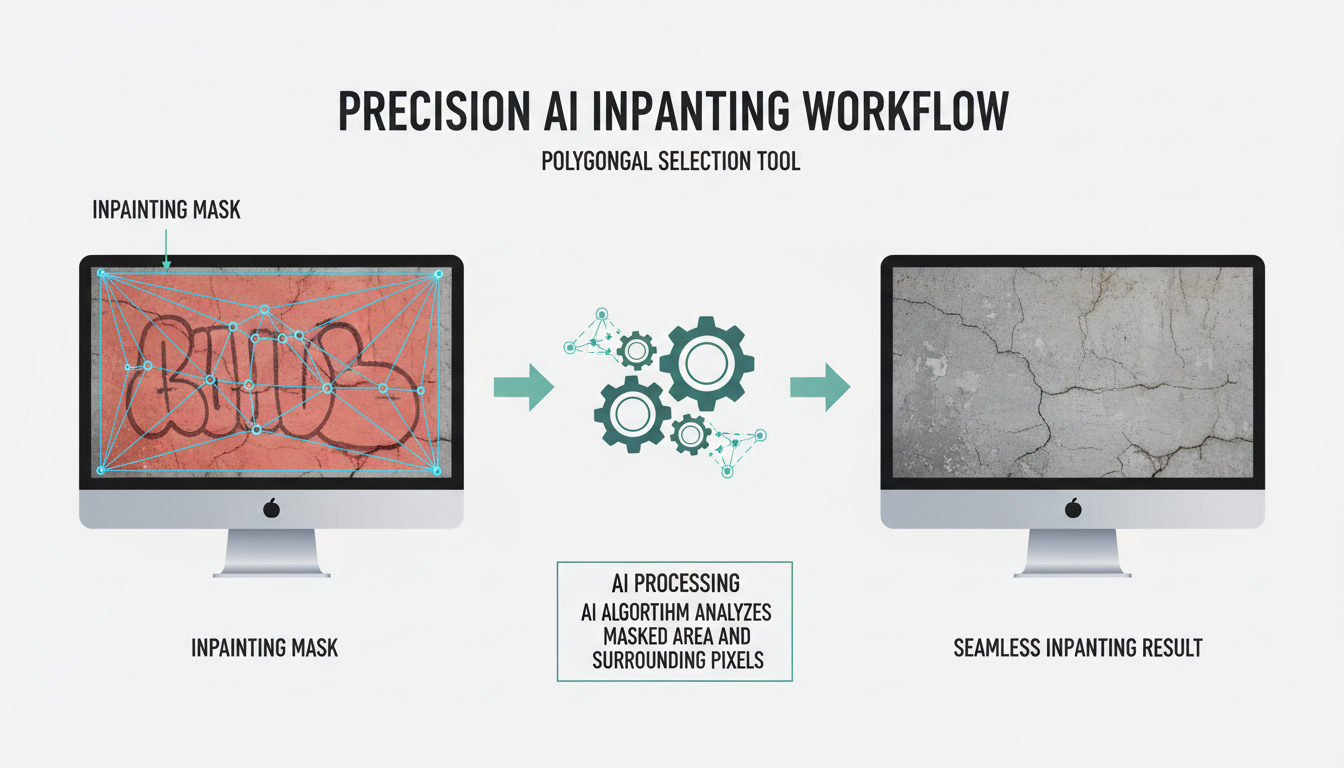 Polygonal selection creating precise inpainting mask for FLUX workflow
Practical Workflow Examples
Product Photography Compositing
- Generate product with transparent background
- Import into LayerForge as top layer
- Import studio backdrop as bottom layer
- Adjust position, scale, rotation
- Add shadow layer with Multiply blend
- Output final composite
This used to require exporting to Photoshop. Now it's three nodes in ComfyUI.
Character Scene Placement
For AI character work, LayerForge solves the placement problem:
- Generate character with consistent style
- Import scene background
- Layer character at desired position
- Use polygonal selection on edge issues
- Inpaint seams with context-aware fill
The result looks like the character was generated in-scene, without the complexity of ControlNet composition.
Iterative Inpainting
Instead of regenerating entire images when one area is wrong:
- Import generated image
- Draw polygon around problem area
- Run inpaint with adjusted prompt
- Repeat for other areas
- Export final composite
Each inpaint runs only on the selected region. Faster, more controlled, better results.
Integration with Existing Workflows
LayerForge plays nicely with everything:
With FLUX: Connect the LayerForge output to FLUX inpainting nodes. The mask output feeds directly to conditioning.
With ControlNet: Export your composed layout and use it as a ControlNet depth or canny input. LayerForge handles the visual composition; ControlNet handles the structural guidance.
With IPAdapter: Compose reference images in LayerForge, then use the output as IPAdapter input for style/face consistency.
With Upscaling: Compose at low resolution for speed, then route the final composite through ESRGAN or SUPIR.
Want to skip the complexity? Apatero gives you professional AI results instantly with no technical setup required.
Canvas State Persistence
One underrated feature: LayerForge saves your canvas state to IndexedDB. Close the browser, come back tomorrow, your layers are still there.
This means you can treat LayerForge as a working document. Build up complex compositions over multiple sessions without losing work.
The state includes layer order, positions, blend modes, visibility—everything. Not just the pixels.
Performance Considerations
LayerForge is lightweight. It's primarily a frontend canvas with minimal backend processing. The heavy lifting happens in your normal ComfyUI nodes.
That said, large canvases with many layers will use browser memory. If you're hitting browser limits:
- Merge layers you're done editing
- Work at smaller canvas sizes during composition
- Scale up only for final output
For most workflows, this won't be an issue. Modern browsers handle substantial canvases without problems.
Comparison to Alternatives
vs. Photoshop/GIMP: Full professional editors with more features. But you lose workflow integration. Every round-trip costs time.
vs. ComfyUI Native Nodes: Possible to composite with ImageBlend, ImageCompositeMasked, etc. But the visual feedback loop is painful. LayerForge provides instant preview.
vs. Qwen Edit: Qwen Edit handles text-instruction edits. LayerForge handles spatial composition. They're complementary, not competing.
LayerForge occupies a unique niche: professional compositing UX inside the generative workflow.
Earn Up To $1,250+/Month Creating Content
Join our exclusive creator affiliate program. Get paid per viral video based on performance. Create content in your style with full creative freedom.
Tips from Experience
Start simple: Use LayerForge for one task first (like position adjustment), then expand to more complex compositing.
Save layer presets: If you're doing repeated product shots, keep a template canvas with your standard backdrop and shadow layers.
Use keyboard shortcuts: The node supports standard shortcuts—Ctrl+Z for undo, Shift+click for multi-select, etc.
Mind the output resolution: LayerForge outputs at canvas resolution. Set your canvas size intentionally, not accidentally.
Current Limitations
Being honest about what LayerForge doesn't do yet:
No layer effects: No drop shadows, glows, or filters applied to layers. You'd need to generate those separately.
No vector tools: Can't draw shapes or paths. It's a raster canvas only.
No text tool: Can't add text directly. Generate text in your AI workflow or import from elsewhere.
Single canvas per node: Each LayerForge node is one canvas. Complex workflows might need multiple instances.
These limitations may change as the project evolves. Check the GitHub for latest updates.
FAQ
Do I need Photoshop skills to use LayerForge? Basic familiarity with layers helps, but the interface is intuitive. If you've used any image editor with layers, you'll adapt quickly.
Does it work with video workflows? Currently image-only. Video compositing would require frame-by-frame processing.
Can I import PSD files? Not directly. Export layers as individual images first, then import into LayerForge.
How do I access the AI background removal? It's an option when importing images. The model downloads automatically on first use.
Is there a mobile version? It runs in browser, so theoretically works on tablets. Practical usability depends on screen size.
Can multiple people collaborate on the same canvas? No real-time collaboration. It's local to your browser session.
What happens if I clear browser data? Canvas state is stored in IndexedDB. Clearing browser data will lose unsaved work.
Who Should Use This
LayerForge is ideal for:
- Creators who composite AI-generated elements frequently
- Product photographers using AI for backgrounds or props
- Anyone frustrated by the Photoshop round-trip
- Workflows that need precise inpainting control
If you're generating standalone images without compositing, LayerForge adds unnecessary complexity. Stick with standard workflows.
But if you're constantly switching between generation and composition—and who isn't—LayerForge collapses that into a single interface.
For cloud-based workflows, Apatero.com is exploring LayerForge-style compositing in our upcoming features. The goal is bringing professional composition to cloud AI without the local setup.
Final Thoughts
I install a lot of ComfyUI custom nodes. Most add incremental improvements. LayerForge is one of the rare ones that fundamentally changes how I work.
The ability to see, drag, blend, and inpaint visually—inside the workflow that generates the content—removes friction I didn't even know I was tolerating.
Try it for one project. You'll understand why I'm writing about it.
Ready to Create Your AI Influencer?
Join 115 students mastering ComfyUI and AI influencer marketing in our complete 51-lesson course.
Related Articles

10 Most Common ComfyUI Beginner Mistakes and How to Fix Them in 2025
Avoid the top 10 ComfyUI beginner pitfalls that frustrate new users. Complete troubleshooting guide with solutions for VRAM errors, model loading...

25 ComfyUI Tips and Tricks That Pro Users Don't Want You to Know in 2025
Discover 25 advanced ComfyUI tips, workflow optimization techniques, and pro-level tricks that expert users use.

360 Anime Spin with Anisora v3.2: Complete Character Rotation Guide ComfyUI 2025
Master 360-degree anime character rotation with Anisora v3.2 in ComfyUI. Learn camera orbit workflows, multi-view consistency, and professional...