AI Video Color Grading in ComfyUI: Complete Guide to Pro Looks (2025)
Master color grading for AI-generated videos in ComfyUI. Learn LUT application, color correction workflows, and cinematic looks for LTX-2, WAN, and Hunyuan output.
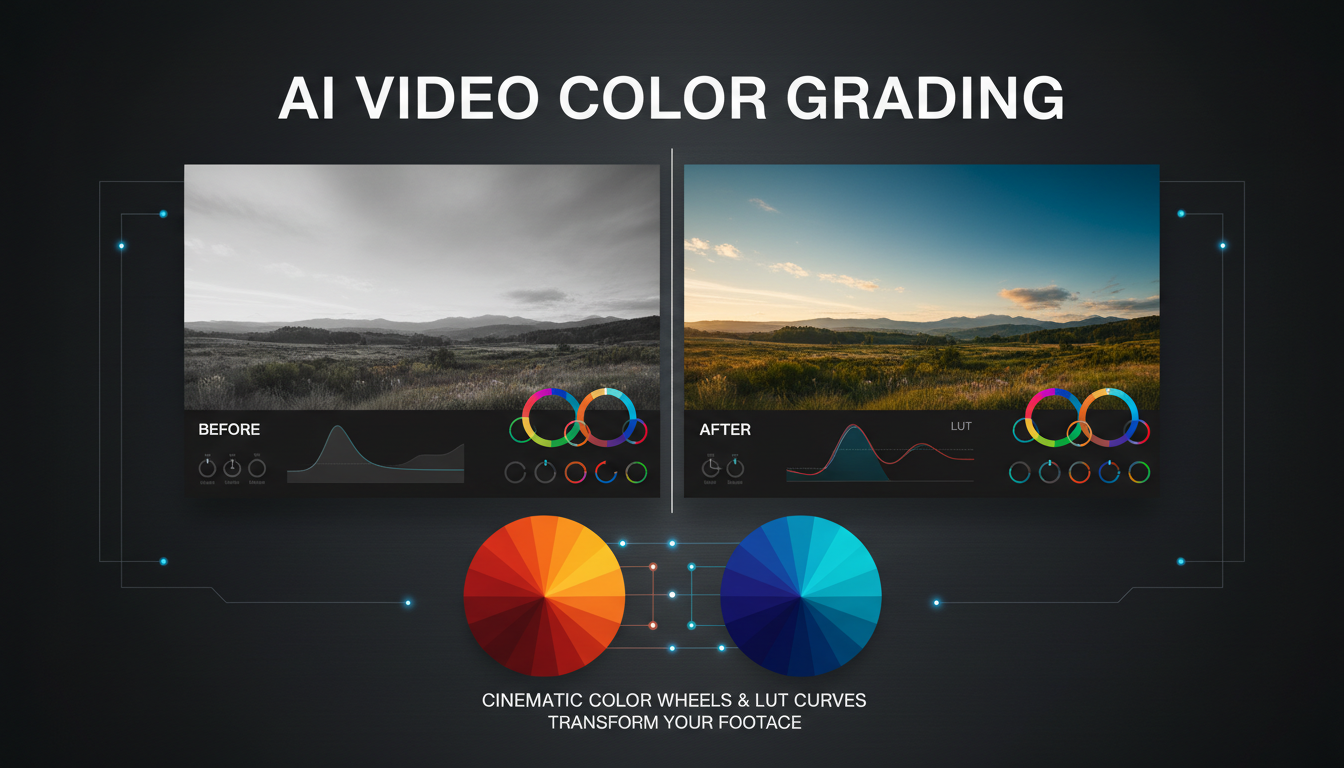
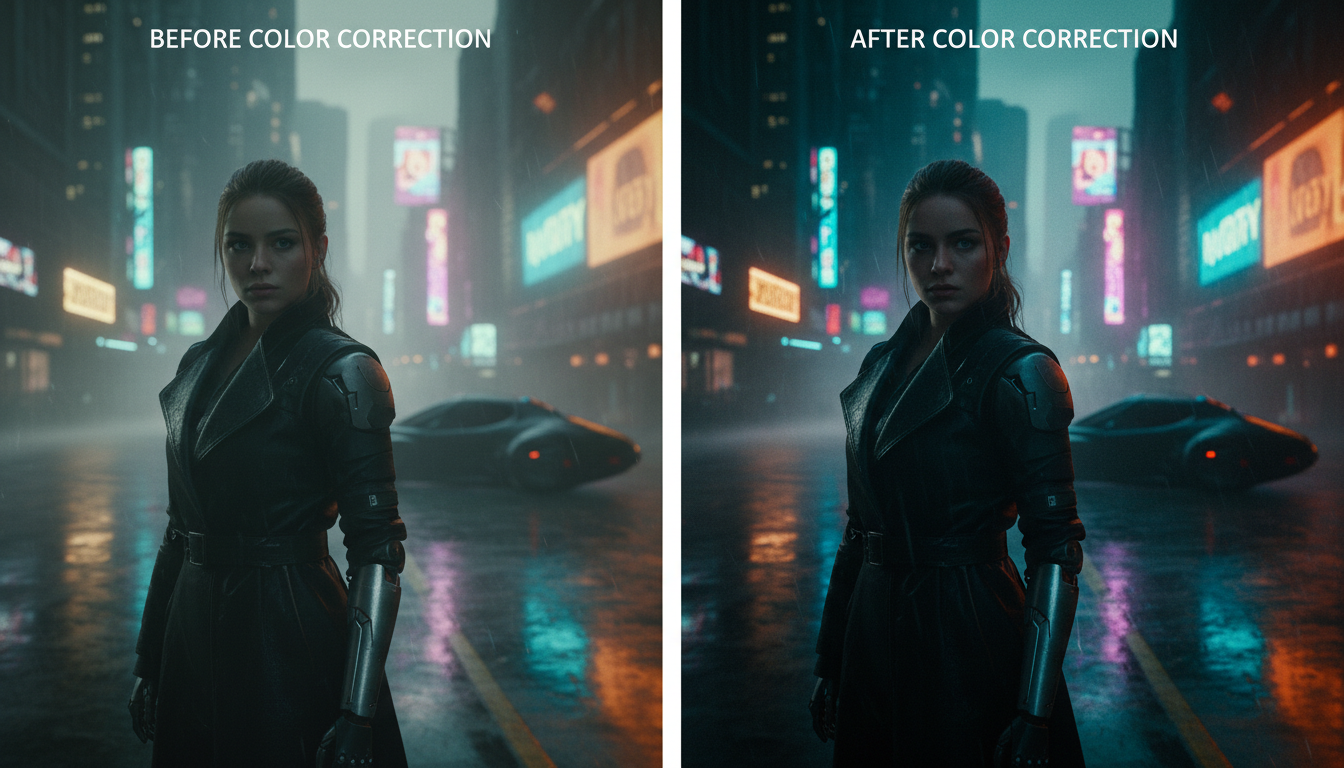
Raw AI video output often looks flat or inconsistent. Color grading transforms it into polished, cinematic content. This guide covers everything from basic correction to advanced cinematic looks directly in ComfyUI.
Quick Answer: Color grade AI videos in ComfyUI using the Image Color Adjustments nodes for basic correction, then apply LUTs via the VideoHelperSuite nodes for cinematic looks. For consistent results across clips, create a grading preset with Brightness (-5 to +10), Contrast (+10 to +20), Saturation (+5 to +15), and apply the same settings to all clips before export.
- Basic correction: Fix exposure, white balance, contrast
- Creative grading: Apply cinematic looks and mood
- LUT application: Pre-built looks for consistency
- Consistency: Match looks across multiple clips
- Export: Preserve color accuracy in final output
Why Color Grade AI Video?
Color grading is what separates amateur content from professional work, and this is especially true for AI-generated video. While the technology for generating video has advanced dramatically, the raw output from even the best models often looks flat, inconsistent, or clinical. It's technically impressive but emotionally flat. Color grading is how you add that emotional dimension back in.
Think about the movies and shows you love. Their distinctive looks come from intentional color choices. The orange and teal of action films, the desaturated greens of The Matrix, the warm golden tones of prestige drama. These aren't accidents. They're creative decisions that shape how audiences feel. You can bring this same level of craft to your AI video work with the right approach and tools.
The Raw Output Problem
AI video models prioritize content generation over color accuracy. Common issues:
- Flat, low-contrast images
- Inconsistent white balance
- Washed-out shadows
- Color casts (often blue or green)
- Lack of cinematic depth
The Color Grading Solution
Color grading addresses these issues:
- Adds contrast and depth
- Creates mood and atmosphere
- Unifies multiple clips
- Achieves professional look
- Enhances storytelling
AI Video vs Traditional Video
AI video has unique grading challenges:
| Aspect | Traditional Video | AI Video |
|---|---|---|
| Color consistency | Usually consistent | Varies per generation |
| Dynamic range | Camera-limited | Model-limited |
| Skin tones | Natural baseline | May be unnatural |
| Black levels | True blacks | Often lifted |
| Highlights | May clip | Rarely clip |
ComfyUI Color Nodes Overview
Native Nodes
ImageAdjustments:
- Brightness, Contrast, Saturation
- Basic but effective for corrections
ImageBlend:
- Combine multiple images with different grades
- Useful for split-toning effects
Custom Nodes for Color
ComfyUI-VideoHelperSuite: Required for video color grading. Includes:
- LUT application nodes
- Video-aware color adjustments
- Batch processing support
ComfyUI-KJNodes: Additional color manipulation:
- Advanced color curves
- HSL adjustments
- Color space conversions
Installation: ```bash cd ComfyUI/custom_nodes git clone https://github.com/Kosinkadink/ComfyUI-VideoHelperSuite git clone https://github.com/kijai/ComfyUI-KJNodes ```
Basic Color Correction Workflow
Step 1: Analyze Your Footage
Before correcting, identify issues:
- Too dark or too bright?
- Color cast present?
- Contrast flat or crushed?
- Saturation level?
Step 2: Exposure Correction
Brightness adjustment: ``` Too dark: +5 to +15 Too bright: -5 to -15 Slightly lift shadows: +3 to +7 ```
Node settings: Connect video output → Image Brightness → Next node
Step 3: Contrast Adjustment
Contrast levels: ``` Flat footage: +15 to +25 Normal footage: +5 to +15 Already contrasty: 0 to +5 ```
AI video typically needs +10 to +20 contrast boost.
Step 4: White Balance
Fixing color casts:
- Blue cast: Add warmth (shift towards orange)
- Yellow cast: Add coolness (shift towards blue)
- Green cast: Add magenta
- Magenta cast: Add green
Use temperature/tint controls if available, or RGB curve adjustments.
Step 5: Saturation
Saturation guidelines: ``` Washed out: +10 to +20 Normal: +5 to +10 Already saturated: 0 to +5 Desaturated look: -10 to -30 ```
LUT Application in ComfyUI
 Professional color grading workflows use LUTs to apply consistent looks across multiple clips.
What Are LUTs?
LUTs (Look-Up Tables) are pre-built color transformations. They map input colors to output colors for consistent results.
Types:
- Technical LUTs: Color space conversion, correction
- Creative LUTs: Cinematic looks, mood, style
Finding LUTs
Free LUT sources:
- Free Presets (various packs)
- Lutify.me free collection
- Color grading software trials
- Community shared packs
Format: .cube files are most compatible.
ComfyUI LUT Workflow
Node setup: ``` Video Input → Apply LUT Node → Video Output ```
VideoHelperSuite ApplyLUT node:
- Load your video frames
- Connect to ApplyLUT node
- Select .cube LUT file
- Adjust intensity (0-100%)
- Connect to output
LUT Intensity
Full strength (100%): Strong, characteristic look.
Reduced strength (40-70%): More subtle, often more realistic.
Recommended approach: Start at 60%, adjust based on result.
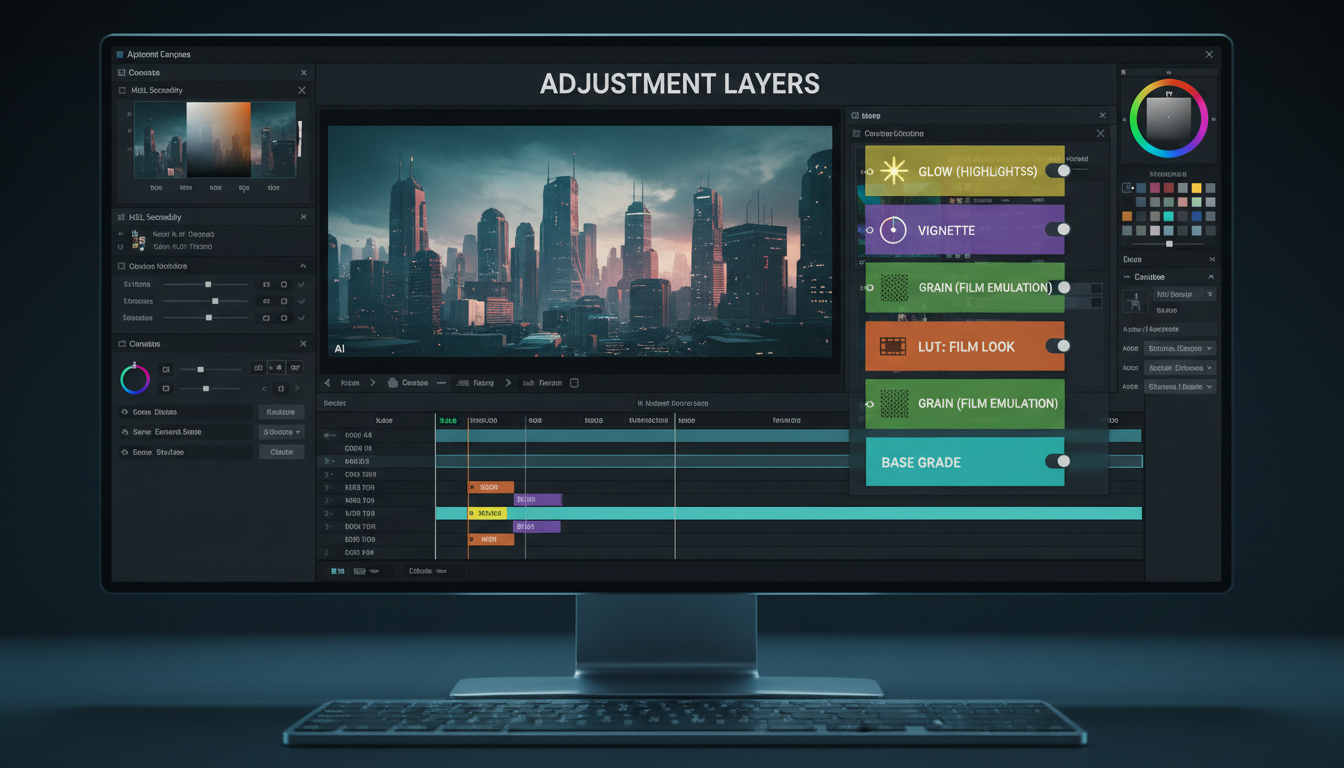
Cinematic Looks
 Color grading transforms flat AI-generated footage into cinematic, professional-looking content.
Film Emulation
Kodak 2383 Style: ``` Lift shadows: +5 Warm shadows (add orange): +10 Cool highlights (add teal): +5 Contrast: +15 Saturation: +5 ```
Fuji 3510 Style: ``` Neutral shadows Subtle warmth overall: +3 High contrast: +20 Slightly desaturated: -5 ```
Free ComfyUI Workflows
Find free, open-source ComfyUI workflows for techniques in this article. Open source is strong.
Genre-Specific Grades
Horror: ``` Desaturated: -20 to -40 Contrast: +15 Crushed blacks: Lower black point Color cast: Green or cyan tint ```
Romance: ``` Warm: +15 temperature Soft contrast: +5 to +10 Slightly saturated: +10 Lifted shadows: +5 ```
Sci-Fi: ``` Cool: -10 temperature High contrast: +20 Saturated blues/cyans: Selective Dark shadows: -5 to black level ```
Documentary: ``` Natural colors: Minimal adjustment Subtle contrast: +5 to +10 Accurate skin tones: Priority Clear shadows: Don't crush ```
Teal and Orange
The classic blockbuster look:
Process:
- Push shadows towards teal
- Push midtones/highlights towards orange
- Add contrast +15
- Slight desaturation -5
ComfyUI implementation: Use split-toning nodes or color curves to selectively adjust shadow and highlight hues.
Model-Specific Grading
LTX-2 Output
LTX-2 typically produces:
- Slightly flat contrast
- Generally accurate colors
- Occasional blue cast
- Good black levels
Recommended grade: ``` Contrast: +10 to +15 Saturation: +5 to +10 Temperature: Slight warm (+3) Shadows: Lift slightly (+3) ```
WAN 2.2 Output
WAN produces:
- More stylized colors
- Sometimes oversaturated
- Variable white balance
- Good contrast by default
Recommended grade: ``` Contrast: +5 to +10 Saturation: -5 to +5 (depends on source) White balance: Often needs correction Highlights: May need recovery ```
Hunyuan Output
Hunyuan characteristics:
- High visual quality
- Sometimes color shifts
- Good dynamic range
- Occasional banding
Recommended grade: ``` Contrast: +5 to +10 Saturation: +5 Color cast correction: As needed Highlights: Usually good ```
Advanced Techniques
Color Curves
For precise control:
S-curve for contrast: ``` Shadow point: Pull down slightly Highlight point: Push up slightly Creates natural contrast ```
Want to skip the complexity? Apatero gives you professional AI results instantly with no technical setup required.
RGB curves for color: ``` Red channel: Adjust warmth Green channel: Adjust tint Blue channel: Adjust temperature ```
Secondary Color Correction
Target specific colors:
Skin tone correction:
- Isolate skin tones (orange/red range)
- Adjust hue towards natural
- Increase saturation slightly
- Don't affect other colors
Sky enhancement:
- Isolate blue range
- Increase saturation +15
- Deepen hue slightly
- Add contrast to clouds
Masks and Regions
Gradient masks: Apply different grades to sky vs ground.
Luminosity masks: Target shadows, midtones, or highlights separately.
Power Windows
For AI video in ComfyUI, approximate power windows with:
- Create mask based on region
- Apply grade to masked area
- Feather edges for natural blend
Consistency Across Clips
Creating Grade Presets
Define your look once: ```
- Grade reference clip
- Document all settings
- Save node configuration
- Apply to all clips in sequence ```
Matching Between Clips
Workflow:
- Select "hero" clip as reference
- Grade hero clip fully
- Match other clips to reference
- Adjust individual clips as needed
- Review sequence for consistency
Shot Matching
When clips don't match:
- Compare waveforms/histograms
- Match black levels first
- Match white levels
- Adjust midtones
- Match color temperature
- Fine-tune saturation
ComfyUI Workflow Examples
Basic Grade Workflow
``` VHS Loader → Image Brightness (+10) → Image Contrast (+15) → Image Saturation (+8) → Apply LUT (60%) → VHS Output ```
Advanced Grade Workflow
``` VHS Loader → Split to RGB Channels → Adjust Red Curve → Adjust Green Curve → Adjust Blue Curve → Merge Channels → Apply Primary LUT (40%) → Apply Creative LUT (30%) → Final Saturation Tweak → VHS Output ```
Multi-Clip Matching Workflow
``` Load Clip A → Reference Grade → Output A Load Clip B → Match to A Settings → Output B Load Clip C → Match to A Settings → Output C ```
Export Considerations
Color Space
sRGB: Standard for web delivery. Most AI video is in sRGB.
Rec.709: Standard for HD video. Convert if needed for broadcast.
Earn Up To $1,250+/Month Creating Content
Join our exclusive creator affiliate program. Get paid per viral video based on performance. Create content in your style with full creative freedom.
DCI-P3: Wider gamut. Only use if specifically needed.
Bit Depth
8-bit: Standard, shows banding in smooth gradients.
10-bit: Better for grades with smooth gradients. Use for final export if supported.
Compression Considerations
H.264: Good balance of quality and size. May introduce color shifts.
H.265: Better quality at same bitrate. Color more accurate.
ProRes: Best quality, large files. Use for archival or further editing.
Troubleshooting
Problem: Banding After Grading
Cause: Pushing low bit-depth footage too far.
Solutions:
- Apply less aggressive grade
- Add subtle film grain to mask banding
- Export at higher bit depth
- Use dithering in export
Problem: Colors Look Wrong After Export
Cause: Color space mismatch.
Solutions:
- Verify export color space matches project
- Check player color settings
- Try different codec
- Embed color profile in output
Problem: Skin Tones Unnatural
Cause: Over-grading affecting skin.
Solutions:
- Use secondary correction on skin
- Reduce overall saturation
- Adjust away from unnatural hues
- Use skin tone-aware LUTs
Problem: Grade Looks Different Per Clip
Cause: Source inconsistency from AI generation.
Solutions:
- Pre-correct clips before creative grade
- Match clips before applying look
- Accept some variation as artistic
- Generate more consistent source clips
Integration with External Software
DaVinci Resolve Pipeline
Workflow:
- Generate video in ComfyUI
- Basic correction in ComfyUI
- Export to Resolve for advanced grading
- Use Resolve's color tools
- Final export from Resolve
Premiere Pro Pipeline
Workflow:
- Generate and export from ComfyUI
- Import to Premiere Pro
- Apply Lumetri color
- Match with other footage
- Export final video
Hybrid Approach
Best of both worlds:
- ComfyUI: Basic correction, consistency matching
- External: Creative grading, advanced techniques
- ComfyUI: LUT application for automation
- External: Final polish and export
Creating Custom LUTs
From ComfyUI Grade
Process:
- Apply your grade to neutral reference image
- Export graded reference
- Use LUT generator tool
- Create .cube file
- Apply LUT to future clips
Tools for LUT Creation
Free options:
- Davinci Resolve (export LUT from grade)
- Lattice (Python library)
- Online LUT generators
Frequently Asked Questions
Should I color grade before or after upscaling?
After upscaling. Grade at final resolution to see accurate results and avoid artifacts from grading low-res footage.
How do I know if my grade is good?
Check on multiple devices (phone, monitor, TV). If it looks good across displays, you're on track. Watch for crushed shadows or blown highlights.
Can I automate color grading in ComfyUI?
Yes. Create workflow with fixed settings and apply to batch of clips. Results will be consistent if source is consistent.
Do I need expensive LUTs?
No. Free LUTs work well. Expensive packs offer more variety but basic looks are achievable with free options.
Why does my video look different after upload?
Platforms recompress and may shift colors. Export with slight saturation boost (+5) and test uploads before final version.
How do I fix AI video that's too saturated?
Reduce saturation -10 to -20. Apply LUT at lower intensity. Use desaturation node before other grading.
What's the best LUT for cinematic look?
No single "best" LUT. Film emulation LUTs (Kodak, Fuji) are popular starting points. Adjust intensity to taste.
Should I grade in SDR or HDR?
SDR for most web delivery. HDR only if you have HDR monitor and HDR delivery target.
How do I match AI video to real footage?
Analyze the real footage's color profile. Apply similar curves, contrast, and saturation. May need to grade AI footage cooler/warmer to match.
Can color grading fix bad AI generation?
It can help but not work miracles. It can't fix motion artifacts, wrong content, or major quality issues. It can fix color and contrast problems.
Wrapping Up
Color grading transforms flat AI video into polished, professional content. The key is understanding your footage's baseline and applying appropriate corrections before creative looks.
Key takeaways:
- Always start with basic correction (exposure, contrast, white balance)
- Apply LUTs at 40-70% intensity for natural looks
- Match clips before applying creative grade
- Consider your delivery platform's color handling
- Test exports on multiple devices
With proper color grading, AI-generated video reaches professional quality standards.
For ComfyUI troubleshooting, see our video generation errors guide. For AI video upscaling, check our Video2X guide. Generate AI video at Apatero.com.
Ready to Create Your AI Influencer?
Join 115 students mastering ComfyUI and AI influencer marketing in our complete 51-lesson course.
Related Articles

10 Most Common ComfyUI Beginner Mistakes and How to Fix Them in 2025
Avoid the top 10 ComfyUI beginner pitfalls that frustrate new users. Complete troubleshooting guide with solutions for VRAM errors, model loading...

25 ComfyUI Tips and Tricks That Pro Users Don't Want You to Know in 2025
Discover 25 advanced ComfyUI tips, workflow optimization techniques, and pro-level tricks that expert users use.

360 Anime Spin with Anisora v3.2: Complete Character Rotation Guide ComfyUI 2025
Master 360-degree anime character rotation with Anisora v3.2 in ComfyUI. Learn camera orbit workflows, multi-view consistency, and professional...