IC-Light V2 for FLUX: Complete AI Image Relighting Guide 2025
IC-Light V2 brings perfect AI relighting to FLUX with 16-channel VAE. Learn text and background-conditioned methods from ControlNet creator lllyasviel.
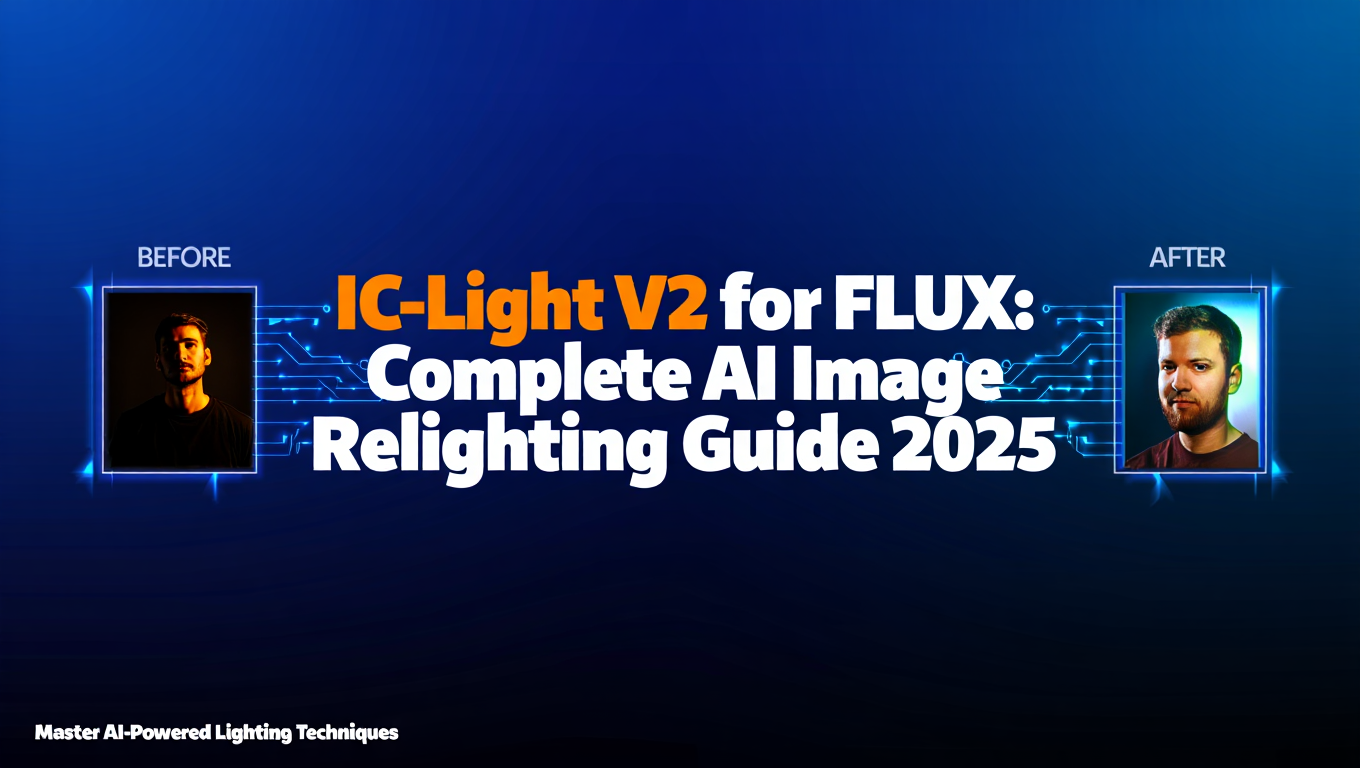
You just generated the perfect portrait. The composition is flawless, the details are sharp, and the subject looks exactly how you envisioned. But there's one problem. The lighting is completely wrong for your project.
In traditional photography, you'd need to reshoot the entire scene with different lighting setups. In AI image generation, you'd typically regenerate dozens of variations hoping one has the right lighting. Both approaches waste time and often fail to deliver exactly what you need.
Quick Answer: IC-Light V2 for FLUX is an AI-powered relighting tool created by lllyasviel (the ControlNet creator) that lets you change lighting and backgrounds in images without regeneration. It uses a 16-channel VAE architecture and supports both text-conditioned and background-conditioned relighting methods, earning a perfect 10/10/10/10 score at ICLR 2025.
- IC-Light V2 now supports FLUX models with native high-resolution capabilities
- Two relighting methods available: text-conditioned (describe lighting) and background-conditioned (paste into scenes)
- Received perfect 10/10/10/10 reviewer scores at ICLR 2025, an extremely rare achievement
- Uses 16-channel VAE architecture for superior quality compared to standard 4-channel models
- Fully open source with 6,000+ GitHub stars and active development
What Is IC-Light V2 for FLUX?
IC-Light stands for Imposing Consistent Light. It's not just another image editing tool. This is a specialized AI model designed specifically to manipulate lighting in images while preserving all other details perfectly.
The original IC-Light worked with Stable Diffusion 1.5 and SDXL models. Version 2 expands support to FLUX, which brings significant improvements in image quality and resolution capabilities. Created by lllyasviel, the same developer behind ControlNet, IC-Light V2 represents latest research in conditional image generation.
The tool operates by separating the subject from its lighting environment. You can then impose new lighting conditions through text descriptions or by providing a background image. The model smoothly integrates your subject into the new lighting scenario without artifacts or inconsistencies.
What makes this particularly impressive is the architecture. While standard FLUX models use a 4-channel VAE, IC-Light V2 uses a custom 16-channel VAE. This expanded capacity allows the model to separately encode lighting information, giving you precise control over illumination without affecting other image characteristics.
The academic community has taken notice. At ICLR 2025, one of the most prestigious AI conferences, IC-Light V2 received perfect scores from all four reviewers. Getting 10/10/10/10 is exceptionally rare and indicates groundbreaking work that advances the entire field.
- Time savings: Relight existing images in seconds instead of regenerating hundreds of variations
- Precise control: Specify exact lighting conditions through text or visual references
- Consistency: Maintain subject details while completely changing illumination
- Professional results: FLUX integration delivers commercial-quality output at high resolutions
How Does IC-Light V2 Work?
Understanding the technical approach helps you get better results. IC-Light V2 uses a clever multi-stage process that separates lighting from content.
First, the model analyzes your input image to identify the subject and its current lighting conditions. It creates an internal representation that treats lighting as a separate layer from the actual content. Think of it like separating a photograph into the object layer and the lighting layer in Photoshop, except this happens automatically through neural networks.
The 16-channel VAE architecture is critical here. Standard image models encode visual information into 4 channels. IC-Light V2 uses 16 channels, dedicating extra capacity specifically to lighting information. This allows the model to understand and manipulate subtle lighting nuances that would be impossible with standard architectures.
When you provide new lighting conditions (either through text or a background image), the model replaces the lighting layer while preserving the content layer. The FLUX diffusion process then renders the final image, ensuring smooth integration between the preserved subject and the new lighting environment.
The model handles complex scenarios remarkably well. Subsurface scattering in skin tones, specular highlights on reflective surfaces, cast shadows with proper perspective. These details require sophisticated understanding of how light interacts with materials, and IC-Light V2 captures them convincingly.
For text-conditioned relighting, the model uses FLUX's powerful text encoder to interpret lighting descriptions. You can specify direction like "light from above" or mood like "dramatic side lighting" or even specific scenarios like "golden hour sunlight through window." The model translates these descriptions into actual lighting transformations.
Background-conditioned relighting works differently. You provide a target background image, and IC-Light V2 analyzes the lighting in that scene. It then adjusts your subject to match that lighting environment. This is incredibly useful for compositing subjects into new scenes while maintaining photorealistic lighting consistency.
Why Should You Use IC-Light V2 Instead of Other Relighting Methods?
The AI image generation space has several relighting approaches. Understanding how IC-Light V2 compares helps you choose the right tool for your projects.
Traditional Image Editing Limitations
Standard photo editing software like Photoshop offers adjustment layers, curves, and selective color grading. These tools can adjust overall brightness and color temperature, but they don't actually change lighting direction or create realistic shadows and highlights. You're manipulating the existing lighting rather than replacing it.
Professional compositing requires manual masking, painting shadows, adjusting highlights, and color matching. This works for static images but takes significant time and skill. Even expert compositors struggle with complex materials like skin tones where lighting affects subsurface scattering.
ControlNet Relighting Approaches
ControlNet itself offers lighting control through normal maps and depth maps. You can guide generation based on 3D surface information. This works well during initial generation but struggles with relighting existing images. You need to regenerate the entire image, which means you lose the exact details you wanted to preserve.
The process also requires creating accurate depth and normal maps from your source image. These preprocessing steps add complexity and potential error sources. If your depth map is slightly inaccurate, the lighting won't look natural.
Why IC-Light V2 Excels
IC-Light V2 was purpose-built for relighting as its primary function. The 16-channel VAE architecture specifically encodes lighting information separately from content. This architectural advantage means cleaner separation and more convincing results.
The FLUX integration brings native high-resolution support. Earlier IC-Light versions worked at lower resolutions typical of SD 1.5 and SDXL. With FLUX, you can relight images at much higher resolutions while maintaining quality. This matters for professional applications where print quality or large displays are required.
Processing speed is surprisingly fast. Text-conditioned relighting typically takes 30-60 seconds on a modern GPU. Background-conditioned relighting runs slightly longer at 60-90 seconds. Compare this to manually compositing lighting in Photoshop, which could take hours for complex scenes.
The model handles edge cases well. Transparent objects, complex hair with fine strands, reflective surfaces, mixed materials. These scenarios often break simpler relighting approaches, but IC-Light V2's training on diverse data helps it generalize effectively.
Platforms like Apatero.com offer instant access to IC-Light V2 without local setup or hardware requirements. You can test relighting approaches quickly, iterate on different lighting conditions, and download final results without managing GPU resources or ComfyUI configurations.
- You need to change more than just lighting (use img2img or inpainting instead)
- Source image has extreme distortion or artifacts that lighting changes would emphasize
- You require physically accurate ray-traced lighting (use 3D rendering software)
- Working with non-photographic styles where realistic lighting is inappropriate
How Do You Set Up IC-Light V2 for FLUX in ComfyUI?
Running IC-Light V2 locally requires specific model files and a properly configured ComfyUI workflow. Here's the complete setup process.
Prerequisites and System Requirements
You need a GPU with at least 12GB VRAM for comfortable operation at standard resolutions. 16GB or more is recommended for higher resolutions or batch processing. The model files are approximately 8GB, so ensure you have adequate storage space.
Install the latest version of ComfyUI if you haven't already. IC-Light V2 requires recent nodes that may not be present in older ComfyUI installations. Update your custom nodes, particularly any FLUX-related nodes and VAE handlers.
Downloading Model Files
Visit the official GitHub repository at https://github.com/lllyasviel/IC-Light to access model downloads. You'll need two primary files for FLUX operation.
The IC-Light V2 FLUX model file should be placed in your ComfyUI models folder under the checkpoints directory. The 16-channel VAE goes into the VAE folder. Pay attention to file naming conventions as ComfyUI nodes will look for specific filenames.
The repository provides two variants. The text-conditioned model handles relighting based on text prompts describing lighting conditions. The background-conditioned model accepts a background image and matches your subject's lighting to that environment. Download both if you want flexibility, or just the variant you plan to use most.
Building the ComfyUI Workflow
Start with a Load Image node to bring in your subject image. This is the image you want to relight. Connect it to an IC-Light V2 preprocessor node that extracts the subject and prepares it for relighting.
Add a FLUX model loader node and point it to your IC-Light V2 FLUX checkpoint file. Make sure you're loading the custom VAE as well, not the standard FLUX VAE. The 16-channel architecture won't work with the standard 4-channel VAE.
For text-conditioned relighting, add a CLIP text encode node where you describe the desired lighting. Use clear, descriptive language like "soft diffused light from camera left" or "dramatic rim lighting from behind subject" or "bright even studio lighting." The more specific your description, the better the results.
For background-conditioned relighting, add a second Load Image node for your target background. Connect this to the background conditioning input of the IC-Light V2 node. The model will analyze lighting in this background and apply it to your subject.
Connect the conditioning and subject inputs to an IC-Light V2 sampler node. Configure sampler settings similar to standard FLUX generation. Start with 20-30 steps at a CFG scale of 3-5. The model is well-trained and doesn't require extreme step counts.
Add a VAE decode node using the 16-channel VAE to convert the latent output back to a viewable image. Finally, connect to a Save Image node to export your result.
Testing Your Setup
Run a simple test with clear lighting instructions. Try "bright sunlight from the right side" with a neutral portrait. If the setup is correct, you should see obvious directional lighting changes while the subject's features remain unchanged.
If you get errors about mismatched VAE channels, double-check you're using the 16-channel IC-Light VAE, not the standard FLUX VAE. If results look blurry or artifacts appear, verify you downloaded the correct model version and that your VRAM is sufficient.
Consider that Apatero.com provides these workflows pre-configured and ready to use. No model downloads, no node configuration, no troubleshooting missing dependencies. This is particularly valuable if you're experimenting with IC-Light V2 before committing to a local setup.
Text-Conditioned Relighting Techniques
Text-conditioned relighting is the more flexible approach. You describe lighting conditions in natural language, and the model interprets your description to transform the image.
Effective Lighting Descriptions
Be specific about direction. Instead of "good lighting," try "soft light from camera right at 45 degrees." The model understands directional terms like above, below, left, right, front, back, and combinations like "upper left" or "from behind and slightly above."
Describe light quality. Terms like soft, diffused, harsh, dramatic, subtle, bright, and dim all influence the result. "Soft diffused window light" produces very different results than "harsh direct spotlight."
Include environmental context when relevant. "Golden hour sunlight through trees" tells the model about color temperature, direction, and the dappled quality of filtered light. "Studio softbox lighting" implies even, professional illumination with specific shadow characteristics.
Time of day descriptions work well. "Early morning light," "noon sun," "sunset glow," and "twilight ambient light" each carry specific color and intensity implications that the model understands.
Common Lighting Scenarios
Free ComfyUI Workflows
Find free, open-source ComfyUI workflows for techniques in this article. Open source is strong.
For portrait photography looks, try "Rembrandt lighting" (light from 45 degrees above and to the side, creating a triangle of light on the shadowed cheek), "butterfly lighting" (light directly in front and above, creating a butterfly-shaped shadow under the nose), or "split lighting" (light from directly to the side, illuminating exactly half the face).
For dramatic effect, use "rim lighting from behind," which creates a bright outline around your subject, or "underlit from below," which creates an eerie or dramatic mood often used in horror contexts.
For natural outdoor looks, specify "overcast sky lighting" for soft shadowless illumination, "direct midday sun" for harsh shadows and bright highlights, or "open shade" for the soft directional light you get when your subject is in shadow but illuminated by bright sky.
For commercial or product photography aesthetics, try "three-point studio lighting" or "clamshell lighting setup." While these are complex multi-light arrangements, the model has learned their characteristic appearance from training data.
Iterating for Perfect Results
Start with broad descriptions and refine based on results. If "sunlight" gives too harsh a result, try "filtered sunlight" or "soft sunlight through clouds." If direction isn't quite right, add more specific positional terms.
Combine multiple descriptors for nuanced control. "Soft golden hour light from the left with subtle fill from the right" tells the model about main light direction, quality, color, and the presence of secondary illumination.
Pay attention to how the model interprets color temperature. "Warm light" skews orange and yellow, "cool light" skews blue and white, "neutral light" maintains natural colors. You can specify actual temperatures like "5500K daylight" if you want technical precision.
Advanced Text Conditioning
Layer multiple lighting conditions by running the output through IC-Light V2 again with different prompts. First pass adds main key lighting, second pass adds fill or rim lights. This sequential approach gives you control similar to multi-light studio setups.
Negative prompts work in text-conditioned mode. If you're getting unwanted shadows, try negative prompting "harsh shadows" or "dark areas." If colors are too saturated, negative prompt "oversaturated" or "vivid colors."
Experiment with mood descriptors. "Cinematic lighting," "film noir aesthetic," "horror movie lighting," or "fashion photography lighting" each carry stylistic implications beyond just technical light placement. The model has learned these aesthetic associations during training.
Background-Conditioned Relighting for Perfect Composites
Background-conditioned relighting shines when you need to place subjects into existing scenes. Instead of describing lighting, you show the model exactly what lighting environment you want.
Choosing Effective Background Images
Your background image should have clear, obvious lighting. Well-lit scenes with visible shadows and highlights give the model strong signals about light direction and quality. Avoid backgrounds with flat, ambiguous lighting as the model won't have clear guidance.
The background doesn't need to be photographically similar to your subject. You can place a portrait into an architectural scene, an outdoor landscape, or an abstract environment. What matters is that the lighting is clear and appropriate for your creative vision.
Higher resolution backgrounds generally work better. The model analyzes lighting characteristics across the image, and more detail provides more information. At minimum, use backgrounds similar in resolution to your subject image.
Lighting Analysis and Matching
IC-Light V2 automatically analyzes several characteristics of your background lighting. Direction is determined by shadow angles and highlight placement. Intensity comes from overall brightness and contrast ratios. Color temperature is extracted from the dominant color cast.
The model also considers environmental lighting properties. Outdoor scenes typically have a dominant sun direction plus sky fill. Indoor scenes might have multiple light sources with different temperatures. The model attempts to capture this complexity and apply it to your subject.
Pay attention to physically plausible combinations. If your background shows strong sunlight from the right, but your subject is clearly indoors under fluorescent lights, the transition will look jarring. Choose backgrounds whose lighting could realistically illuminate your subject.
Integration and Compositing
After relighting, you typically need to composite your subject into the background. Some ComfyUI workflows automate this with masking nodes. The IC-Light V2 preprocessor can output an alpha matte of your subject, which you can use to easily blend the relit subject over the background.
Want to skip the complexity? Apatero gives you professional AI results instantly with no technical setup required.
Edge blending is crucial for realistic composites. Even perfectly matched lighting will look wrong if the cutout edges are too sharp. Slight feathering or edge blur makes the integration more natural. Experiment with 2-5 pixel feather amounts.
Consider color grading the final composite to unify the image. Even with accurate relighting, slight differences in color response between subject and background can reveal the composite nature. Subtle overall color adjustments help sell the illusion.
Multi-Subject Scenes
You can relight multiple subjects separately and composite them into the same background. This is useful for creating group scenes where you photographed or generated each person individually. Relight each subject with the same background image to ensure consistent lighting across all figures.
The workflow would be to load each subject, run IC-Light V2 with the same background for each, then composite all relit subjects into the final scene. This maintains perfect lighting consistency that would be nearly impossible to match manually.
Platforms like Apatero.com simplify this multi-subject workflow with batch processing options. Upload multiple subjects, apply the same background-conditioned relighting to all, and export a folder of consistently lit results ready for final compositing.
What's the Difference Between IC-Light V2 and ControlNet?
Both tools come from the same developer and both offer conditional control over image generation. Understanding their differences helps you choose the right approach.
Fundamental Purpose
ControlNet was designed as a general-purpose conditioning system for Stable Diffusion. It allows you to guide generation based on structural information like edges, depth, poses, and yes, even lighting through normal maps. It's a flexible framework that supports many different control types.
IC-Light V2 is purpose-built specifically for relighting. Its entire architecture focuses on separating lighting from content and manipulating illumination while preserving everything else. This specialized design makes it far more effective for relighting tasks.
Architectural Differences
ControlNet adds conditioning inputs to an existing diffusion model. It trains an auxiliary network that processes your control image (like a depth map or edge map) and injects that information into the main generation process at multiple layers.
IC-Light V2 uses a custom 16-channel VAE that fundamentally changes how the model encodes images. This isn't a plugin or addition to standard FLUX. It's a specialized variant trained specifically for lighting manipulation tasks.
When to Use Each Tool
Use ControlNet when you're generating new images and want to control composition, pose, depth, or style. It's perfect for creating variations of an image while maintaining structural elements. If you want to generate a portrait with a specific pose or generate a scene with a specific depth layout, ControlNet excels.
Use IC-Light V2 when you have an existing image with the exact content you want, but the lighting is wrong. It's purpose-built for relighting without regeneration. You preserve all the details of your original image while completely changing illumination.
Can You Use Both Together?
Advanced workflows can combine them. Generate an initial image using ControlNet to control pose and composition, then use IC-Light V2 to perfect the lighting. This sequential approach gives you control over multiple aspects of your final image.
You could also use IC-Light V2 first to establish lighting, then use ControlNet's lineart or depth modes to generate variations that maintain that lighting. The combination possibilities expand your creative options significantly.
Complexity and Learning Curve
ControlNet requires understanding multiple conditioning types, preprocessing steps, and appropriate strength settings. Different control types work better for different tasks. There's a learning curve to knowing which ControlNet mode to use and how to create effective conditioning images.
IC-Light V2 is more straightforward. You have two modes: describe lighting with text, or show lighting with a background image. The model does the heavy lifting of understanding and applying lighting. The conceptual overhead is lower.
Real-World Applications and Use Cases
IC-Light V2 solves practical problems across multiple creative fields. Understanding common applications helps you identify opportunities in your own projects.
Earn Up To $1,250+/Month Creating Content
Join our exclusive creator affiliate program. Get paid per viral video based on performance. Create content in your style with full creative freedom.
Portrait and Fashion Photography
Photographers often shoot with available light that isn't ideal. You might capture the perfect expression, but the lighting is flat or unflattering. IC-Light V2 lets you retroactively improve lighting without reshooting.
Fashion ecommerce teams can shoot products with consistent lighting by relighting catalog photos to match. If you shot items at different times or locations, background-conditioned relighting ensures every product appears under identical illumination.
Headshot photographers can offer clients multiple lighting options from a single shoot. Capture one well-exposed portrait, then deliver variations with different lighting moods. Corporate, creative, dramatic, soft, clients get options without additional studio time.
Product Visualization and Ecommerce
Product photos need consistent lighting across entire catalogs. If you're shooting hundreds of items, maintaining perfectly consistent studio lighting is challenging. Relight all products with the same background image to ensure uniformity.
Seasonal campaigns can repurpose existing product photos with different lighting moods. Summer campaign uses bright, warm lighting. Holiday campaign uses cooler, more dramatic lighting. Same product photos, different atmospheres through relighting.
3D rendered products can be integrated into photographed environments with matching lighting. Render your product with neutral lighting, then use IC-Light V2 with the target environment as background. The product will appear lit by the same sources as the real scene.
Character Design and Concept Art
Character artists can establish consistent lighting across multiple poses. Design a character in one lighting condition, then relight variations to match. This ensures lighting continuity in character sheets and turnarounds.
Concept artists can quickly explore how designs look under different environmental lighting. How does this character design work in bright outdoor settings versus dark indoor environments? Relight the same design to test readability and mood.
Comic and manga artists working digitally can establish consistent lighting for characters across multiple panels. Draw your character once with good lighting, then relight copies as needed for different scenes. This maintains visual consistency while reducing repetitive lighting work.
Film and Video Production
VFX teams can match CG elements to live-action plates by using the plate as background conditioning. The CG element will receive lighting that matches the filmed environment, improving integration and reducing manual lighting matching work.
Previsualization artists can relight storyboard frames to test different lighting scenarios before actual production. Shoot rough reference with actors, then try different lighting approaches through IC-Light V2. This helps directors and cinematographers plan actual lighting setups.
Archival footage restoration can improve lighting on historical photos and film frames. Old photographs with poor lighting can be enhanced while maintaining historical accuracy. Relight to improve visibility without changing the actual content.
Consider that Apatero.com offers instant access to these workflows without requiring extensive VFX knowledge or expensive software licenses. Creative teams can experiment with lighting approaches quickly and iterate based on director or client feedback.
Advanced Tips and Optimization Strategies
Getting great results requires understanding the nuances of how IC-Light V2 responds to different inputs and settings.
Subject Preparation
Clean, well-separated subjects relight more convincingly. If your subject has complex transparency or fine details like hair, ensure those are cleanly captured in the alpha matte. The preprocessor does automatic subject extraction, but providing a clean input improves results.
Avoid subjects with extreme motion blur or heavy compression artifacts. The model will preserve these flaws while changing lighting, which often makes artifacts more visible. Start with the highest quality source images available.
Resolution matters for fine details. Higher resolution inputs preserve more detail during the relighting process. If you're working with lower resolution images, consider upscaling them before relighting, then downscaling the final result if needed.
Lighting Prompt Optimization
More specific prompts generally work better than vague descriptions. Compare "nice lighting" (vague) with "soft window light from upper left, subtle fill from right" (specific). The model has more clear direction with specific prompts.
Reference real-world lighting scenarios the model likely encountered during training. Photography lighting patterns like Rembrandt, butterfly, and split lighting are well-represented in training data. Environmental descriptions like golden hour or overcast also connect to common training examples.
Test prompt variations systematically. If your first prompt doesn't quite work, change one element at a time. First try adjusting direction, then quality, then color. This methodical approach helps you understand which prompt elements influence which aspects of the result.
Sampler Settings and Generation Parameters
Start with 20-25 steps for most relighting tasks. IC-Light V2 is well-trained and converges quickly. More steps provide diminishing returns and primarily increase generation time.
CFG scale between 3 and 5 works well for most cases. Lower values give the model more freedom to interpret lighting naturally. Higher values force stronger adherence to your text prompt but may produce less natural results.
The seed value affects subtle variations in how lighting is applied. If you're getting results that are almost right but not quite, try different seeds. The core lighting direction and quality will remain similar, but subtle details will vary.
Workflow Efficiency
Create template workflows for common relighting tasks. Text-conditioned portrait relighting, background-conditioned product compositing, batch processing multiple subjects. Save these as presets in ComfyUI for quick access.
Batch process similar images together. If you're relighting 20 portraits with the same lighting description, set up a batch workflow that processes all images sequentially. This is far more efficient than manually running each one individually.
Use lower resolution for testing and iteration. Generate at 512x512 or 768x768 to quickly test different lighting prompts and settings. Once you've dialed in the perfect approach, run your final generation at full resolution. This dramatically speeds up the creative iteration process.
Troubleshooting Common Issues
If lighting changes are too subtle, increase CFG scale slightly or make your text prompt more specific and emphatic. Add words like "strong," "dramatic," or "bright" to push the effect further.
If lighting changes are too extreme or look unnatural, decrease CFG scale and use more measured prompt language. Instead of "dramatic intense lighting," try "moderately strong directional light."
If colors look wrong after relighting, this often indicates a mismatch between the subject's original color temperature and the new lighting's color temperature. You can address this with post-processing color grading, or by specifically mentioning color temperature in your lighting prompt.
If shadows appear in wrong locations or look physically implausible, your text prompt might have conflicting directional information. Simplify to a single clear light direction first, then add complexity gradually.
Frequently Asked Questions
Is IC-Light V2 better than the original IC-Light?
Yes, for several reasons. IC-Light V2 adds FLUX support, which brings significantly better image quality and native high-resolution capabilities compared to SD 1.5 and SDXL. The 16-channel VAE architecture in V2 provides better separation of lighting information from content, resulting in more convincing relighting with fewer artifacts. The original IC-Light remains useful for those working exclusively with older Stable Diffusion models, but V2 represents a substantial improvement in both quality and flexibility.
Can IC-Light V2 work with any image or only AI-generated ones?
IC-Light V2 works with any image, whether AI-generated or photographed. The model doesn't care about the source. However, it works best with clear subjects that can be easily separated from their backgrounds. Complex scenes with multiple subjects or ambiguous figure-ground relationships may produce less convincing results. Portrait photos, product shots, and clear subject photography relight most successfully.
How much VRAM do I need to run IC-Light V2 locally?
You need at least 12GB VRAM for standard resolution relighting, with 16GB or more recommended for higher resolutions or batch processing. The 16-channel VAE uses more memory than standard 4-channel models, and FLUX models are generally larger than earlier Stable Diffusion versions. If you have 8GB or less, consider using Apatero.com instead, which provides cloud-based access without local hardware requirements.
Can I relight only part of an image instead of the entire subject?
The standard IC-Light V2 workflow relights the entire extracted subject. For selective relighting of specific regions, you would need to mask the areas you want to change and only process those regions through IC-Light V2. Advanced ComfyUI workflows can accomplish this with masking nodes, or you can manually composite partially relit elements in image editing software. This requires more complex setup but provides fine-grained control.
Does IC-Light V2 understand complex lighting setups like three-point lighting?
Yes, IC-Light V2 recognizes standard photography lighting terminology including three-point, Rembrandt, butterfly, split, and other named lighting patterns. The model learned these patterns from its training data, which included many professionally lit photographs. However, results may vary based on your subject and how clearly you describe the setup. Start with named patterns and add specific adjustments as needed.
Why do some relit images look artificial or have weird shadows?
Artificial appearance usually stems from physically implausible lighting combinations or the model misinterpreting ambiguous prompts. Ensure your lighting description matches what could actually exist in reality. Check that shadow directions align with your described light source. If using background-conditioned mode, verify the background lighting is clear and unambiguous. Sometimes reducing CFG scale helps the model produce more natural results by giving it more interpretive freedom.
Can I use IC-Light V2 commercially or is it research-only?
Check the specific license on the GitHub repository at https://github.com/lllyasviel/IC-Light as licensing terms can change. Generally, lllyasviel's projects have been open source and permissive, but always verify current terms before commercial use. If you're using IC-Light V2 through Apatero.com, commercial usage rights are covered under Apatero's terms of service, simplifying licensing concerns.
How does IC-Light V2 compare to using img2img for relighting?
Img2img regenerates the entire image based on your prompt, which means you lose fine details and exact features from your source image. IC-Light V2 preserves the exact subject while only changing lighting. If you have a specific image you want to keep but with different lighting, IC-Light V2 is far superior. If you're open to variations and regeneration, img2img offers more flexibility for changing other aspects beyond lighting.
What file formats does IC-Light V2 support?
In ComfyUI workflows, IC-Light V2 works with standard image formats including PNG, JPG, and WebP. PNG is recommended for subjects with transparency or when you need alpha channels. The model outputs at the same resolution as your input unless you configure upscaling nodes in your workflow. Most implementations automatically handle format conversion, so you rarely need to worry about compatibility.
Can I relight videos with IC-Light V2?
Video relighting requires processing each frame through IC-Light V2 and then reassembling the sequence. This is computationally expensive and time-consuming. Frame-to-frame consistency can be challenging as subtle variations in relighting might create flickering. Specialized video workflows with temporal consistency mechanisms exist but are complex to set up. For short clips or specific frames, it's feasible. For longer content, consider dedicated video relighting tools or accept the consistency limitations.
Conclusion
IC-Light V2 for FLUX represents a significant advancement in AI-powered image relighting. The combination of lllyasviel's expertise (proven with ControlNet), the specialized 16-channel VAE architecture, and FLUX's high-quality generation capabilities creates a tool that delivers professional results with minimal complexity.
Text-conditioned relighting gives you the flexibility to describe lighting scenarios naturally. Background-conditioned relighting ensures perfect integration when compositing subjects into existing scenes. Both approaches preserve your subject's exact details while directly changing illumination, solving a problem that previously required regeneration, professional compositing skills, or expensive reshoots.
The perfect 10/10/10/10 ICLR 2025 scores validate the technical innovation behind IC-Light V2. This isn't just a useful tool. It's pushing the boundaries of what's possible in conditional image generation.
For creators who want to experiment with IC-Light V2 without local setup, Apatero.com offers instant access with pre-configured workflows, no hardware requirements, and commercial usage rights. Whether you're a photographer perfecting portraits, an ecommerce team maintaining catalog consistency, or a concept artist exploring lighting scenarios, IC-Light V2 delivers the control you need with the quality your projects demand.
The future of image editing increasingly involves AI models trained for specific tasks rather than general-purpose tools requiring manual work. IC-Light V2 demonstrates this specialization approach at its best. Perfect lighting is no longer about having the right equipment or skills at capture time. It's about having the right tools and knowledge to impose the lighting you need after the fact.
Ready to Create Your AI Influencer?
Join 115 students mastering ComfyUI and AI influencer marketing in our complete 51-lesson course.
Related Articles

10 Best AI Influencer Generator Tools Compared (2025)
Comprehensive comparison of the top AI influencer generator tools in 2025. Features, pricing, quality, and best use cases for each platform reviewed.

5 Proven AI Influencer Niches That Actually Make Money in 2025
Discover the most profitable niches for AI influencers in 2025. Real data on monetization potential, audience engagement, and growth strategies for virtual content creators.

AI Action Figure Generator: How to Create Your Own Viral Toy Box Portrait in 2026
Complete guide to the AI action figure generator trend. Learn how to turn yourself into a collectible figure in blister pack packaging using ChatGPT, Flux, and more.