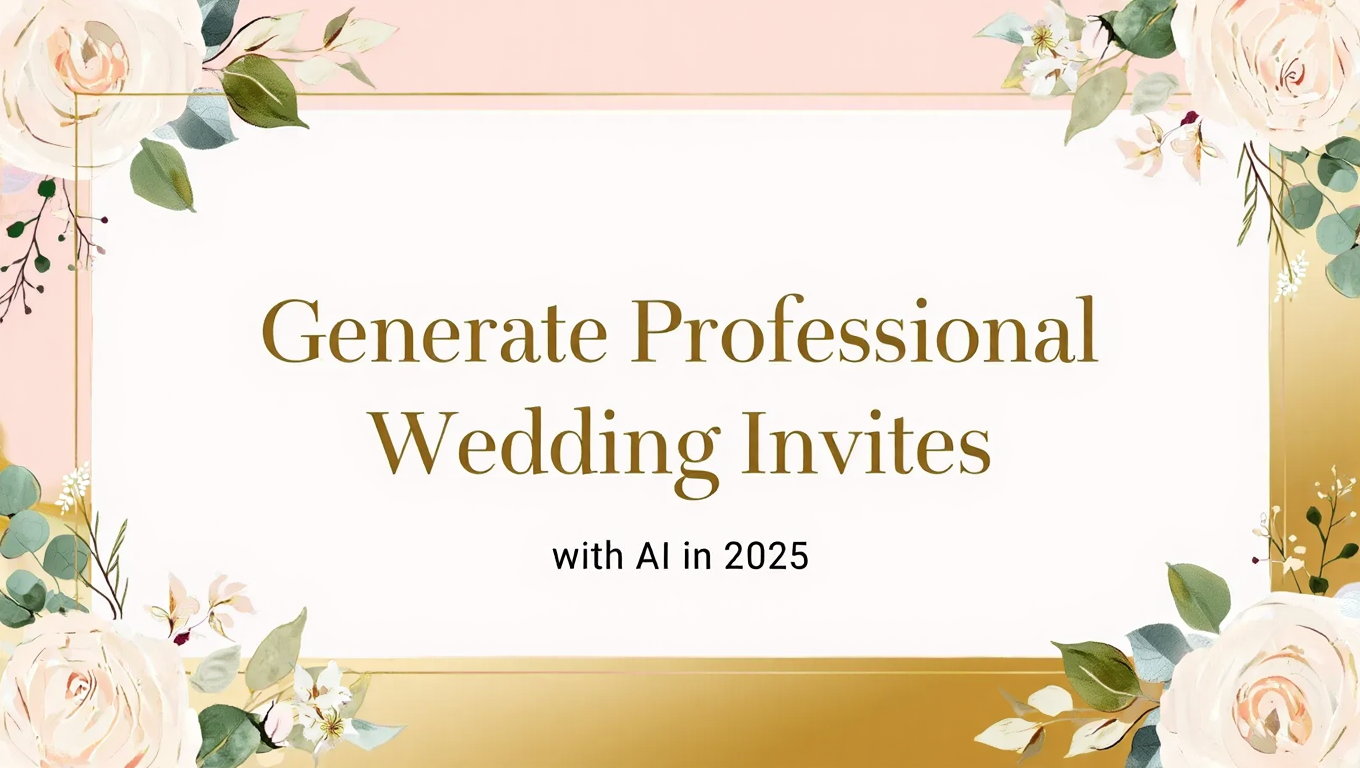
Generate Professional Wedding Invites with AI in 2025
Complete guide to creating wedding invitations using AI tools. Learn style options, customization techniques, text handling, print-ready outputs,...
Make AI images and video in your browser
Characters, video, photo packs. No GPU, no setup. Your first generation is free.
My sister got quoted $1,800 for custom wedding invitations last year. Eighteen hundred dollars. For some paper with flowers on it. The designer wanted 3 weeks for the first draft, another 2 weeks for revisions, and made it very clear that "significant changes" would cost extra.
She showed me the style examples they sent... generic floral borders that looked like they came from a template anyway. I told her "give me a weekend, I'll try something." Used ComfyUI with a botanical LoRA, generated about 50 different designs in 4 hours, she picked her favorite, I added the text in Canva, sent it to a printer for $200 total.
The designer was not happy when she cancelled. But $1,600 saved plus actually getting exactly the aesthetic she wanted? Worth every hour I spent learning how to do print-ready AI outputs.
- AI excels at generating invitation backgrounds, borders, and decorative elements but struggles with readable text that requires post-processing
- ComfyUI workflows with ControlNet and regional prompting provide precise control over layout, while tools like Midjourney offer faster iteration for style exploration
- Print-ready outputs require 300 DPI resolution at final size (typically 5x7 inches = 2100x1500 pixels minimum), CMYK conversion, and proper bleed areas
- Hybrid approaches work best: generate artistic elements with AI, add text in traditional design software like Canva or Photoshop for reliability
- Platforms like Apatero.com provide optimized workflows for design generation with proper resolution and color management
Quick Answer: Generate professional wedding invitations with AI by creating decorative backgrounds and design elements using Stable Diffusion or Midjourney, then adding text and final layout in design software like Canva, Adobe Illustrator, or Photoshop. Use ComfyUI with ControlNet for precise layout control, generate at minimum 2100x1500 pixels for 5x7 inch prints at 300 DPI, and convert to CMYK color space before sending to print. This hybrid approach uses AI's artistic strengths while avoiding its text generation weaknesses, producing print-ready invitations in 2-4 hours instead of weeks.
Why Use AI for Wedding Invitation Design?
The wedding invitation market has remained remarkably traditional despite advances in digital design. Most couples choose between expensive custom design or cookie-cutter templates with minimal customization. AI creates a third option that combines custom artistry with accessibility.
The Cost-Time-Quality Triangle:
Traditional wedding stationery forces you to pick two of three: cheap, fast, or high quality. Custom designers provide quality but at high cost and slow timelines. Template services offer speed and affordability but sacrifice uniqueness. AI breaks this triangle by enabling custom, high-quality designs with minimal time and cost investment.
A professional custom wedding invitation design typically costs between 500 dollars and 2,000 dollars for the initial design, plus per-invitation printing costs. The design process takes 2-4 weeks with multiple revision rounds. AI-generated designs can achieve comparable aesthetic quality in a few hours of work with near-zero cost beyond your time and computing resources.
Creative Control and Iteration:
The biggest advantage isn't just cost savings. It's the ability to explore dozens or hundreds of design directions quickly. Traditional design requires committing to a direction early because revisions are expensive and time-consuming. With AI generation, you can try "elegant vintage botanical" on Monday, "modern minimalist geometric" on Tuesday, and "watercolor romantic florals" on Wednesday, finding what resonates before committing.
This iteration freedom means you're not settling for "good enough" or the designer's interpretation of your vague description. You can generate variations until something matches your exact vision.
Unique Artistic Styles:
AI-generated wedding invitations can achieve artistic styles that would be extremely expensive to produce traditionally. Detailed watercolor illustrations, detailed Art Nouveau borders, custom botanical drawings, or fantasy-inspired artwork all become equally accessible. The complexity doesn't increase cost or time with AI the way it does with traditional illustration.
Practical Limitations:
AI isn't a complete replacement for traditional design tools - it's a powerful new tool in the design toolkit. Current AI image generation has specific weaknesses you need to understand and work around:
Text generation remains unreliable. While models can sometimes generate readable text, it's inconsistent enough that you shouldn't depend on it for critical information like names, dates, and venue details. The hybrid approach of AI-generated artwork plus professionally-typeset text works best.
Fine control over specific elements can be challenging. If you need the bride's bouquet to contain exactly 7 roses and 3 lilies positioned precisely, traditional illustration might be easier than coaxing AI to match that specificity.
Color accuracy for printing requires additional steps. AI generates in RGB color space, but professional printing uses CMYK. This conversion can shift colors, requiring testing and adjustment.
Why This Matters Now:
2025 marks a turning point where AI image generation quality has crossed the threshold from "interesting experiment" to "professional tool." Models like SDXL, Flux, and Midjourney v6 produce results that don't immediately scream "AI-generated" the way earlier models did. Resolution capabilities now match or exceed print requirements.
For couples planning weddings, this means you can now realistically use AI as part of your design process without compromising on quality or professionalism. The key is understanding how to use it effectively, which tools work for which tasks, and how to prepare outputs for printing.
While platforms like Apatero.com simplify this process with pre-configured workflows optimized for print design, understanding the fundamentals helps you make informed choices regardless of which tools you use. For broader context on AI image generation capabilities, our complete guide to getting started with AI image generation covers the foundational concepts.
What Design Styles Work Best for AI-Generated Wedding Invitations?
Not all artistic styles translate equally well to AI generation for wedding invitations. Some styles play to AI's strengths while others highlight its weaknesses. Understanding which approaches work reliably helps you choose directions that will succeed.
Style Categories and AI Effectiveness:
| Style Category | AI Effectiveness | Strengths | Challenges | Best Tools |
|---|---|---|---|---|
| Botanical/Floral | Excellent | Natural variation, organic layouts | Specific flower species accuracy | SDXL, Flux, Midjourney |
| Watercolor | Excellent | Texture generation, color blending | Controlling specific shapes | SDXL with watercolor LoRAs |
| Art Nouveau/Vintage | Very Good | detailed patterns, decorative borders | Fine line consistency | Midjourney, SDXL |
| Minimalist/Geometric | Good | Clean compositions, simple elements | Precise geometric accuracy | Midjourney, vector conversion |
| Photographic | Fair | Realistic textures | Uncanny valley issues with people | SDXL, specialized checkpoints |
| Illustrated/Cartoon | Good | Stylized characters, whimsy | Specific character consistency | AnimateDiff for consistency |
| Luxury/Gold Foil | Very Good | Texture simulation, metallic effects | Actual metallic printing requires post | SDXL with material LoRAs |
Botanical and Floral Designs:
This is AI's strongest category for wedding invitations. Generating beautiful, detailed floral borders, wreaths, and botanical illustrations plays perfectly to Stable Diffusion's training data and capabilities.
Effective prompts:
- "elegant wedding invitation border, watercolor roses and eucalyptus, soft pink and sage green, delicate botanical illustration, white background"
- "Art Nouveau style floral frame for wedding invitation, lily of the valley and ivy, elegant curved organic lines, vintage botanical print"
- "romantic floral wreath, peonies and garden roses, loose watercolor style, wedding invitation decoration, pastel color palette"
These prompts work well because they describe overall aesthetic and composition rather than requiring precise control over individual elements. The organic, natural variation in botanical subjects means small AI inconsistencies feel like artistic variation rather than mistakes.
Watercolor Artistic Style:
Watercolor aesthetics are particularly forgiving of AI's occasional softness or blur because these are inherent characteristics of the medium. The slight imperfections in AI generation read as authentic watercolor technique rather than errors.
Optimization techniques:
- Use watercolor-trained LoRAs or models for authentic texture
- Include medium-specific terms: "wet-on-wet," "color bleed," "soft edges"
- Generate at high resolution to capture subtle color gradients
- Layer multiple generations with varying opacity for depth
For watercolor styles, consider using specialized models or our best prompts for architecture visualization techniques adapted for invitation design, which cover achieving specific aesthetic qualities through prompt engineering.
Vintage and Art Nouveau:
Historical artistic styles work exceptionally well because AI models have extensive training on classic artwork and posters from these periods. Art Nouveau's characteristic flowing lines, natural motifs, and decorative patterns generate reliably.
Key elements to include:
- Specific period references: "Art Nouveau," "Art Deco," "Victorian," "Edwardian"
- Material mentions: "letterpress texture," "engraved details," "embossed borders"
- Artist references: "Alphonse Mucha style," "William Morris influence"
- Typography era cues: "vintage typography," "classic serif," "ornate lettering"
These references tap into strong existing patterns in the training data, producing results that feel authentically period-appropriate.
Minimalist and Modern:
Clean, minimalist designs require AI to do less, which can work in your favor. However, achieving perfectly straight lines, exact spacing, or geometric precision can be challenging. This style works best when you're comfortable with slight imperfections or plan to refine in design software.
Effective approach:
- Generate decorative accent elements separately (botanical sprigs, geometric shapes)
- Create subtle textures or backgrounds
- Use AI for initial composition, refine geometry in Illustrator or Figma
- Focus on "organic minimalism" rather than technical precision
Luxury and Metallic Effects:
Simulating gold foil, rose gold accents, or metallic finishes is surprisingly effective in AI generation. While the actual print won't be metallic unless you use specialty printing, AI can create designs that look like they have metallic elements.
Prompt techniques:
- "gold foil effect," "rose gold accents," "metallic shimmer"
- "embossed appearance," "debossed texture," "raised lettering"
- "luxury wedding invitation," "premium design," "elegant gold details"
Post-processing can enhance these effects, or you can work with specialty printers who add real metallic foil to AI-generated designs.
Styles to Approach Carefully:
Photorealistic portraits or venues: Unless you're very skilled with LoRA training and have specific reference photos, avoid trying to generate photorealistic images of the couple or wedding venue. The uncanny valley effect and difficulty controlling specific likenesses make this more frustrating than valuable.
Text-heavy designs: Don't attempt to have AI generate the entire invitation including all text. Text generation remains the weakest aspect of current models. Generate decorative elements and add text separately.
Hyper-specific compositions: Designs that require precise placement of particular objects in exact positions fight against AI's probabilistic nature. Better to generate beautiful elements and compose them precisely in design software.
Culturally specific patterns: While AI can generate general "ethnic" or "cultural" patterns, authentic traditional designs from specific cultures may be poorly represented in training data. Combine AI generation with authentic reference materials to ensure cultural appropriateness.
For more on achieving specific visual styles with AI, our guides on regional prompting and mask-based composition show how to control exactly where specific elements appear in your generated images.
Platforms like Apatero.com offer style presets optimized for common wedding invitation aesthetics, letting you explore these approaches without manual prompt engineering, but understanding what works helps you choose and refine directions effectively.
How Do You Handle Text in AI-Generated Wedding Invitations?
Text handling is the single biggest challenge in using AI for wedding invitations. Names, dates, and venue information must be perfectly accurate and clearly readable - there's zero tolerance for the garbled text or misspellings that AI models frequently produce.
The Current State of AI Text Generation:
Modern image generation models (SDXL, Flux, Midjourney) have improved text capabilities compared to earlier versions, but "improved" doesn't mean "reliable enough for wedding invitations." You might get correct text 30-50% of the time, with varying degrees of wrongness the rest of the time.
The problem stems from how these models work. They learned associations between letter shapes and meaning but don't truly "understand" text the way language models do. They're generating pixels that look like letters, not composing actual words with spelling rules.
The Hybrid Approach (Recommended):
The most reliable method for wedding invitations is the hybrid approach:
- Generate decorative backgrounds, borders, and artistic elements with AI
- Add all text, names, dates, and information in traditional design software
- Combine for final print-ready output
This uses AI's artistic strengths while avoiding its weaknesses entirely.
Implementation Workflow:
Step 1: Generate Background/Decorative Elements Use AI to create the invitation background, floral borders, decorative frames, or artistic elements. Generate these without any text, or with placeholder text blocks that you'll replace.
Example prompt: "elegant floral border frame for wedding invitation, watercolor roses and eucalyptus, sage green and dusty pink, white center space for text, botanical illustration style"
Step 2: Upscale to Print Resolution Ensure your AI-generated artwork is at least 2100x1500 pixels for a standard 5x7 inch invitation at 300 DPI. Use AI upscaling models if needed. Our AI image upscaling comparison guide covers the best upscaling approaches.
Step 3: Import to Design Software Bring your AI-generated background into:
- Canva (easiest, web-based, templates available)
- Adobe Photoshop (professional raster editing)
- Adobe Illustrator (vector text, precise control)
- Affinity Designer (affordable alternative to Adobe)
Step 4: Add Text Professionally Use professional typography for all invitation text:
- Names of couple
- Date and time
- Venue address
- RSVP information
- Additional details
Choose fonts that complement your AI-generated artwork. Elegant script fonts pair well with floral designs, modern sans-serifs work with minimalist backgrounds, vintage serif fonts match Art Nouveau borders.
Step 5: Final Composition and Refinement Adjust text placement, sizing, and color to integrate perfectly with the AI-generated background. Add any additional decorative elements, ensure proper spacing, and verify all information is correct.
Text Color and Readability:
| Background Style | Recommended Text Color | Contrast Strategy | Readability Enhancement |
|---|---|---|---|
| Light/White background | Dark gray, navy, black | High contrast | Clean, classic |
| Dark background | White, cream, light gray | High contrast | Elegant drama |
| Busy floral | White with dark outline | Maximum visibility | Text stands out |
| Watercolor | Complement dominant color | Medium-high contrast | Integrated aesthetic |
| Metallic effect | Dark on light gold, white on dark | Varies by design | Luxury feel |
Alternative: ControlNet Text Guidance
For more adventurous users with ComfyUI, you can use ControlNet to guide text placement while still adding final text in design software:
- Create a rough layout in design software with text placement
- Use this as ControlNet input to guide AI generation around text areas
- Generate artwork that respects text positioning
- Replace placeholder text with final professional typography
This approach combines AI flexibility with layout control, though it requires more technical setup.
When AI Text Might Work:
Free ComfyUI Workflows
Find free, open-source ComfyUI workflows for techniques in this article. Open source is strong.
There are limited scenarios where AI-generated text can be acceptable:
Decorative non-critical text: If you want "Love," "Joy," or similar single decorative words as design elements rather than information, AI can sometimes generate these acceptably. Review carefully and regenerate if needed.
Stylized headers: Large decorative titles like "Wedding Invitation" or "Save the Date" might work if you're comfortable regenerating until you get correct spelling. Still riskier than adding text in design software.
Background texture text: Very faint, blurred text in the background as texture rather than readable information can work since accuracy doesn't matter.
Font Pairing Strategies:
When adding text to AI-generated backgrounds, font selection significantly impacts the final result:
For floral/botanical designs:
- Primary text: Elegant script (Great Vibes, Allura, Dancing Script)
- Details: Clean serif (Garamond, Crimson Text, Libre Baskerville)
For minimalist/modern:
- Primary text: Thin modern serif (Playfair Display, Cormorant)
- Details: Geometric sans-serif (Montserrat, Raleway, Futura)
For vintage/Art Nouveau:
- Primary text: Period-appropriate serif (Bodoni, Didot, Trajan)
- Details: Decorative Art Nouveau fonts (Goudy, Caslon)
Color Management for Text:
Text color should complement the AI-generated background while maintaining readability:
- Sample colors from the AI-generated artwork
- Use darker or lighter versions of sampled colors for text
- Ensure minimum 4.5:1 contrast ratio for readability
- Test printed samples - screen colors differ from print
Print Testing Before Bulk Orders:
Before printing 100 invitations, order 1-2 test prints:
- Verify text is clearly readable at final size
- Check that AI-generated artwork prints cleanly
- Confirm colors match expectations
- Test paper stock and printing method
This small investment prevents expensive mistakes on bulk orders.
For users who want more control over the integration of AI elements and text, platforms like Apatero.com offer guided workflows that generate print-ready artwork optimized for text overlay, though the hybrid approach of adding text in design software remains the most reliable method regardless of generation platform.
What Are the Technical Requirements for Print-Ready Wedding Invitations?
Generating beautiful designs is only half the challenge. Converting AI-generated artwork into professional print-ready files requires understanding resolution, color space, file formats, and printing specifications.
Resolution Requirements:
Print quality demands much higher resolution than screens display. The standard for professional printing is 300 DPI (dots per inch) at final size.
Standard wedding invitation sizes and pixel requirements:
| Invitation Size | Dimensions (inches) | Pixels at 300 DPI | Aspect Ratio | Common Use |
|---|---|---|---|---|
| A7 | 5 x 7 | 1500 x 2100 | 5:7 | Most common |
| A6 | 4.5 x 6.25 | 1350 x 1875 | 18:25 | Smaller budget option |
| Square | 5.5 x 5.5 | 1650 x 1650 | 1:1 | Modern aesthetic |
| A9 | 3.5 x 5.5 | 1050 x 1650 | 7:11 | RSVP cards |
| DL | 4 x 9 | 1200 x 2700 | 4:9 | Slim/modern |
Generating at Correct Resolution:
Most AI image generators default to 512x512, 768x768, or 1024x1024 - far below print requirements. You need to either generate at higher resolutions directly or upscale after generation.
Option 1: Direct High-Resolution Generation
- SDXL can generate up to 1024x1024 natively, 2048x2048 with tiling
- Flux handles higher resolutions more reliably than SD 1.5
- Requires significantly more VRAM (16GB+ for 2048x2048)
- Longer generation times (2-5 minutes instead of 30 seconds)
Option 2: Generate + Upscale
- Generate at 1024x1024 for best quality/speed balance
- Upscale to print resolution using AI upscaling models
- Recommended upscalers: RealESRGAN, SwinIR, ESRGAN 4x
- Better results than generating at high resolution directly (often)
For detailed upscaling strategies, refer to our AI upscaling comparison guide which tests different models for print quality.
Color Space Conversion:
AI generates images in RGB color space (Red, Green, Blue) used for screens. Professional printing uses CMYK color space (Cyan, Magenta, Yellow, Black). This conversion is critical and can significantly shift colors.
RGB to CMYK Conversion Process:
- In Photoshop: Image > Mode > CMYK Color
- In Illustrator: Edit > Edit Colors > Convert to CMYK
- Online tools: Various websites offer RGB to CMYK conversion
Color Shift Expectations:
| Color Type | RGB Appearance | CMYK Shift | Mitigation Strategy |
|---|---|---|---|
| Bright cyan/blue | bold, saturated | Dulls significantly | Expect shift, test print |
| Pure red | Bright, vivid | Shifts toward orange | Adjust in CMYK mode |
| bold green | Neon-like | Becomes muted | Use darker greens |
| Purple/violet | Rich, deep | Can shift to brown | Test critical colors |
| Pastels | Soft, subtle | Usually stable | Minimal adjustment |
Testing Strategy:
Generate in RGB, convert to CMYK in design software, and compare. If critical colors shift unacceptably, regenerate with adjusted prompts to compensate. For example, if your sage green becomes muddy brown in CMYK, prompt for "slightly brighter sage green" to account for the shift.
Want to skip the complexity? Apatero gives you professional AI results instantly with no technical setup required.
File Format Requirements:
Different printers accept different file formats. Confirm requirements before final export:
PDF (Most Universal):
- PDF/X-1a or PDF/X-4 for professional printing
- Embeds fonts, preserves colors
- Most printers accept PDFs
- Best overall choice
TIFF (High Quality):
- Uncompressed or LZW compression
- Large file sizes
- Preserves maximum quality
- Required by some professional printers
PNG (Digital Use):
- Good for online proofs
- Not ideal for professional printing
- Smaller file size
- Acceptable for some print-on-demand services
Bleed and Safe Areas:
Professional printing requires bleed - extra image area beyond the final cut line that gets trimmed off. This prevents white edges if cutting is slightly imperfect.
Standard specifications:
- Bleed: 0.125 inches (3mm) beyond final size on all sides
- Safe area: 0.25 inches inside final edge for critical text/elements
- Trim line: Final size after cutting
For a 5x7 inch invitation:
- Final size: 5 x 7 inches
- With bleed: 5.25 x 7.25 inches (add 0.125" to each side)
- Safe area: 4.5 x 6.5 inches (subtract 0.25" from each side)
Setting up bleed in AI generation:
Generate your artwork slightly larger than final size to allow for bleed. If final is 1500x2100 pixels, generate at 1575x2175 pixels (5% larger) to provide bleed area.
Alternatively, generate at exact final size and extend edges in Photoshop using content-aware fill or by extending the background pattern.
Paper Stock Considerations:
The paper you choose affects how AI-generated designs print:
Matte finish:
- Reduces glare
- Better for detailed illustrations
- Slightly softens colors
- More formal appearance
Glossy finish:
- bold colors
- Modern aesthetic
- Can show fingerprints
- Better for photographic-style designs
Textured/Cotton paper:
- Premium feel
- Absorbs ink differently
- Can soften fine details
- Test print essential
Working with Print Services:
Online print-on-demand (Vistaprint, Moo, Shutterfly):
- Easiest option
- Upload PDF or high-res PNG
- Preview tools show final result
- Lower cost for small quantities
- Limited paper/finish options
Local print shops:
- Personal service
- Can advise on technical specs
- See paper samples in person
- Better for custom requests
- Often higher quality
Professional letterpress/specialty:
- Highest quality
- Requires vector files or high-res rasters
- More expensive
- Unique finishes (gold foil, embossing)
- Best for luxury invitations
Quality Control Checklist:
Before sending to print:
- Resolution is 300 DPI at final size
- Colors converted to CMYK
- Bleed area included (0.125" all sides)
- Text is in safe area (0.25" from edge)
- All text is spelled correctly
- File format matches printer requirements
- Test print ordered and approved
- Fonts embedded (if using PDF)
- No RGB images remaining in file
For users working in ComfyUI, creating print-ready outputs requires additional nodes for upscaling and resolution management. Our ComfyUI basics guide covers essential nodes for managing high-resolution outputs.
Platforms like Apatero.com can generate at print-ready resolutions directly and provide CMYK previews, simplifying the technical preparation process, but understanding these requirements ensures you can work with any printer or service.
How Do You Build Effective ComfyUI Workflows for Wedding Invitations?
For users who want maximum control over the generation process, ComfyUI offers powerful workflows specifically optimized for design work like wedding invitations. These workflows combine multiple techniques for precise control over composition and style.
Basic Wedding Invitation Workflow Structure:
A functional wedding invitation workflow in ComfyUI includes these core components:
1. Base Generation:
- Load Checkpoint (SDXL or Flux for highest quality)
- CLIP Text Encode for positive prompt
- CLIP Text Encode for negative prompt
- Empty Latent Image (set to print resolution)
- KSampler for generation
- VAE Decode for final image
2. Style Control:
Earn Up To $1,250+/Month Creating Content
Join our exclusive creator affiliate program. Get paid per viral video based on performance. Create content in your style with full creative freedom.
- LoRA loader for specific artistic styles (watercolor, vintage, etc.)
- Style selector for consistent aesthetic
- Color palette guidance
3. Layout Control:
- ControlNet for composition guidance
- Regional prompting for specific areas
- Mask-based generation for borders vs. center space
4. Quality Enhancement:
- Upscaling nodes (ESRGAN, SwinIR)
- Detail refinement
- Color correction
Resolution Configuration:
Set your Empty Latent Image node to dimensions that match print requirements. For a 5x7 inch invitation at 300 DPI:
Width: 1500 pixels (5 inches x 300 DPI) Height: 2100 pixels (7 inches x 300 DPI)
However, SDXL generates best at 1024x1024 or similar sizes. For optimal results, generate at 1024x1024 then upscale, or use 1024x1440 (closer to 5:7 aspect ratio) and upscale to final resolution.
ControlNet for Layout Precision:
ControlNet helps maintain specific composition elements:
Canny edge detection: Define where borders, frames, and major design elements should appear. Create a sketch of your desired layout, use it as ControlNet input.
Depth control: Separate foreground decorative elements from background, creating layered compositions.
Scribble control: Rough sketches guide overall composition without strict adherence.
Implementation example:
- Sketch your desired border design in any drawing tool
- Use sketch as ControlNet Canny input
- Generate with strong ControlNet influence (0.7-1.0)
- AI fills in artistic detail while respecting layout
Our depth ControlNet guide demonstrates these principles in detail.
Regional Prompting for Sections:
Wedding invitations typically have distinct areas: decorative borders, central text space, corner elements, and background. Regional prompting lets you specify different prompts for each section.
Example regional setup:
- Top 20%: "delicate floral border, roses and eucalyptus, watercolor style"
- Middle 60%: "soft white background, subtle texture, clean space"
- Bottom 20%: "continuation of floral border, elegant botanical elements"
This prevents the AI from filling the entire image with decorations and maintains the necessary text space. For complete regional prompting techniques, see our regional prompter guide.
LoRA Selection for Wedding Aesthetics:
Specific LoRAs can dramatically improve wedding invitation generation:
Watercolor LoRAs:
- Enhance natural media appearance
- Improve color blending
- Create authentic paint textures
Vintage/Retro LoRAs:
- Period-appropriate aesthetics
- Aged paper effects
- Classic typography styles
Floral/Botanical LoRAs:
- More accurate flower rendering
- Better botanical illustration styles
- Improved organic compositions
Load LoRAs with 0.6-0.8 strength for noticeable effect without overwhelming the base model.
Batch Generation for Variations:
Wedding invitation design benefits from exploring multiple variations. Use ComfyUI's batch capabilities to generate multiple options:
- Set batch size to 4-8
- Use random or sequential seeds
- Generate multiple variations of same prompt
- Select best result or combine elements from multiple outputs
This exploration phase helps you find the perfect design direction before refining details.
Multi-Step Refinement Workflow:
Advanced workflows use multiple generation passes for higher quality:
Pass 1: Base composition (1024x1024, 25 steps)
- Establish overall layout
- Define major design elements
- Set color palette
Pass 2: Detail refinement (1024x1024, 20 steps, higher CFG)
- Sharpen details
- Refine specific elements
- Use img2img with low denoising (0.3-0.5)
Pass 3: Upscaling (to 1500x2100 or higher)
- AI upscaling model
- Maintain detail at print resolution
- Final quality pass
Integration with External Tools:
ComfyUI workflows can integrate with other design tools:
Export stages:
- Generate base in ComfyUI
- Export PNG at high resolution
- Import to Photoshop/Illustrator
- Add text and final refinements
- Export print-ready PDF
Automation with API: Advanced users can script ComfyUI via API to generate multiple design variations automatically, export them, and organize into folders for review.
Template Workflow Advantages:
Creating reusable workflow templates saves time when designing multiple related pieces:
- Save the invitation workflow
- Modify prompts for RSVP cards (smaller size)
- Adjust for thank-you cards (different text space)
- Generate coordinating suite of stationery
All pieces maintain consistent aesthetic because they use the same base workflow with only prompt and size modifications.
Troubleshooting Common Issues:
Decorations fill text space:
- Increase regional prompting strength
- Use negative prompts: "centered decoration, filled background"
- Add ControlNet guidance to preserve clear areas
Inconsistent style across generations:
- Fix the seed for reproducibility
- Increase LoRA strength
- Use style reference images with IPAdapter
Low resolution details:
- Generate at higher base resolution (requires more VRAM)
- Use better upscaling models
- Try generating specific details separately and compositing
For users managing complex workflows, our guide to fixing messy ComfyUI workflows helps keep multi-stage design workflows organized and maintainable.
While Apatero.com provides pre-built optimized workflows for wedding invitations and design work, understanding these ComfyUI principles helps you customize and troubleshoot effectively when you need specific results.
Frequently Asked Questions
Can AI generate the entire wedding invitation including all text accurately?
Current AI models cannot reliably generate complete invitations with accurate text. While models like SDXL and Flux have improved text capabilities, accuracy rates for multi-word phrases remain around 30-50%, which is far too low for critical information like names, dates, and addresses. The recommended approach is using AI for decorative backgrounds, borders, and artistic elements, then adding text in design software like Canva, Photoshop, or Illustrator where you have complete control and can ensure 100% accuracy.
What resolution should I generate at for professional printing?
For professional printing, you need 300 DPI (dots per inch) at final size. For a standard 5x7 inch wedding invitation, that's 1500x2100 pixels minimum. Since many AI models generate best at 1024x1024, the optimal approach is generating at 1024x1024 or 1024x1440, then upscaling to 1500x2100 or higher using AI upscaling models like RealESRGAN or SwinIR. This produces better results than generating directly at very high resolutions and uses less VRAM.
How do I ensure colors print correctly when using AI-generated designs?
AI generates in RGB color space (for screens) but professional printing uses CMYK color space. After generating your design, convert it to CMYK in design software like Photoshop or Illustrator before sending to print. Expect some color shifting during conversion - bright blues and bold greens typically dull, and purples can shift toward brown. Order test prints before bulk printing to verify colors meet your expectations, and be prepared to adjust your generation prompts to compensate for CMYK shifts if needed.
Which AI tool is best for wedding invitation design: Midjourney, Stable Diffusion, or commercial platforms?
Each has strengths. Midjourney excels at quick iteration and exploring styles, with minimal setup and consistently beautiful results, but offers less precise control. Stable Diffusion via ComfyUI provides maximum control through ControlNet, regional prompting, and custom workflows, ideal for specific layout requirements but with steeper learning curve. Commercial platforms like Canva's AI features offer easiest use with templates but least customization. For best results, use Midjourney or Stable Diffusion for generating artistic elements, then compose in traditional design software for text and final layout.
Can I sell wedding invitations designed with AI-generated artwork?
Legal and ethical considerations vary by jurisdiction and how you're using AI. If you generate artwork using Stable Diffusion or Flux (open models), you typically own the output and can use it commercially. Midjourney's terms allow commercial use with paid subscriptions. However, check specific model licenses, don't claim the work is hand-illustrated if it's AI-generated, and be transparent with clients about using AI in your process. For selling commercially, consider working with a lawyer to ensure your usage complies with current AI copyright regulations.
How long does it take to create a complete wedding invitation using AI?
With AI assistance, you can create a complete print-ready wedding invitation in 2-4 hours versus 2-4 weeks with traditional designers. The process breaks down roughly as: 30-60 minutes exploring styles and generating variations, 30-60 minutes selecting and refining the best design, 30 minutes upscaling to print resolution, 30-60 minutes adding text and final composition in design software, and 30 minutes preparing print-ready files. This assumes some familiarity with the tools; first attempts might take longer as you learn the workflow.
What's the best way to match AI-generated invitations with other wedding stationery?
Generate all pieces using the same base prompts, model, seed, and LoRAs to maintain consistent aesthetic across invitations, RSVP cards, thank-you notes, programs, and menus. Create a master workflow in ComfyUI or save your Midjourney prompts, then modify only the dimensions and specific content for each piece. Export design elements (borders, decorative motifs) separately and reuse across different stationery items. This creates a cohesive suite where all pieces clearly belong together while being sized appropriately for their specific purposes.
Do I need expensive software or can I use free tools?
You can create professional AI-generated wedding invitations entirely with free tools. For generation: Stable Diffusion via ComfyUI (free, open-source), Stable Diffusion WebUI (free), or limited free trials of commercial platforms. For design and text: Canva free tier (sufficient for basic invitations), GIMP (free Photoshop alternative), or Inkscape (free Illustrator alternative). For upscaling: free ComfyUI upscaling nodes or online services. The main investment is time learning the tools rather than software cost, though paid options like Photoshop and Midjourney offer more convenience and features.
How do I handle multiple language wedding invitations with AI?
Generate the decorative background and design elements once, then add text in multiple languages using design software. This ensures the aesthetic remains identical while allowing proper typography for different languages. Be especially careful with non-Latin scripts (Arabic, Chinese, Hindi, etc.) which AI models handle very poorly - always add these in design software never attempt AI generation. For bilingual invitations, design with adequate text space for the language that requires more room, and ensure fonts support all necessary character sets.
Can AI generate matching save-the-dates, programs, and thank-you cards?
Absolutely. Once you've created a successful wedding invitation design, use the same prompts, model, and seed to generate coordinating pieces at different sizes. Save your ComfyUI workflow as a template, modify dimensions for each piece (save-the-dates often 4x6, programs 5.5x8.5, thank-you cards 4.25x5.5), and regenerate. Keep the same LoRAs, style prompts, and color palette for consistency. You can even extract specific design elements from the invitation (like corner florals or border patterns) and reuse them across all pieces for perfect aesthetic cohesion.
Conclusion: Creating Your Perfect AI-Generated Wedding Invitations
AI has fundamentally changed what's possible in custom wedding invitation design, democratizing access to professional-quality custom artwork that would have cost thousands of dollars just a few years ago. The technology has crossed the threshold from experimental to practical, with output quality matching or exceeding traditional design in many aesthetic categories.
The key to success isn't treating AI as a complete replacement for design tools and processes. It's understanding AI as a powerful new capability in the design toolkit - exceptional at generating decorative elements, exploring stylistic directions, and creating unique artwork, but needing integration with traditional design tools for text handling, print preparation, and final composition.
Your Practical Workflow:
Start with style exploration. Generate dozens of variations exploring different aesthetics - floral watercolor, Art Nouveau borders, minimalist geometric, vintage botanical. Find a direction that resonates with your vision before investing time in refinement.
Once you've selected a style, refine the generation with higher resolution, careful prompting, and quality enhancements. Use ComfyUI workflows with ControlNet for precise layout control, or Midjourney for quick iteration with consistent quality.
Generate at appropriate resolution for printing (1500x2100 pixels minimum for 5x7 inch invitations), upscaling if necessary using AI upscaling models.
Export your AI-generated artwork and import into design software (Canva for simplicity, Photoshop for professional control). Add all text using professional typography, ensuring perfect accuracy and readability.
Convert to CMYK color space, add bleed areas, embed fonts, and export print-ready PDFs. Order test prints to verify colors and quality before bulk printing.
The Time and Cost Investment:
Expect to invest 2-4 hours creating your first AI-generated wedding invitation, with subsequent pieces (RSVP cards, thank-you notes) taking much less time since you're working from established workflows and aesthetics. The learning curve is real but manageable, especially if you have basic familiarity with design software.
Cost-wise, AI-generated invitations can save hundreds or thousands of dollars compared to custom design, with the trade-off being your time investment in learning the tools and creating the designs yourself.
Looking Forward:
AI image generation continues to improve rapidly. Text generation capabilities are advancing, color control is becoming more sophisticated, and resolution capabilities keep increasing. The techniques you learn now for wedding invitation design translate to other design needs - event announcements, business cards, marketing materials, and more.
For couples planning weddings who want the benefits of AI-generated custom design without the technical complexity, platforms like Apatero.com provide managed solutions with optimized workflows, automatic print preparation, and design assistance. For those who enjoy the creative process and want maximum control, ComfyUI and similar tools offer unlimited creative possibilities.
Whether you're a couple designing your own invitations, a designer adding AI to your toolkit, or a stationer exploring new capabilities, AI-generated wedding invitations represent a genuine evolution in what's possible. Master the hybrid approach of AI-generated artwork combined with professional text handling and print preparation, and you'll create invitations that rival anything a traditional designer could produce at a fraction of the time and cost.
The perfect wedding invitation is no longer limited by budget or access to expensive designers. It's limited only by your creativity and willingness to explore what's now possible with AI assistance.
Make AI images and video in your browser
Characters, video, photo packs. No GPU, no setup. Your first generation is free.
Related Articles

10 Best AI Influencer Generator Tools Compared (2025)
Comprehensive comparison of the top AI influencer generator tools in 2025. Features, pricing, quality, and best use cases for each platform reviewed.

5 Proven AI Influencer Niches That Actually Make Money in 2025
Discover the most profitable niches for AI influencers in 2025. Real data on monetization potential, audience engagement, and growth strategies for virtual content creators.

AI Action Figure Generator: How to Create Your Own Viral Toy Box Portrait in 2026
Complete guide to the AI action figure generator trend. Learn how to turn yourself into a collectible figure in blister pack packaging using ChatGPT, Flux, and more.